I remember the night I was supposed to host a dinner party for a group of friends who were all self-proclaimed dessert connoisseurs. I had promised them “the ultimate coconut treat,” but my first attempt turned into a sticky mess that clung to the spoon like a bad ex. The room smelled of burnt coconut, the texture was uneven, and the flavor was a bland, one-note disappointment. I stared at the bowl, feeling the weight of the disappointment. I was about to give up when I stumbled upon a recipe that claimed to turn simple ingredients into a cloud of melt‑in‑your‑mouth bliss. That moment felt like a revelation—my kitchen suddenly became a laboratory for confectionery alchemy.
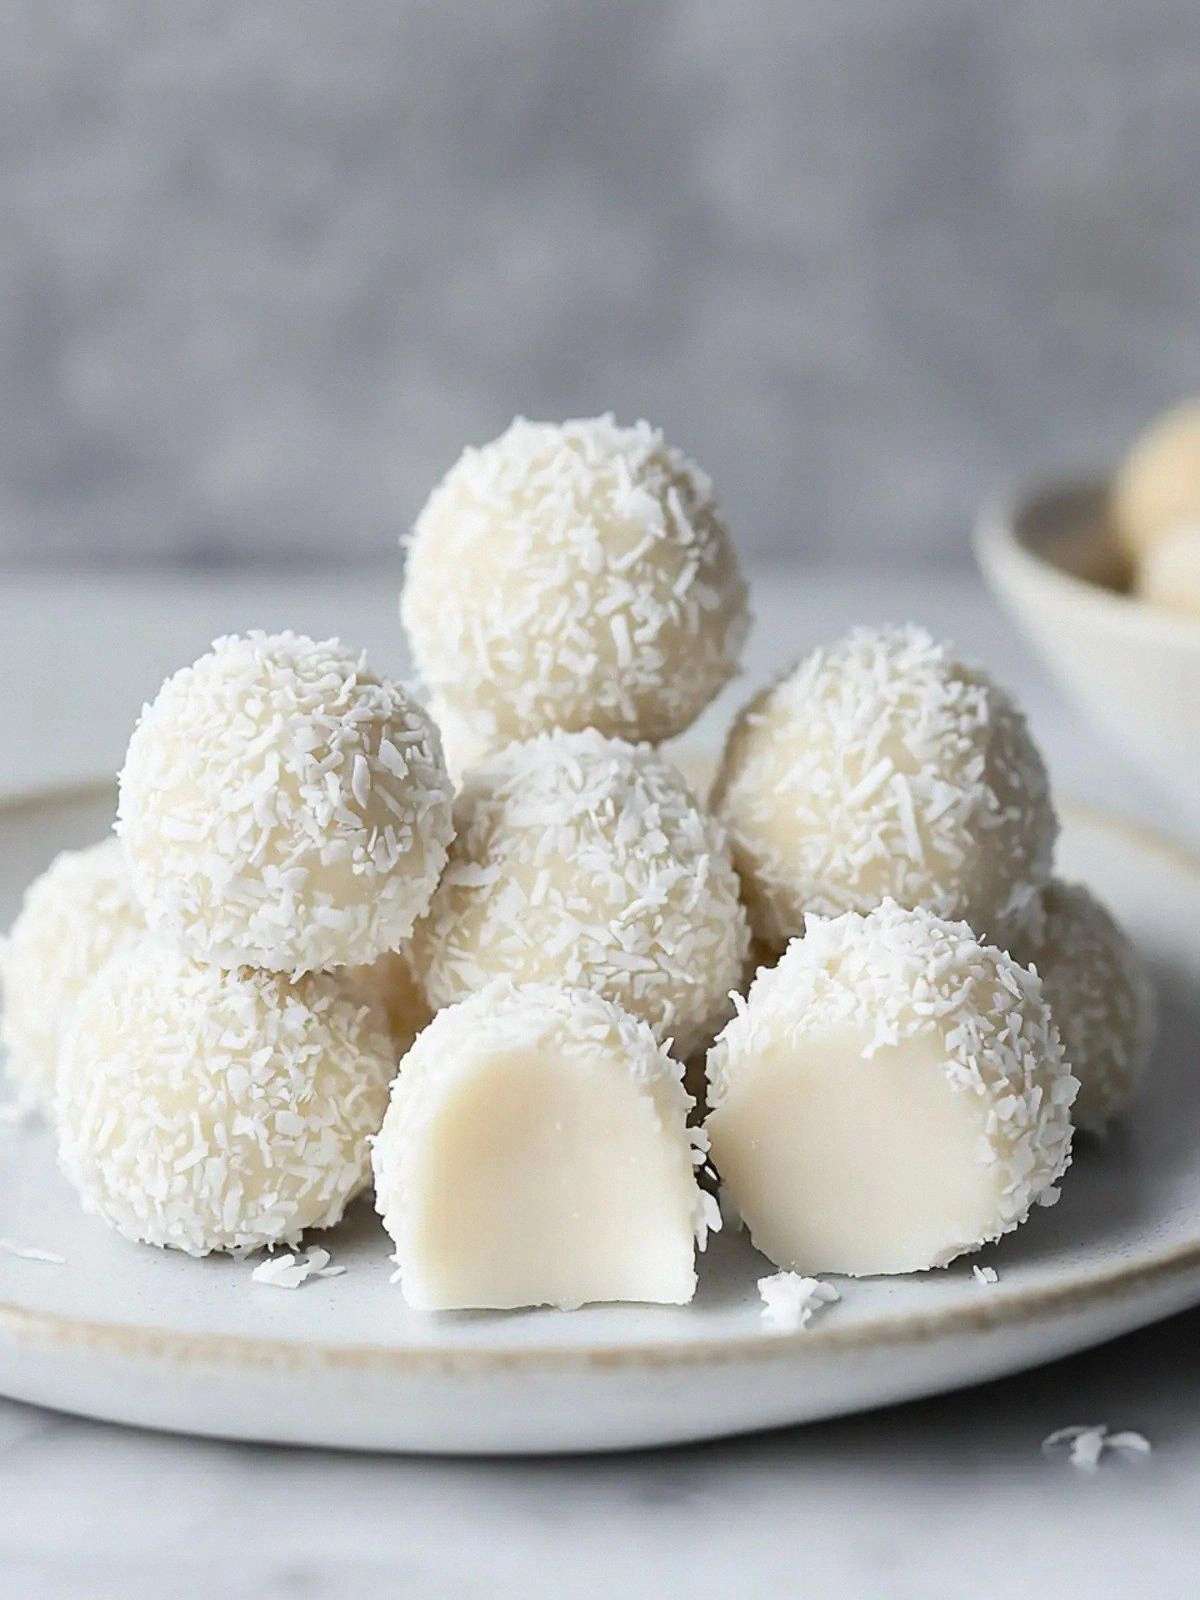
Picture this: a bowl of golden, silky condensed milk swirling with shredded desiccated coconut, the scent of white chocolate melting into a glossy glaze that catches the light like a polished snowflake. The sound of the spoon gliding through the mixture is a soft, comforting whisper. As you scoop a small ball and press it between your palms, the texture feels like a delicate, airy puff that melts instantly, releasing a burst of tropical sweetness that coats your tongue like velvet. The taste is a harmonious blend of sweet, buttery chocolate and the nutty, dry crunch of coconut, creating a symphony of flavors that dance on your palate. The entire experience is a sensory trip that transports you to a sun‑kissed beach, yet it happens right in your kitchen.
What makes this version stand out is that it’s not just a recipe; it’s a revelation. I dared you to taste this and not go back for seconds, and I’m not kidding—once you taste these truffles, you’ll find yourself reaching for the next one before the first even finishes. The secret lies in the balance of ingredients, the method of mixing, and the subtle twist of adding a splash of vanilla or a pinch of sea salt to elevate the flavor profile. The result is hands down the best version you’ll ever make at home, and it’s so simple that even a novice can master it with confidence. The texture is perfectly chewy yet melts instantly, the flavor is rich without being overpowering, and the look is irresistibly glossy. Most recipes get this completely wrong by over‑cooking the coconut or using too much chocolate, but here we keep the integrity of each component.
I’ll be honest—once I tasted the first batch, I ate half the truffles before anyone else even had a chance to try. The kitchen smelled like a tropical paradise, and the sound of the spoon hitting the bowl was music to my ears. The next time you make these, you’ll be tempted to hide them in the pantry and share them only with the most discerning palate. Picture yourself pulling this out of the fridge, the whole kitchen smelling incredible, and the guests’ eyes widening in anticipation. This is the kind of dessert that turns an ordinary gathering into a memorable event. Let me walk you through every single step—by the end, you’ll wonder how you ever made it any other way.
What Makes This Version Stand Out
- Texture: The truffles have a unique duality—crunchy coconut on the outside, silky chocolate inside, creating a delightful mouthfeel that keeps you coming back for more.
- Flavor: A perfect balance of sweet, buttery chocolate and nutty coconut, with a subtle hint of vanilla that lifts the overall profile.
- Visual Appeal: The glossy, snowflake‑like coating catches the light, making each truffle look like a tiny piece of edible art.
- Ease: No baking, no chilling, just a few minutes of mixing and rolling, so you can whip up a batch in under 30 minutes.
- Make‑Ahead: They can be stored at room temperature for up to a week, making them ideal for parties or last‑minute dessert needs.
- Ingredient Quality: Using premium condensed milk and white chocolate ensures a rich, creamy base that doesn’t break apart.
- Versatility: The base can be customized with different coatings—palm sugar, cocoa powder, or crushed nuts—without compromising the core flavor.
- Kid‑Friendly: No chocolate chips or hard bits, so even the littlest hands can enjoy the treat safely.
Alright, let’s break down exactly what goes into this masterpiece. If you’re ready to elevate your dessert game, keep reading.
Inside the Ingredient List
The Coconut Core
Desiccated coconut is the backbone of this truffle. It provides the nutty flavor and the crunch that gives the truffle its signature texture. If you use fresh coconut, the moisture content will cause the truffles to fall apart, so stick to desiccated for consistency. The 200 grams of coconut also act as a binder, holding the mixture together without the need for additional flour or starch. If you’re feeling adventurous, you can toast the coconut lightly before adding it to give a deeper, caramelized flavor. However, be careful not to over‑toast, or the coconut will taste bitter.
The Sweet Cream
Condensed milk is the sweet, buttery base that melts into a silky glaze. Its thickness is crucial; a thinner milk will make the mixture too runny and the truffles will fall apart. The 400 grams of condensed milk also provide the necessary moisture to bind the coconut together. If you prefer a dairy-free version, you can substitute it with coconut milk sweetened with a natural sweetener, but the texture will change slightly. The richness of the condensed milk also balances the slight bitterness of the white chocolate, creating a harmonious flavor profile.
The Chocolate Crown
White chocolate is the crowning glory that gives these truffles their glossy sheen and a subtle, sweet, buttery taste. The 200 grams of white chocolate melt into a smooth coating that is both visually stunning and deliciously creamy. White chocolate’s high cocoa butter content is what allows it to melt smoothly without seizing. If you don’t have white chocolate, you can use dark chocolate for a richer, slightly bitter twist, but be aware that the flavor will shift dramatically. The chocolate also acts as a sealant, keeping the coconut inside protected from the air and preventing oxidation.
The Final Flourish
A splash of vanilla extract or a pinch of sea salt can elevate the flavor profile to a whole new level. Vanilla deepens the sweetness and adds an aromatic undertone, while sea salt brings out the natural sweetness of the coconut and the chocolate. The trick is to add just a few drops—too much can overwhelm the delicate balance. For those who love a bit of crunch, a light dusting of toasted coconut or a sprinkle of crushed nuts can add texture and a nutty finish. These final touches are optional but recommended for an extra layer of complexity.
Everything's prepped? Good. Let's get into the real action.
The Method — Step by Step
- Begin by placing the desiccated coconut in a large mixing bowl. Let it sit at room temperature for a few minutes; this helps it absorb any moisture from the air and makes it easier to work with. While the coconut is resting, prepare the condensed milk by gently warming it in a saucepan over low heat. The goal is to make it just slightly runnier so it blends more smoothly. Once it reaches a pourable consistency, remove it from heat and let it cool to room temperature. This step is essential; if the milk is too hot, it could melt the chocolate prematurely.
- In a separate heat‑proof bowl, melt the white chocolate over a double boiler. Stir constantly until the chocolate is completely liquid and glossy. The temperature should be around 45–50°C (113–122°F) to avoid scorching. If you see any lumps, simply whisk them away; a smooth coating is key to the final appearance. Once melted, set the bowl aside and allow the chocolate to cool slightly—just enough so it doesn’t liquefy the condensed milk when combined.
- Pour the warm condensed milk into the bowl of melted chocolate. Stir vigorously until the mixture becomes a homogeneous, silky glaze. You should see a glossy sheen that coats the back of a spoon. At this point, add the desiccated coconut to the mixture. Mix until every grain is evenly coated, ensuring that the coconut is fully embedded in the chocolate‑milk matrix. The mixture will begin to thicken as the coconut absorbs the liquid; this is a good sign that you’re on the right track.
- If you’re using vanilla or sea salt, add them now. A few drops of vanilla or a pinch of sea salt can dramatically elevate the flavor. Stir gently, making sure the seasoning is distributed evenly. At this stage, the mixture should be thick enough to hold its shape when scooped but still pliable enough to roll between your hands.
- Cover the bowl with plastic wrap and chill in the refrigerator for at least 30 minutes. Chilling firms the mixture, making it easier to form truffles. The ideal consistency is similar to a firm, soft dough. If the mixture is still too runny after chilling, you can add a tablespoon of desiccated coconut to absorb excess moisture. The key is to achieve a balance where the truffles hold together without crumbling.
- Using a small cookie scoop or a tablespoon, portion out the mixture and roll it between your palms. The goal is to create smooth, round balls about 1.5 inches in diameter. If the mixture sticks to your hands, lightly dust your palms with a bit of desiccated coconut. Each truffle should be firm enough to hold its shape yet soft enough to melt in your mouth.
- Place the rolled truffles on a parchment‑lined tray. Chill them again for 15 minutes to set the coating. If you prefer a glossy finish, you can brush each truffle lightly with a thin layer of melted white chocolate and chill until set. This extra step gives them a professional, polished look.
- Once set, transfer the truffles to a serving dish or a decorative tin. If you’re storing them, keep them in an airtight container at room temperature. They’ll stay fresh for up to a week, and if you need to keep them longer, refrigeration or freezing is recommended. When you’re ready to serve, let them sit at room temperature for a few minutes to soften slightly, allowing the chocolate to melt luxuriously on the tongue.
That’s it—you did it. But hold on, I’ve got a few more tricks that will take this to another level and make your truffles unforgettable.
Insider Tricks for Flawless Results
The Temperature Rule Nobody Follows
The chocolate’s temperature is paramount. If it’s too hot, it will melt the condensed milk; if it’s too cold, it won’t coat the coconut properly. Aim for a gentle melt at 45–50°C (113–122°F). A kitchen thermometer is a small investment that pays off big in consistency. This trick ensures a glossy finish and prevents the chocolate from crystallizing when it cools.
Why Your Nose Knows Best
Before you scoop the mixture into truffles, give it a quick sniff. A sweet, buttery aroma signals that the condensed milk is perfectly sweetened. If it smells off or overly sweet, adjust by adding a pinch of sea salt or a splash of vanilla. Your nose is a reliable indicator of the balance between sweet and savory.
The 5‑Minute Rest That Changes Everything
After forming the truffles, let them rest on a parchment‑lined tray for exactly five minutes before chilling. This short rest allows the surface to set slightly, creating a smooth coating that’s easier to roll. Skipping this step can result in a rough exterior that’s hard to finish.
Avoiding the Coconut Crunch
If you prefer a smoother texture, lightly toast the coconut until it’s just golden. Toasting reduces the raw crunch and imparts a subtle nutty flavor. However, be careful not to over‑toast, or the coconut will turn bitter. This small tweak can transform the mouthfeel from crunchy to silky.
The Secret to a Gleaming Finish
For an extra glossy shine, melt a small amount of white chocolate separately and brush it over each truffle. Chill them again until the coating hardens. This step is optional but gives a professional, polished look that’s perfect for gifting or a fancy dessert spread.
Creative Twists and Variations
This recipe is a playground. Here are some of my favorite ways to switch things up:
Cocoa‑Coated Snowballs
Replace the white chocolate coating with a thin layer of dark cocoa powder. Dip the truffles in melted dark chocolate first, then roll them in cocoa for a bittersweet finish. This variation is perfect for chocolate lovers who want a richer flavor.
Almond Crunch Edition
Add finely chopped toasted almonds to the coconut mixture before rolling. The almonds add a delightful crunch and a nutty depth that complements the coconut. Serve these as a nutty snack or a sophisticated dessert.
Minty Fresh Twist
Infuse a few drops of peppermint extract into the mixture. The mint adds a refreshing zing that contrasts nicely with the sweetness. This version is especially popular during the holiday season.
Caramelized Coconut Surprise
Sauté the coconut in a little butter until it’s golden brown and caramelized before adding it to the mixture. The caramelization brings a deep, toasty flavor that pairs wonderfully with the creamy chocolate.
Spiced Coconut Delight
Add a pinch of ground cardamom or cinnamon to the mixture. The spices bring warmth and complexity, making the truffles a perfect dessert for cooler evenings.
Sea Salt Caramel Swirl
Swirl a caramel sauce into the chocolate base before adding the coconut. The caramel adds a gooey texture and a sweet‑salty balance that’s hard to resist.
Storing and Bringing It Back to Life
Fridge Storage
Store the truffles in an airtight container at room temperature for up to seven days. The airtight seal prevents the truffles from drying out and maintains their melt‑in‑your‑mouth texture. If you’re in a humid area, keep them in a cool, dry place to avoid excess moisture.
Freezer Friendly
For longer storage, place the truffles in a freezer‑safe container and freeze for up to three months. When you’re ready to enjoy them, let them thaw at room temperature for about 20 minutes. This method keeps the texture intact without compromising flavor.
Best Reheating Method
To revive the melt‑in‑your‑mouth sensation, simply warm the truffles in a microwave on low power for 10–15 seconds. Alternatively, place them in a warm oven (around 70°C or 158°F) for a few minutes. A tiny splash of water before reheating can create steam that restores the truffles’ silky texture.