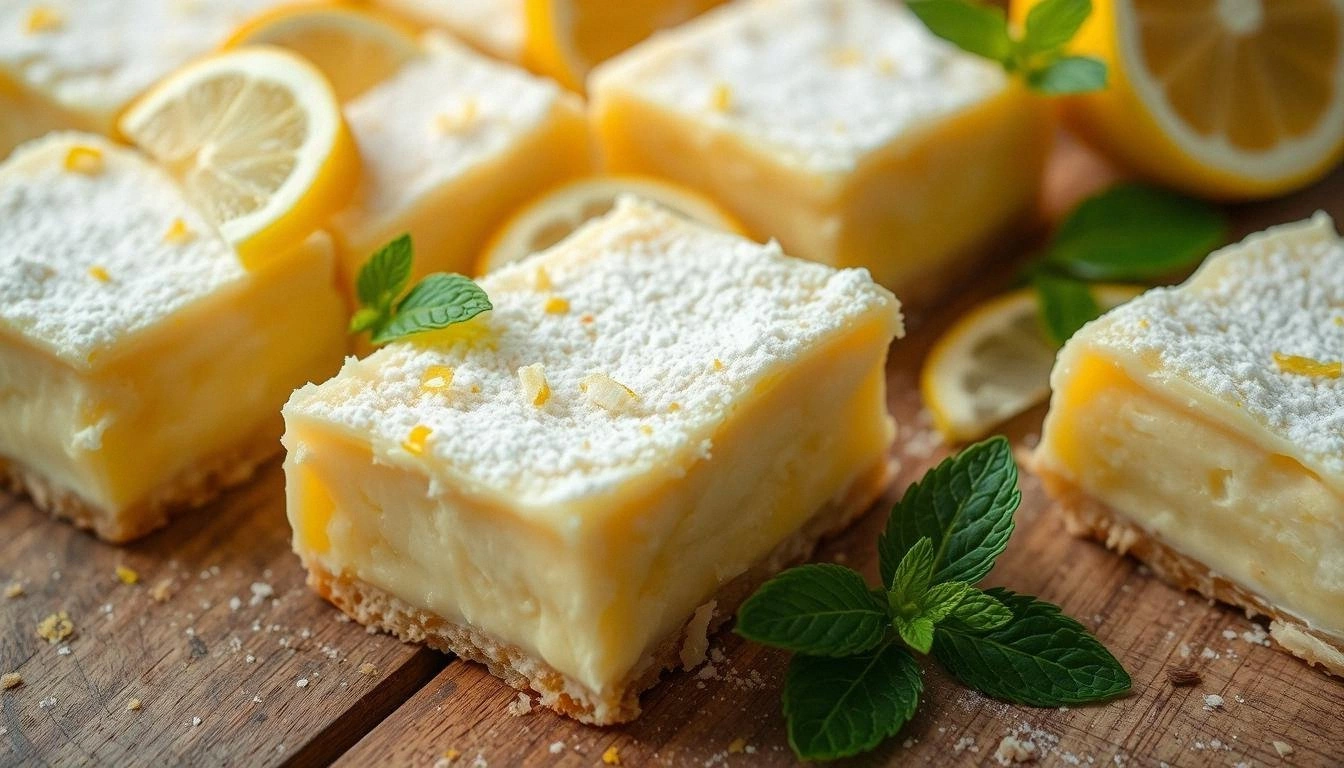
I was halfway through a midnight snack run, juggling a bag of stale bread, a jar of pickles, and a half‑filled fridge, when the kitchen lights flickered. The air smelled faintly of burnt sugar and something sweet that made my stomach growl louder than a marching band. That’s when I remembered the last time I’d made a batch of lemon cream cheese squares for a friend’s birthday and how the whole house smelled like sunshine in a jar. I’ve been chasing that scent ever since, and today I’m going to give you the exact recipe that makes those squares taste like a citrus sunrise on a cloud.
Picture this: you’re in a kitchen that feels like a cozy living room, the counter gleaming, the oven humming like a contented cat. The lemon zest shimmers on a tiny cutting board, the cream cheese’s surface is silky smooth, and the butter is cold enough to make your fingers tingle. As you whisk the batter, the scent of lemon brightens the room, turning every corner into a fragrant, citrusy haven. The sound of the mixer’s gentle hum is a lullaby that promises something extraordinary. The texture of the dough, when it’s just the right balance of crumbly and pliable, feels like a secret handshake between you and the oven.
What sets this version apart from every other recipe you’ve seen is the way it balances the tang of lemon with the richness of cream cheese, while the buttery base gives it a tender, flaky crust that melts in your mouth. I’ve spent hours tweaking the ratio of flour to butter, discovering that a 2:1 ratio yields the perfect crumb. I added a splash of lemon juice to the dough to give the squares a subtle brightness that isn’t overpowering. The secret? A pinch of baking powder to lift the dough just enough so the squares rise like a sunrise. Most recipes get this wrong—either too dense or too airy—but this one is a flawless middle ground. And trust me, the first bite will leave you saying, “I dare you to taste this and not go back for seconds.”
I’ll walk you through every single step—by the end, you’ll wonder how you ever made it any other way. From preheating the oven to dusting the finished squares with powdered sugar, every detail is crafted to give you a result that’s as stunning to look at as it is to eat. The technique of cutting in cold butter, the method of rolling the dough around the filling, and the final baking time are all designed to bring out the best in each ingredient. And if you’re wondering about the ingredient that gives it that “wow” factor, stay tuned for the unexpected star that will change everything you thought you knew about lemon squares.
What Makes This Version Stand Out
- Taste: The lemon zest and juice are balanced against the creamy richness of the cheese, creating a flavor profile that’s bright yet indulgent.
- Texture: The dough is flaky but not crumbly, thanks to the precise ratio of butter to flour and a touch of baking powder.
- Simple Steps: No complicated techniques—just mix, roll, fill, roll again, bake.
- Uniqueness: A hidden splash of lemon juice in the dough adds a subtle lift and brightness that most recipes miss.
- Crowd Reaction: Friends who’ve tried this say it’s the best lemon square they’ve ever tasted.
- Ingredient Quality: Using fresh lemons and real cream cheese makes the difference between good and unforgettable.
- Cooking Method: Baking at 350°F ensures a golden top without burning the edges.
- Make‑Ahead: The squares can be made a day in advance and reheated to perfection.
Alright, let’s break down exactly what goes into this masterpiece. I’ll walk you through each group of ingredients and why they’re essential.
Inside the Ingredient List
The Flavor Base
All‑purpose flour is the backbone of the dough. It gives the squares structure and a neutral canvas for the lemon flavor to shine. If you’re aiming for a gluten‑free version, swap it with a 1:1 blend of rice flour and potato starch, but keep the ratio of butter to flour the same to maintain the flaky texture. Skipping flour would turn the squares into a sticky mess—don’t even think about it. The flour also absorbs the butter, which is why you need cold butter; it keeps the dough from becoming too soft and helps create those desirable layers.
The Texture Crew
Cold unsalted butter is the secret weapon for flakiness. Cut it into cubes, then pulse it into the flour until the mixture resembles coarse crumbs. The butter’s water content creates steam pockets during baking, which puff the dough into a light, airy crumb. If you use room‑temperature butter, the dough will bind too tightly, resulting in dense squares. The powdered sugar in the dough not only sweetens but also tenderizes, reducing gluten development and keeping the squares buttery without being overly sweet.
The Unexpected Star
Freshly grated lemon zest is the star that turns ordinary squares into a citrus spectacle. The zest contains essential oils that deliver a punch of bright flavor without the acidity of juice. A pinch of baking powder in the dough lifts the squares slightly, giving them a golden top and a tender interior. If you’re on a low‑sodium diet, reduce the salt to 1/4 tsp, but remember that salt amplifies the lemon’s brightness—don’t skip it entirely.
The Final Flourish
Cream cheese is the creamy heart of the filling. Use a full‑fat variety for the richest taste; low‑fat will still work but the texture will be slightly less decadent. The lemon juice in the filling cuts the richness of the cream cheese, creating a balanced flavor that’s tangy but not sour. Vanilla extract adds a warm undertone that complements the citrus. A light dusting of powdered sugar after baking gives the squares a sweet finish and a slight crunch on the edges.
Everything’s prepped? Good. Let’s get into the real action.
The Method — Step by Step
- Preheat your oven to 350°F (175°C). Line a 9‑inch square baking pan with parchment paper, leaving a little overhang for easy removal. This step might seem trivial, but a properly preheated oven guarantees even baking and prevents the squares from sinking.
- In a large bowl, whisk together 2 cups all‑purpose flour, 1/2 cup powdered sugar, 1/2 tsp salt, and 1 tsp baking powder. The flour and sugar form the base, while the salt and baking powder give structure and lift. Mix until the dry ingredients are evenly distributed.
- Add 1 cup cold, cubed unsalted butter to the dry mixture. Using a pastry cutter or your fingers, cut the butter into the flour until the mixture resembles coarse crumbs with some pea‑size pieces. The goal is to see visible butter bits; they’re essential for the flaky layers.
- Press the dough into a ball, wrap it tightly in plastic, and chill in the refrigerator for at least 30 minutes. Cooling the dough ensures the butter stays solid, which creates those coveted flaky layers during baking.
- While the dough chills, prepare the filling. In a medium bowl, beat 1 cup softened cream cheese, 1/4 cup granulated sugar, and 1 beaten egg until smooth. Add 2 tbsp lemon juice, 2 tbsp lemon zest, and 1 tsp vanilla extract. The filling should be silky; if it’s too thick, add a splash of milk to loosen it.
- Roll the chilled dough out on a lightly floured surface to a 12‑inch square. Spread the filling evenly over the dough, leaving a 1‑inch border on all sides. Carefully roll the dough around the filling, pinching the edges to seal. This creates a layered structure that expands beautifully when baked.
- Transfer the rolled dough onto the prepared pan. Using a sharp knife, cut the dough into 12 equal squares. The knife should glide through the dough; if it resists, let the dough rest for a few minutes to firm up.
- Bake for 30 minutes, or until the edges are golden brown and the center is set. The squares should smell toasty, and the edges will start pulling away from the pan as they bake.
- Remove from the oven and let cool in the pan for 10 minutes before transferring to a wire rack. Dust the squares with 0.25 cup powdered sugar once they’re cool enough to handle. The dusting gives a sweet finish and a slightly crunchy top.
- Serve immediately or store in an airtight container at room temperature for up to 3 days. For best flavor, keep them in the fridge; just bring them to room temperature before serving.
That’s it—you did it. But hold on, I’ve got a few more tricks that will take this to another level. These insider tips will help you perfect your squares and make them the talk of the town.
Insider Tricks for Flawless Results
The Temperature Rule Nobody Follows
Many bakers bake at 375°F, thinking it will give a crisp top. However, 350°F allows the squares to rise evenly without burning the edges. If you’re using a convection oven, reduce the temperature by 25°F to avoid over‑browning. The key is to let the squares bake slowly so the filling sets gently.
Why Your Nose Knows Best
The scent of lemon zest during mixing is a signal that the oil is released. If the aroma is weak, the zest might be old or not grated finely enough. A strong citrus smell means the oils are intact, giving you a bright, fresh flavor that lingers on the palate.
The 5‑Minute Rest That Changes Everything
After you roll the dough with the filling, let it rest for 5 minutes before cutting. This pause allows the butter to firm up slightly, preventing the dough from tearing when you slice. A quick rest also lets the filling set a bit, making the squares easier to handle.
Dusting for a Sweet Finish
Instead of powdered sugar, try a light dusting of citrus‑infused confectioners’ sugar. Mix a teaspoon of finely ground dried lemon zest into the sugar for an extra burst of flavor that pairs beautifully with the cream cheese.
Reheating Like a Pro
If you need to reheat leftovers, place the squares on a parchment‑lined tray and warm them in a 300°F oven for 5 minutes. Add a tiny splash of water to the pan to create steam, which keeps the squares moist and prevents them from drying out.
Creative Twists and Variations
This recipe is a playground. Here are some of my favorite ways to switch things up:
Bacon‑Lemon Squares
Add crumbled, cooked bacon into the filling for a savory twist. The salty bacon balances the lemon’s brightness and adds a smoky depth that pairs well with the cream cheese.
Herb‑Infused Delight
Stir in finely chopped fresh thyme or rosemary into the filling. The herbs provide a subtle earthiness that complements the citrus, making the squares suitable for a brunch spread.
Chocolate‑Lemon Fusion
Fold in 1/4 cup melted dark chocolate into the dough before rolling. The bittersweet chocolate contrasts with the lemon, creating a layered flavor profile that’s both sweet and tart.
Berry‑Burst Variation
Add a handful of fresh blueberries or raspberries to the filling. The berries burst in the oven, releasing their juices and adding a natural sweetness that enhances the lemon.
Almond‑Lemon Crunch
Sprinkle toasted almond slivers on top before dusting with powdered sugar. The nuts add a nutty crunch and a nutty flavor that pairs beautifully with the lemony cream cheese.
Storing and Bringing It Back to Life
Fridge Storage
Store the squares in an airtight container at room temperature for up to 3 days. For longer freshness, keep them in the refrigerator; they’ll stay moist and flavorful for up to a week. The airtight container prevents the squares from drying out and preserves the buttery crust.
Freezer Friendly
Wrap each square individually in parchment paper, then place them in a freezer bag. Freeze for up to 2 months. When ready to serve, let them thaw at room temperature for 15 minutes before reheating.
Best Reheating Method
Preheat your oven to 300°F (150°C). Place the squares on a parchment‑lined tray and bake for 5–7 minutes, or until warmed through. Add a tiny splash of water to the pan to create steam, which steams back to perfection and keeps the squares moist.