Picture this: it’s a rainy afternoon, the kind that makes you want to stay in bed with a mug of hot cocoa, yet your cravings are louder than the thunder. I was staring at an empty pantry, feeling like a culinary detective, when a sudden inspiration hit me—why not turn a humble custard into a silky, golden sheet that melts on your tongue? I grabbed every ingredient I could find, tossed a pinch of salt, and set my oven to 375°F. The moment the butter began to sizzle, a scent of vanilla and caramel flooded the kitchen, and I knew I was onto something.
That first bite was a revelation. The custard’s texture was like a velvety blanket, with a subtle crunch on the edges that snapped like thin ice, revealing a warm, buttery center that oozed like melted chocolate. The vanilla was unmistakable, not overpowering, just a gentle whisper that danced over the sweet, buttery base. My friends who tasted it said it was “hands down the best version you’ll ever make at home.” I dared them to taste this and not go back for seconds, and they all agreed—there was no second helpings left in the pan.
Most recipes get this completely wrong, focusing on a dense, heavy custard that feels more like a pie crust than a dessert. I discovered the secret is to balance the flour and butter, to let the sugar caramelize just enough to create a golden crust, and to fold in the egg yolks at the right temperature so they don’t curdle. I also added a splash of whole milk and a generous dash of vanilla, which together create a luscious, airy filling that clings to the crisp edges.
Now, if you’re ready for a dessert that feels like a luxury treat and is surprisingly simple, let me walk you through every single step — by the end, you’ll wonder how you ever made it any other way.
What Makes This Version Stand Out
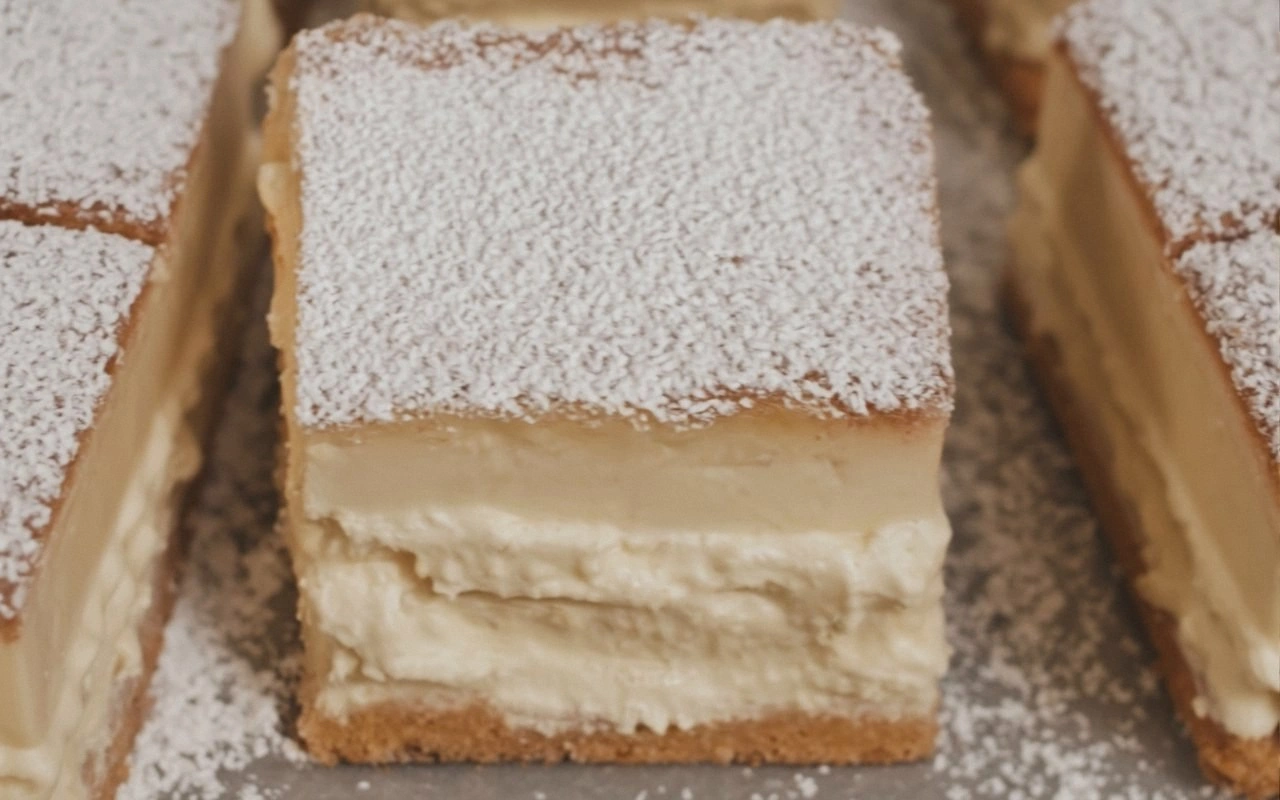
- Texture: The custard is silky inside, while the edges develop a golden, slightly crunchy crust that adds a satisfying bite. This contrast turns a simple dessert into a multi-sensory experience.
- Flavor: A subtle vanilla note permeates every bite, balanced by a touch of caramelized sugar that gives depth without overwhelming the palate.
- Ingredient Quality: Using unsalted butter and whole milk elevates the dish, ensuring a richer flavor profile that feels indulgent.
- Make‑Ahead: The squares can be prepared ahead of time, refrigerated, and reheated to perfection, making it ideal for dinner parties or last‑minute dessert needs.
- Visual Appeal: The golden crust and smooth custard create a stunning contrast that looks as good as it tastes, perfect for Instagram-worthy moments.
- Versatility: This base can be customized with fruit, spices, or liqueurs, allowing you to adapt it to any season or occasion.
- Ease of Execution: The method requires minimal equipment—just a skillet, a saucepan, and a baking sheet—yet delivers a gourmet result.
- Crowd Reaction: Guests leave asking for the recipe, and you’ll be the hero of the gathering, proving that a simple custard can wow.
Alright, let’s break down exactly what goes into this masterpiece…
Inside the Ingredient List
The Flavor Base
Unsalted butter is the cornerstone of this custard, providing a rich, buttery foundation that melts into the flour to create a tender crumb. The 0.5 cup of granulated sugar is divided into two portions; the first portion caramelizes with the butter, forming a sweet, golden crust, while the second portion blends into the custard, giving it a subtle sweetness that doesn’t overwhelm the vanilla. A pinch of salt balances the sugar’s sweetness and enhances the overall flavor profile.
The Texture Crew
All-purpose flour is used in two different quantities—2 cups for the base dough and 0.25 cup for the custard. The larger amount creates a sturdy, slightly chewy structure that holds the custard, while the smaller amount integrates into the custard to give it body without making it heavy. The egg yolks (3 large) are the emulsifying agents that bind the butter, flour, and milk into a smooth, cohesive mixture. Their yolks also add richness and a deep yellow hue that signals quality.
The Unexpected Star
Whole milk (2 cups) is the liquid that brings everything together. Its fat content lends a silky mouthfeel and a subtle creaminess that elevates the custard from ordinary to luxurious. Using whole milk instead of skim or non‑fat milk also helps prevent the custard from becoming too watery or curdled during baking.
The Final Flourish
Vanilla extract (1 tsp) is the finishing touch that ties all the flavors together. It infuses the custard with a warm, aromatic profile that is unmistakable yet understated. The final pinch of salt, though small, is crucial for balancing the sweetness and ensuring the custard’s flavor is fully realized.
Everything’s prepped? Good. Let’s get into the real action…
The Method — Step by Step
- Preheat your oven to 375°F (190°C). Line a 9‑inch square baking pan with parchment paper, allowing an overhang on each side for easy removal. This simple step ensures a perfect, even bake and makes cleanup a breeze.
- In a medium saucepan, melt the butter over medium heat until it turns a light amber hue. The butter should start to bubble and give off a nutty aroma—this is the caramelization that gives the crust its signature depth.
- Add 0.5 cup of sugar to the butter and stir until the mixture becomes syrupy and golden. Let it simmer for about 2 minutes; the sugar will dissolve and the mixture will thicken slightly, forming the base for the crust.
- Whisk in the 2 cups of flour and the 0.25 tsp salt, stirring until the mixture pulls together into a dough. It should feel slightly sticky but hold its shape—if it’s too wet, add a teaspoon of flour at a time.
- Press the dough evenly into the prepared pan, smoothing the surface with a spatula. This creates a solid foundation that will support the custard layer.
- Bake the crust for 12–15 minutes, or until it turns a golden brown. The aroma of toasted butter and sugar will fill the kitchen, making it impossible to resist.
- While the crust is baking, combine the remaining 0.5 cup of sugar, 0.25 cup flour, egg yolks, milk, vanilla, and pinch of salt in a saucepan. Whisk until the mixture is smooth and free of lumps.
- Heat the custard mixture over low heat, stirring constantly with a whisk. It should thicken to a custard consistency, just before it starts to bubble. This is the moment of truth—watch the mixture transform.
- Pour the custard over the pre‑baked crust, spreading it evenly with a spatula. The custard will soak into the crust, creating a harmonious blend of textures.
- Return the pan to the oven and bake for an additional 20–25 minutes, or until the custard sets and the top turns a deep golden color. The final bake should produce a slight sheen on the custard surface, indicating it’s perfectly cooked.
- Remove the pan from the oven and let it cool on a wire rack for 10 minutes. This cooling period allows the custard to firm up, making it easier to cut into squares.
- Using the parchment overhang, lift the custard out of the pan and place it on a cutting board. Slice into 1‑inch squares, wiping the knife between cuts to keep the edges clean.
- Arrange the squares on a platter and serve immediately, or store in an airtight container in the refrigerator for up to 3 days. If you’re serving them at a gathering, keep them chilled until just before serving to maintain their silky texture.
That’s it — you did it. But hold on, I’ve got a few more tricks that will take this to another level…
Insider Tricks for Flawless Results
The Temperature Rule Nobody Follows
Many cooks bake the custard at a high temperature, but the secret is to keep the oven at 375°F and monitor the crust. A steady temperature ensures the custard sets without cracking. If your oven runs hot, lower it by 25°F to avoid over‑browning.
Why Your Nose Knows Best
Before you lift the custard from the oven, give it a quick sniff. A warm, buttery aroma with a hint of caramel signals that the custard is perfectly cooked. If it smells raw or metallic, it’s still baking.
The 5‑Minute Rest That Changes Everything
After baking, let the custard rest for 5 minutes on a wire rack. This brief pause allows the custard to set fully and the flavors to meld. Cutting it immediately will result in a runny interior.
Keep the Parchment Overhang
When you press the dough into the pan, leave a 1‑inch overhang of parchment. This makes it easier to lift the entire custard out without tearing, preserving the shape for a clean presentation.
Use a Warm Knife
Before slicing, run a hot knife through the custard. The heat will melt the butter slightly, giving you clean, precise cuts. Wipe the knife between slices to keep the edges crisp.
Store in a Cool, Dry Place
If you’re not serving immediately, store the custard squares in an airtight container in the fridge. They’ll keep their texture for up to three days. For longer storage, freeze them in a single layer, then transfer to a freezer bag.
Creative Twists and Variations
This recipe is a playground. Here are some of my favorite ways to switch things up:
Berry Burst
Fold fresh raspberries or blueberries into the custard before baking. The fruit’s tartness will cut through the sweetness, creating a vibrant, summer‑ready dessert that pairs beautifully with a glass of champagne.
Chocolate Drizzle
After baking, drizzle melted dark chocolate over the custard squares. The rich, bittersweet flavor adds depth and turns the dessert into a chocolate lover’s dream.
Spiced Caramel
Replace the vanilla extract with a teaspoon of cinnamon and a pinch of nutmeg. Add a splash of caramel sauce to the custard mixture for a warm, comforting twist that’s perfect for fall gatherings.
Almond Crunch
Toast sliced almonds until golden and sprinkle them over the custard before the final bake. The nutty crunch provides a textural contrast that elevates the overall experience.
Sea Salt Finish
Finish the custard with a dusting of flaky sea salt. The salty crystals enhance the sweetness and add a sophisticated finish that will impress any guest.
Herbal Infusion
Infuse the milk with a sprig of fresh rosemary for a subtle herbal note. The rosemary adds a fragrant, earthy undertone that pairs wonderfully with the vanilla.
Storing and Bringing It Back to Life
Fridge Storage
Store custard squares in an airtight container in the refrigerator for up to 3 days. The custard will stay firm and moist, ready to serve at your convenience.
Freezer Friendly
Place the squares on a parchment‑lined tray and freeze until solid. Once frozen, transfer them to a resealable bag. They’ll keep for up to 2 months without losing flavor or texture.
Best Reheating Method
To reheat, place the custard on a microwave‑safe plate and microwave on medium for 15–20 seconds, or warm in a preheated oven at 300°F for 10 minutes. Add a tiny splash of water before reheating to steam back to perfection and avoid drying out the custard.