I still remember the morning I accidentally created what would become my most-requested breakfast recipe. It was one of those chaotic Sundays where the pantry looked like a tornado had hit, my coffee was already cold, and I had promised my niece I'd make her "something special" for breakfast. All I had was a half-empty box of Oreos, basic pancake ingredients, and a serious case of creative desperation. Fast forward twenty minutes, and the kitchen smelled like a Willy Wonka fever dream while these magnificent, cloud-like pancakes were sizzling away, studded with cookie chunks that melted into pockets of chocolatey bliss. My niece took one bite, her eyes went wide as saucers, and she declared me the "official breakfast wizard of the family." I dare you to taste these and not go back for seconds.
Here's the thing about most Oreo pancake recipes floating around the internet: they're doing it completely wrong. They either dump whole cookies into the batter (hello, soggy disappointment) or they use some artificial cookies-and-cream extract that tastes like a melted candle. This version? This is the real deal. We're talking about pancakes so fluffy they practically levitate off the plate, with Oreo pieces that stay perfectly crisp on the edges while turning into molten chocolate centers. The secret lies in crushing the cookies just right — not too fine, not too chunky — and folding them in at the exact moment when the batter is ready but hasn't been overworked.
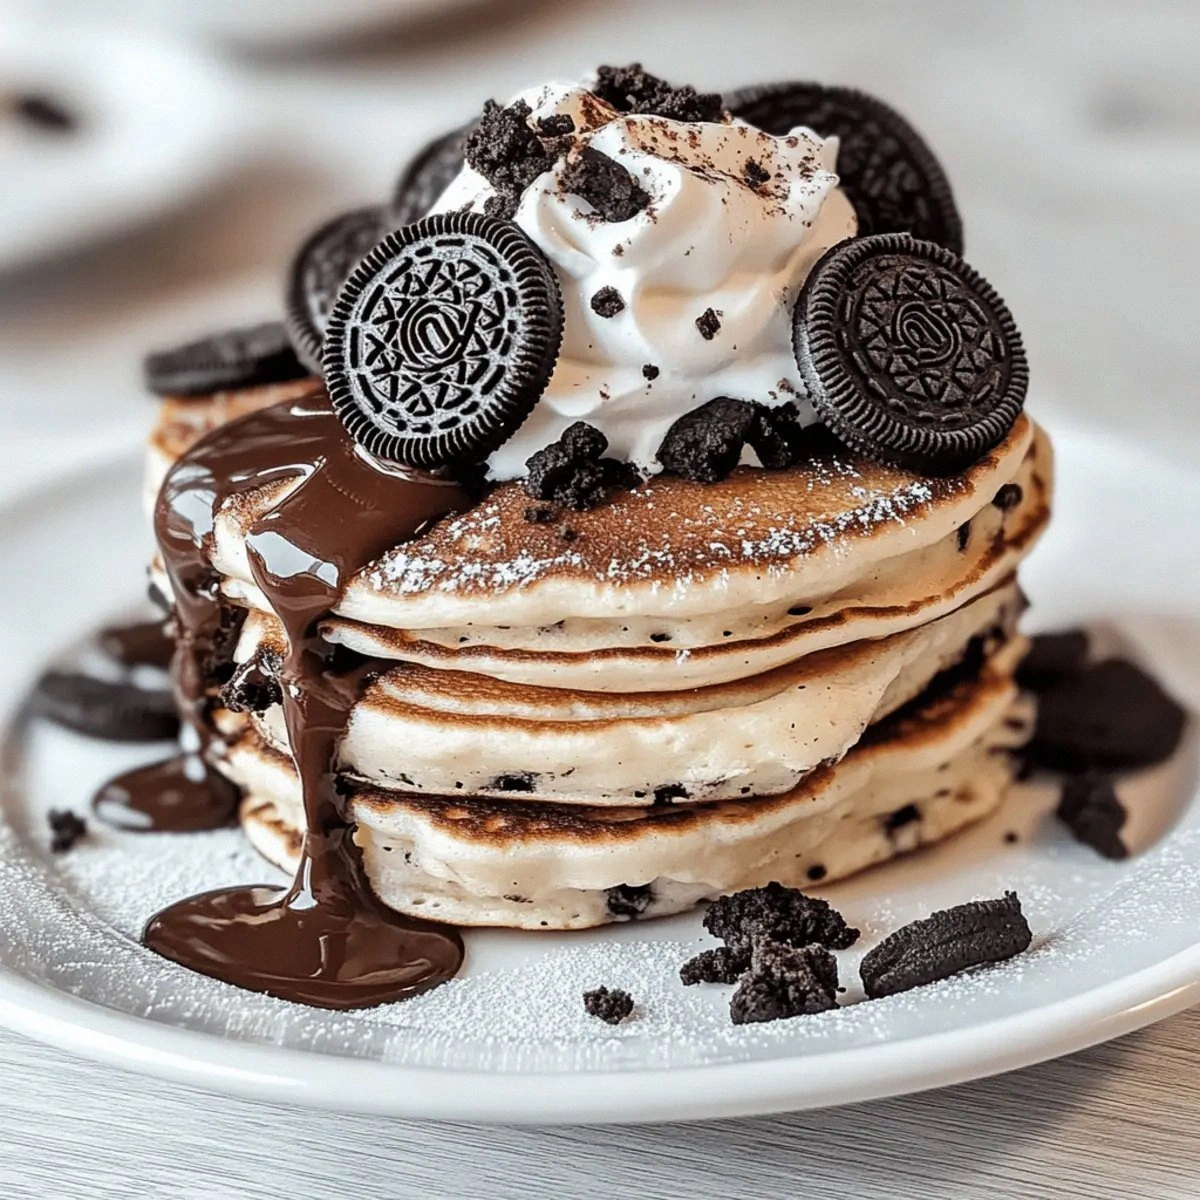
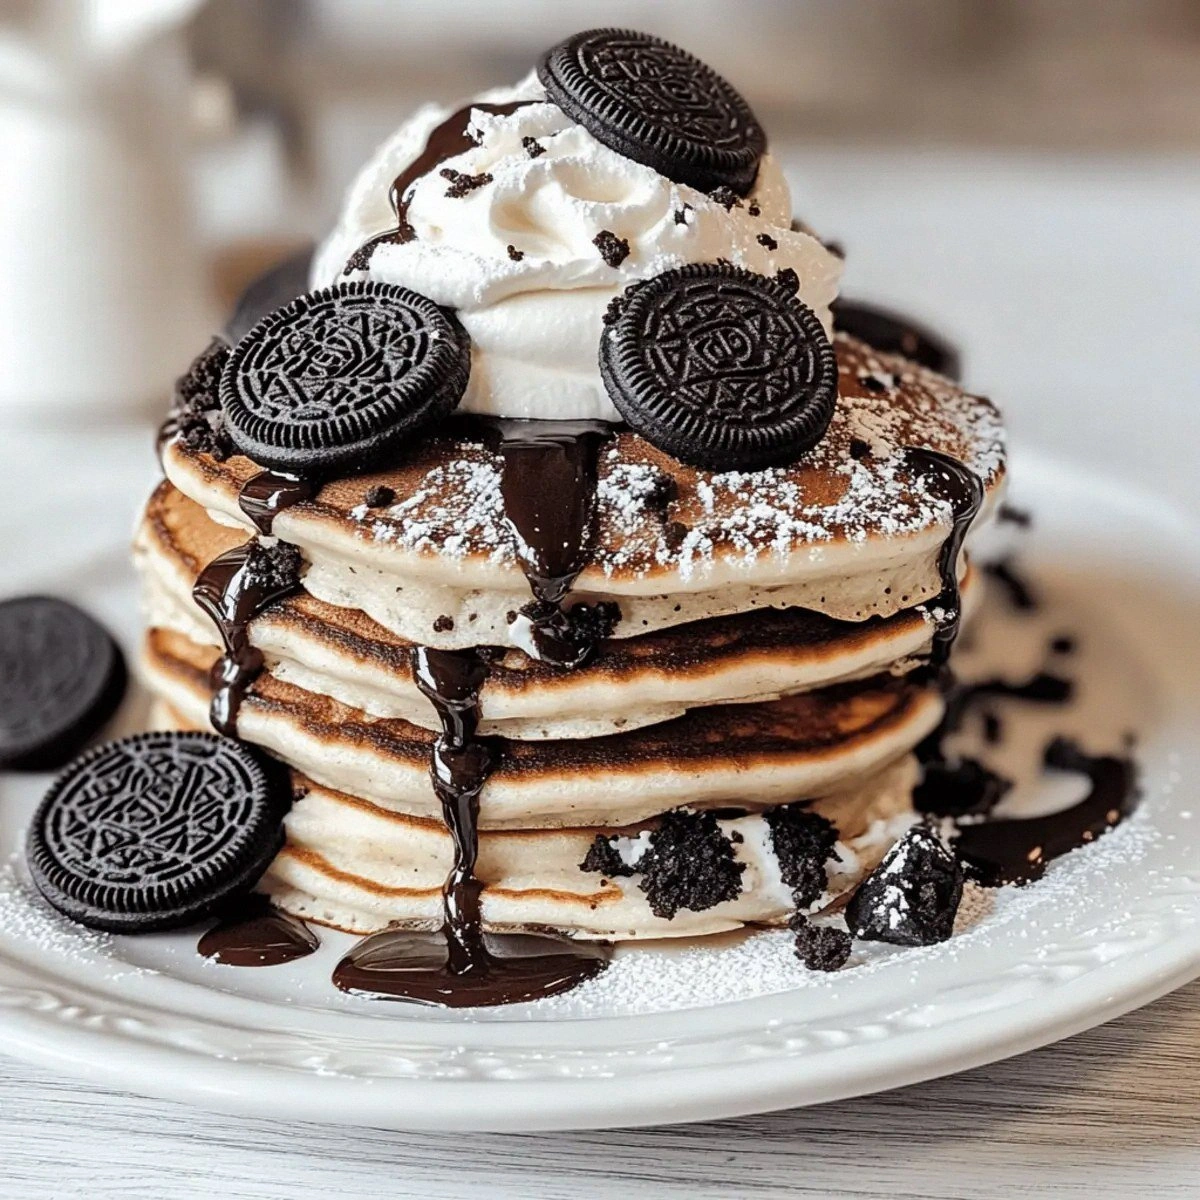
Picture yourself pulling these golden beauties off the griddle, steam rising in lazy curls while the kitchen fills with that intoxicating aroma of butter, vanilla, and chocolate cookies. The sound when you flip them? That satisfying sizzle that tells you the edges are caramelizing into crispy perfection. And when you stack them high and watch the maple syrup cascade down like a sweet waterfall, pooling around the Oreo pieces that peek through the surface like buried treasure? That's breakfast nirvana right there.
Let me walk you through every single step — by the end, you'll wonder how you ever made it any other way. Whether you're trying to impress weekend guests, win over picky kids, or just treat yourself to the most indulgent Tuesday morning of your life, these Oreo pancakes are about to become your new obsession. Trust me, I've been making these for years now, and they still make me feel like a kid who just discovered dessert for breakfast is actually allowed.
What Makes This Version Stand Out
I've tested dozens of Oreo pancake recipes, and most of them fall flat — literally. They either turn out dense as hockey pucks or so loaded with cookie chunks that they fall apart on the flip. This recipe fixes every single problem you've ever had with fancy pancakes, delivering results that would make a diner chef weep with joy.
- Cloud-Level Fluff: We're using a specific ratio of baking powder to acid that creates bubbles so big, these pancakes practically levitate. The secret? Letting the batter rest for exactly five minutes while the chemical reaction works its magic.
- Oreo Distribution Magic: Instead of just folding in crushed cookies, we create a cookie swirl that ensures every bite has the perfect cookie-to-pancake ratio. No more hunting for the good bites — every forkful is the good bite.
- Crispy Edge Technology: Most recipes leave you with soggy edges where the cookies meet the batter. Not here. We use a higher heat sear that caramelizes the cookie pieces, creating these incredible crispy bits that shatter like thin ice when you bite into them.
- Breakfast-to-Dessert Flexibility: These work just as well for a Saturday morning family breakfast as they do for a midnight dessert craving. Add ice cream and they're an instant sundae base. Leave them plain with syrup and they're sophisticated enough for brunch guests.
- Make-Ahead Champion: The batter actually improves after a 30-minute rest, which means you can prep everything the night before and have restaurant-quality pancakes in minutes the next morning. Weekend entertaining just got stupidly easy.
- Kid-Approved, Adult-Adored: I've served these to everyone from sugar-crazed five-year-olds to health-conscious food bloggers, and everyone becomes instant converts. They're like edible nostalgia that somehow feels both indulgent and wholesome.
- One-Bowl Wonder: Despite tasting like they came from a fancy brunch spot, these come together in one bowl with a fork. No electric mixers, no complicated techniques, no mountain of dishes mocking you from the sink.
Alright, let's break down exactly what goes into this masterpiece...
Inside the Ingredient List
Great recipes aren't just about throwing ingredients together — they're about understanding how each component plays its part in the final symphony of flavors and textures. Every ingredient here has been carefully chosen and tested to create the perfect Oreo pancake experience.
The Flavor Foundation
All-purpose flour forms the backbone of our pancakes, but not just any flour will do. You want the kind that's been sitting in your pantry for at least a week — fresh flour has too much protein and will make your pancakes tough and bread-like. The flour creates the structure that holds all those glorious Oreo pieces in suspension, preventing them from sinking to the bottom like sad little cookie shipwrecks.
Baking powder is your leavening superhero, and we're using a generous amount because Oreo pieces are heavy little devils that want to drag your pancakes down into dense territory. The trick is making sure your baking powder is fresh — if it's been open longer than six months, treat yourself to a new can. Old baking powder is the difference between sky-high pancakes and flat frisbees that even the dog won't eat.
Granulated sugar does more than just sweeten the deal here. It helps create that gorgeous golden-brown exterior through caramelization, and it tenderizes the gluten in the flour, ensuring your pancakes stay delicate and tender. We're using just enough to complement the Oreos without turning breakfast into dessert overload.
The Texture Crew
Whole milk is non-negotiable for the richest, most luxurious texture. Skim milk will leave you with sad, rubbery pancakes that taste like diet regret. The fat in whole milk creates steam during cooking, which helps lift the batter and creates those beautiful air pockets that make each bite feel like you're eating a chocolatey cloud.
That single large egg is doing triple duty — binding everything together, adding richness, and contributing to the rise. Make sure it's at room temperature before you start; cold eggs can seize up the melted butter and create weird lumps in your batter. Just let it sit on the counter for 15 minutes while you prep everything else.
Melted butter is the secret weapon that most recipes miss. We're mixing it right into the batter where it creates little pockets of richness throughout each pancake. Use unsalted butter so you can control the salt level, and let it cool slightly before mixing so it doesn't scramble your egg.
The Unexpected Star
Here's where we get controversial: we're using regular Oreos, not Double Stuf. I know, I know, more filling sounds better, but trust me on this one. Regular Oreos have the perfect cookie-to-cream ratio that holds up to cooking without turning into a melted mess. The cream filling acts like little flavor bombs that melt just enough to create swirl patterns throughout your pancakes.
When you crush the Oreos, resist the urge to pulverize them into dust. You want a mix of textures — some fine crumbs that disappear into the batter, some pea-sized pieces that provide satisfying crunch, and a few larger chunks that create those Instagram-worthy cross-sections when you cut into your stack.
The Final Flourish
Maple syrup might seem basic, but please don't disrespect your beautiful pancakes with fake pancake syrup. Real maple syrup has complex flavors that complement the chocolate and cream in ways that corn syrup-based imposters never could. Warm it slightly before serving so it flows like liquid gold over your stack.
Whipped cream is optional but highly recommended for special occasions. Make it fresh — the stuff in the can dissolves into nothingness, while homemade whipped cream holds its shape and adds a luxurious richness that makes these feel like dessert for breakfast.
Fresh berries provide the perfect acidic counterpoint to all that richness. Raspberries are my go-to because their tartness cuts through the sweetness like a laser, but strawberries or blueberries work beautifully too. Plus, they make the whole thing look like you planned this breakfast for Instagram, even if you just threw it together on a Tuesday.
Everything's prepped? Good. Let's get into the real action...
The Method — Step by Step
- Start by setting up your mise en place like a pro — this means measuring everything out before you start mixing. In a large bowl, whisk together your flour, baking powder, sugar, and salt until they're as well combined as old friends at a reunion. This initial mixing ensures your leavening is evenly distributed, preventing those sad pancakes that rise on one side but stay flat on the other. Take a moment here to appreciate the simple beauty of dry ingredients — they're about to transform into something magical.
- Now for the fun part: place six Oreos in a zip-top bag and channel any pent-up frustration into crushing them. You want a mix of fine dust and chunky pieces about the size of chocolate chips. The dust will melt into your batter creating chocolate swirls, while the chunks provide textural contrast. Add about two-thirds of your crushed Oreos to the dry ingredients and toss them around like you're mixing a salad. Save the rest for later — they'll become your crispy crown.
- In a separate bowl or large measuring cup, whisk together the milk and egg until the egg is completely incorporated and the mixture looks like pale yellow silk. Drizzle in your melted butter while whisking constantly — this creates an emulsion that prevents the fat from seizing up when it hits the cold milk. The mixture should look glossy and smooth, like liquid sunshine. If you see any lumps, keep whisking until they disappear.
- Here's where most people mess up: make a well in the center of your dry ingredients and pour in the wet mixture all at once. Using a fork, gently fold everything together with just 10-12 strokes. The batter should look lumpy and barely combined — that's exactly what you want. Overmixing develops gluten and gives you tough, chewy pancakes that could double as shoe leather. Some dry flour spots are perfectly fine; they'll hydrate as the batter rests.
- Let the batter rest for exactly five minutes while you heat your griddle or pan. This resting period allows the flour to fully hydrate and the baking powder to start its bubbling action. During this time, the batter will thicken slightly as the flour absorbs the liquid. Don't skip this step — it's the difference between good pancakes and legendary ones that your family will request every weekend.
- Heat a non-stick griddle or large skillet over medium heat until a drop of water sizzles and dances across the surface. If you're using an electric griddle, set it to 375°F — this is the sweet spot where the outside cooks quickly enough to prevent spreading while the inside stays tender. Lightly grease the surface with butter, but don't go crazy — too much fat will fry the edges and create greasy pancakes that leave oil slicks on your plate.
- Pour 1/4 cup of batter onto the hot griddle for each pancake, spacing them about 2 inches apart. Work quickly here — the baking powder is active and you want all your pancakes to have the same rise. When you see bubbles forming on the surface and the edges look set (about 2-3 minutes), it's time for the flip. The bottom should be golden brown with darker spots where the Oreo pieces have caramelized.
- The flip is where confidence matters. Slide your spatula under each pancake in one smooth motion and flip it like you mean it. Hesitation leads to folded, broken pancakes that look like they've been through a war. Cook the second side for about 1-2 minutes — it won't brown as much as the first side, but you want it cooked through. The pancakes are done when they spring back lightly when touched in the center.
- Transfer your golden beauties to a warm plate and resist the urge to stack them immediately. Let them breathe for a minute — this prevents the steam from making the bottom ones soggy. While you're cooking the remaining batter, keep finished pancakes warm in a 200°F oven on a wire rack set over a baking sheet. The rack allows air to circulate, maintaining that crucial crisp edge.
- Now for the grand finale: stack three pancakes on a plate, drizzle with warm maple syrup, and crown with the remaining crushed Oreos. Add a dollop of whipped cream and scatter fresh berries around like you're painting a breakfast masterpiece. The contrast of hot pancakes with cold cream, the crunch of cookie pieces against fluffy cake, the sweet syrup against tart berries — this is what breakfast dreams are made of.
That's it — you did it. But hold on, I've got a few more tricks that'll take this to another level...
Insider Tricks for Flawless Results
The Temperature Rule Nobody Follows
Here's the thing that separates pancake masters from mere mortals: temperature control. Your batter should be at room temperature before it hits the griddle. Cold batter hits a hot surface and seizes up, creating dense centers and burnt edges. Take your ingredients out of the fridge 30 minutes before cooking, or speed things up by placing your milk in a warm water bath for five minutes. The difference is dramatic — room temperature batter creates pancakes so fluffy they practically float off the plate.
But here's the kicker: your griddle temperature matters even more. Too hot and the outside burns before the inside cooks, leaving you with Oreo pieces that taste like bitter charcoal. Too cool and the batter spreads into sad, pale puddles that absorb grease like edible sponges. Invest in an infrared thermometer if you're serious about pancake perfection — 375°F is your magic number, every single time.
Why Your Nose Knows Best
I'll be honest — I ate half the batch before anyone else got to try it because I couldn't resist the siren call of freshly cooked pancakes. But here's how I know when they're perfectly done: the smell changes. Raw pancake batter smells like flour and eggs, but when they're ready to flip, your kitchen fills with this warm, nutty aroma that's like vanilla and toasted sugar having a party. That smell means the Maillard reaction is happening — the chemical process that creates hundreds of flavor compounds and turns ordinary ingredients into something extraordinary.
This next part? Pure magic. When you smell that toasty aroma, start looking for the other signs: bubbles that form and pop without closing up, edges that look set and slightly dry, and the pancake moving as a single unit when you gently shake the pan. These three signals, combined with that incredible smell, mean your pancake is ready for its grand flip.
The 5-Minute Rest That Changes Everything
Most recipes tell you to rest the batter, but they don't tell you why or for how long. Five minutes is the sweet spot — long enough for the flour to fully hydrate and the baking powder to start producing carbon dioxide bubbles, but short enough that you don't lose the leavening power. During this rest, something beautiful happens: the starch granules in the flour absorb liquid and swell, creating a thicker, more stable batter that rises higher and cooks more evenly.
A friend tried skipping this step once — let's just say it didn't end well. Her pancakes spread like crepe batter and cooked up dense and chewy, with Oreo pieces that sank to one side like they'd given up on life. Don't be like my friend. Set a timer, pour yourself another cup of coffee, and let chemistry do its thing.
The Flavor Amplifier Nobody Expects
Okay, ready for the game-changer? Add a quarter teaspoon of instant espresso powder to your dry ingredients. I know it sounds weird, but coffee doesn't make these taste like mocha — it just amplifies the chocolate flavor in the Oreos in a way that makes people say "what's that amazing depth of flavor?" It's like turning up the volume on your favorite song without changing the tune. The bitterness balances the sweetness and creates a complexity that elevates these from "really good pancakes" to "I need this recipe immediately."
Stay with me here — this is worth it. The espresso powder dissolves completely into the batter, leaving no trace except an incredible richness that makes the chocolate taste more chocolatey. I've had people swear there must be some secret ingredient, and they're right, but they'd never guess it's something as simple as coffee. It's the culinary equivalent of adding salt to caramel — a small amount that makes everything else taste more like itself.
Creative Twists and Variations
This recipe is a playground. Here are some of my favorite ways to switch things up:
The Peanut Butter Cup Remix
Replace half the Oreos with crushed peanut butter cookies, and swirl a tablespoon of peanut butter into your maple syrup before warming it. The combination of chocolate, peanut butter, and fluffy pancake creates a breakfast version of your favorite candy. Kids go absolutely bonkers for this version, and adults pretend they're ordering it "for the children" while secretly hoarding the leftovers.
The Mint Chocolate Dream
Use Mint Oreos instead of regular ones, and add a drop of peppermint extract to your batter. Top with crushed candy canes if you're feeling festive, or fresh mint leaves for a more sophisticated touch. This version tastes like a Thin Mint exploded into breakfast form, and it's absolutely incredible with hot chocolate on cold winter mornings.
The Salted Caramel Indulgence
Drizzle caramel sauce between each pancake layer instead of syrup, and finish with a sprinkle of flaky sea salt. The salt intensifies the chocolate and creates this sophisticated sweet-savory balance that makes these feel worthy of a special occasion brunch. Add some toasted pecans if you want to really gild the lily.
The Gluten-Free Game-Changer
Swap the all-purpose flour for a 1:1 gluten-free baking blend, and you're in business. The Oreos are already gluten-free (surprise!), so this is an easy adaptation that doesn't compromise on texture or flavor. I've served these to gluten-eating friends who couldn't tell the difference until I told them.
The Birthday Cake Celebration
Use Birthday Cake Oreos and add rainbow sprinkles to the batter for a confetti effect. Top with vanilla buttercream instead of whipped cream, and you've got a breakfast that tastes like a party. This is my go-to for birthday mornings or any day that needs artificial cheer in the best possible way.
The S'mores Spectacular
Add crushed graham crackers to the batter along with the Oreos, top with toasted marshmallows and chocolate shavings. Use a kitchen torch to brûlée the marshmallows right before serving. It's messy, it's over-the-top, and it's absolutely worth the sugar coma that follows.
Storing and Bringing It Back to Life
Fridge Storage
Leftover pancakes (though I can't imagine why you'd have any) can be stored in an airtight container in the refrigerator for up to three days. Separate layers with parchment paper to prevent them from becoming a single, inseparable mass. When you're ready to reheat, don't microwave them into rubbery submission — instead, warm them in a toaster oven or regular oven at 350°F for about 5 minutes. They'll emerge almost as good as fresh, with crispy edges and soft centers.
Freezer Friendly
These freeze beautifully, making them perfect for meal prep or those mornings when you need chocolate therapy but can't muster the energy to cook. Let them cool completely, then freeze in a single layer on a baking sheet before transferring to a freezer bag. They'll keep for up to two months, though they've never lasted more than a week in my house. To reheat, pop them straight from frozen into the toaster — no defrosting needed. They'll emerge with crispy edges and warm, tender centers that taste almost fresh-made.
Best Reheating Method
Here's the secret to bringing these back to life: add a tiny splash of water to your pan before reheating. As the water evaporates, it creates steam that rehydrates the pancakes without making them soggy. Cover the pan for the first 30 seconds, then uncover to let any excess moisture evaporate. This method works whether you're reheating one pancake or a whole stack, and it preserves the crispy Oreo edges that make these so special.