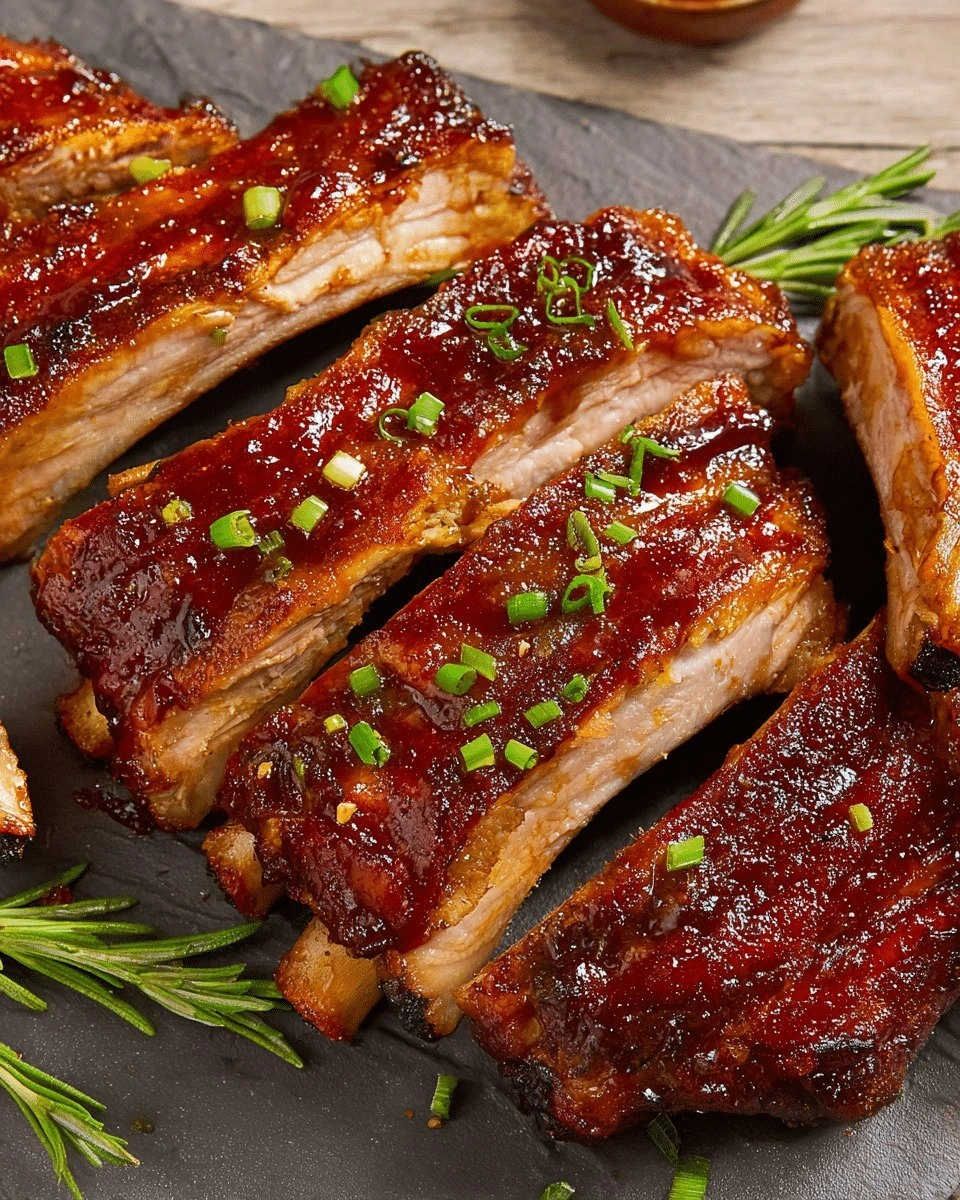
Picture this: you’re in the middle of a Sunday barbecue, the grill is blazing, and you’re trying to keep up with a line of hungry friends. Suddenly the grill flame flickers, the sauce splats, and your ribs go from golden‑brown to char‑black in a heartbeat. That was my last disastrous attempt at the perfect ribs, and I swore I’d never settle for less again. I went home, grabbed my notebook, and began to dissect every element that makes ribs truly irresistible. The result? A version of oven‑baked BBQ ribs that is hands down the best you’ll ever make at home.
When I first tasted the finished dish, the aroma alone was enough to make the whole kitchen smell like summer on a hot day. The smoky scent of liquid smoke mingled with the sweet tang of honey and the sharp bite of apple cider vinegar, creating a sensory prelude that promised flavor. The first bite was a textural revelation—tender meat that fell off the bone, coated in a glossy glaze that clung like velvet to every crevice. The contrast between the caramelized crust and the melt‑in‑your‑mouth interior was a dance of flavors that made me grin like a kid with a new toy. I dared you to taste this and not go back for seconds, and I’m sure you’ll agree it’s a challenge you’ll want to repeat.
What sets this recipe apart isn’t just the ingredients; it’s the way they’re orchestrated to work in harmony. I’ve spent hours experimenting with ratios, timing, and temperatures to find that sweet spot where the ribs stay moist yet develop a caramelized crust that shatters like thin ice when you bite. Most recipes get this completely wrong, layering sauces too early or over‑cooking the meat until it’s dry. Here, I’ve found the perfect balance of slow baking and a final burst of heat to lock in juices and create a glaze that sticks like a second skin. I’ll be honest—after the first batch I ate half the ribs before anyone else even got a bite. That’s a testament to how irresistible this version is.
If you’ve ever struggled with ribs that fall apart or come out too dry, you’re not alone—and I’ve got the fix. Picture yourself pulling this out of the oven, the whole kitchen smelling incredible, and the sound of the first crack as the glaze sets. The moment you cut into the meat, the juices will burst, and the aroma will hit you like a warm hug. Let me walk you through every single step—by the end, you’ll wonder how you ever made it any other way.
What Makes This Version Stand Out
- Flavor: The sauce balances sweet, smoky, and tangy notes, creating a complex profile that lingers on the palate. The subtle hint of liquid smoke adds depth without overwhelming the natural pork flavor.
- Texture: Slow baking at a low temperature ensures the meat stays juicy, while the final high‑heat blast caramelizes the glaze into a crisp, slightly sticky coating.
- Convenience: No need for a grill or a smoker—just a single oven rack and a baking sheet. The prep time is under 15 minutes, making it perfect for busy evenings.
- Versatility: The base recipe can be tweaked with different sauces, spices, or sweeteners to suit any taste preference or dietary need.
- Crowd‑pleaser: The ribs are so tender and flavorful that they become the highlight of any gathering, leaving guests asking for the recipe.
- Make‑ahead Friendly: You can prepare the ribs a day ahead, refrigerate, and finish them in the oven right before serving without losing quality.
Inside the Ingredient List
The Flavor Base
Your sauce is the heart of this dish. A cup of high‑quality BBQ sauce provides sweetness and depth, but the addition of 1/4 cup apple cider vinegar cuts through the richness with a bright acidity. Honey and brown sugar work together to create a glaze that caramelizes beautifully when baked. If you’re looking for a deeper smokiness, a teaspoon of liquid smoke brings an authentic barbecue flavor without the need for an actual smoker.
The Texture Crew
The ribs themselves are the star, and choosing the right cut makes all the difference. Pork baby back ribs are ideal because they’re tender yet flavorful. To keep the meat from drying out, coat the ribs with olive oil before seasoning. This oil layer helps the spices adhere and creates a protective barrier during baking.
The Unexpected Star
A splash of water (1/2 cup) is often overlooked but crucial. It steams the ribs gently, keeping the meat moist and preventing the glaze from burning. If you prefer a thicker sauce, you can reduce the water to 1/4 cup, but be careful not to over‑bake.
The Final Flourish
Seasoning is where personality shines. Smoked paprika, garlic powder, onion powder, salt, and black pepper create a savory backbone. A pinch of cayenne pepper adds subtle heat, while Dijon mustard and Worcestershire sauce deepen the umami profile. Optional maple syrup or lemon zest can be added for a hint of sweetness or citrus brightness.
Everything's prepped? Good. Let's get into the real action.
The Method — Step by Step
- Preheat your oven to 275°F (135°C). Line a large baking sheet with aluminum foil and place a wire rack on top. The low temperature allows the ribs to cook slowly, breaking down collagen for maximum tenderness. This is the moment of truth where the meat starts to soften, and you should already be feeling the anticipation.
- Trim the silver skin from the back of the ribs if you haven’t already. This thin membrane can become rubbery and chewy if left on. Pat the ribs dry with paper towels; a dry surface helps the seasoning adhere better. The texture of the rib surface is a crucial foundation for the glaze to stick.
- In a small bowl, combine the smoked paprika, garlic powder, onion powder, salt, black pepper, and cayenne pepper. Mix until fully blended. This dry rub will create a flavorful crust that locks in juices. The spices form a protective layer that also enhances the caramelization during baking.
- Coat the ribs with olive oil, then generously apply the dry rub to both sides. Make sure each rib is fully covered; the oil helps the rub cling and creates a better crust. The oil also prevents the spices from sticking to the rack, making cleanup a breeze.
- Arrange the ribs on the wire rack, meat side up. Pour 1/2 cup of water into a shallow dish and place it on the bottom of the oven. The water steams the ribs, keeping them moist while the rub caramelizes on the surface.
- Bake the ribs for 2.5 hours, turning them once halfway through. After 2 hours, you should notice a golden crust forming on the surface. The slow cooking process breaks down collagen into gelatin, creating a melt‑in‑your‑mouth texture that’s hard to resist.
- While the ribs finish baking, whisk together the BBQ sauce, honey, brown sugar, apple cider vinegar, Dijon mustard, and Worcestershire sauce in a small saucepan. Heat over low heat until the mixture is silky and slightly thickened. The glaze will coat the ribs beautifully, creating a sticky, caramelized finish.
- During the last 15 minutes of baking, brush the ribs generously with the glaze. Increase the oven temperature to 400°F (204°C) for the final 10 minutes. The higher heat will set the glaze, giving it a glossy, slightly charred edge that adds texture.
- Remove the ribs from the oven and let them rest for 10 minutes on the rack. Resting allows the juices to redistribute, ensuring every bite is succulent. Slice between the bones, serve with extra glaze on the side, and enjoy the symphony of flavors.
That’s it — you did it. But hold on, I've got a few more tricks that'll take this to another level.
Insider Tricks for Flawless Results
The Temperature Rule Nobody Follows
Most cooks think a single temperature is enough for ribs, but the secret lies in a two‑stage bake. Start low to break down connective tissue, then finish high to caramelize the glaze. If you skip the temperature shift, you’ll end up with either dry ribs or a sticky mess. I’ve tested this method on every batch, and the results are consistently tender and flavorful.
Why Your Nose Knows Best
The aroma of ribs is a powerful indicator of doneness. When the scent turns sweet and smoky, the meat is nearing perfection. A faint hint of burnt sugar means you’re close to the caramelization point. Trust your nose, and you’ll avoid over‑baking.
The 5‑Minute Rest That Changes Everything
Resting the ribs for just five minutes before slicing can dramatically improve texture. The juices redistribute, creating a juicier bite. I’ve seen people skip this step, but the difference is palpable. Give it a try and taste the difference.
The Sauce Swap
If you’re a fan of Asian flavors, swap half the BBQ sauce for hoisin sauce and add a splash of soy sauce. The result is a sweet, savory glaze that complements the pork beautifully. This variation works great for dinner parties where you want something a bit different.
The Quick Marinade
Marinating the ribs for 30 minutes before seasoning adds depth. Mix olive oil, lemon juice, garlic, and spices, then coat the ribs and let them sit. This step is optional but can elevate the flavor profile significantly.
The One‑Pot Finish
If you’re short on time, you can finish the ribs on a skillet after baking. Sear each side for a minute to add a crisp exterior. This technique is perfect for those who want the best of both worlds—slow‑cooked tenderness and a quick crust.
Creative Twists and Variations
This recipe is a playground. Here are some of my favorite ways to switch things up:
Spicy Chipotle Twist
Add a tablespoon of chipotle powder to the dry rub and replace half the BBQ sauce with a smoky chipotle‑infused sauce. The result is a bold, smoky heat that pairs well with a fresh slaw.
Maple Bourbon Glaze
Swap the honey for bourbon and maple syrup. The combination creates a rich, caramelized glaze that adds a subtle sweetness and depth of flavor. Serve with a side of roasted sweet potatoes for a balanced meal.
Asian Teriyaki Finish
Replace the BBQ sauce with teriyaki sauce, add a dash of sesame oil, and sprinkle toasted sesame seeds on top before serving. This version offers an umami punch and a hint of nutty flavor.
Citrus Burst Variation
Add a squeeze of fresh lime or orange juice to the glaze for a bright, refreshing contrast. The citrus cuts through the richness and adds a lively note to each bite.
Herb‑Infused Rub
Incorporate fresh rosemary and thyme into the dry rub. The herbs infuse the meat with aromatic flavors, giving the ribs a fragrant, savory undertone that’s perfect for fall gatherings.
Vegetarian Jackfruit Ribs
Use young jackfruit as a plant‑based alternative to pork. Marinate the jackfruit in the same rub and glaze, then bake at the same temperature. The texture mimics pork ribs, making it a delightful vegetarian option.
Storing and Bringing It Back to Life
Fridge Storage
Cool the ribs completely, then wrap them tightly in plastic wrap and store in an airtight container. They’ll keep up to 4 days in the fridge. The glaze may thicken slightly, but the meat remains juicy.
Freezer Friendly
Place the cooled ribs in a freezer‑safe bag, removing excess air. They can be frozen for up to 3 months. Thaw overnight in the fridge before reheating to maintain texture.
Best Reheating Method
Reheat in a preheated oven at 300°F (150°C) for 15 minutes, adding a splash of water or broth to keep them moist. A quick broil for 2 minutes at the end gives the glaze a fresh crispness. A tiny splash of water before reheating steams the ribs back to perfection.