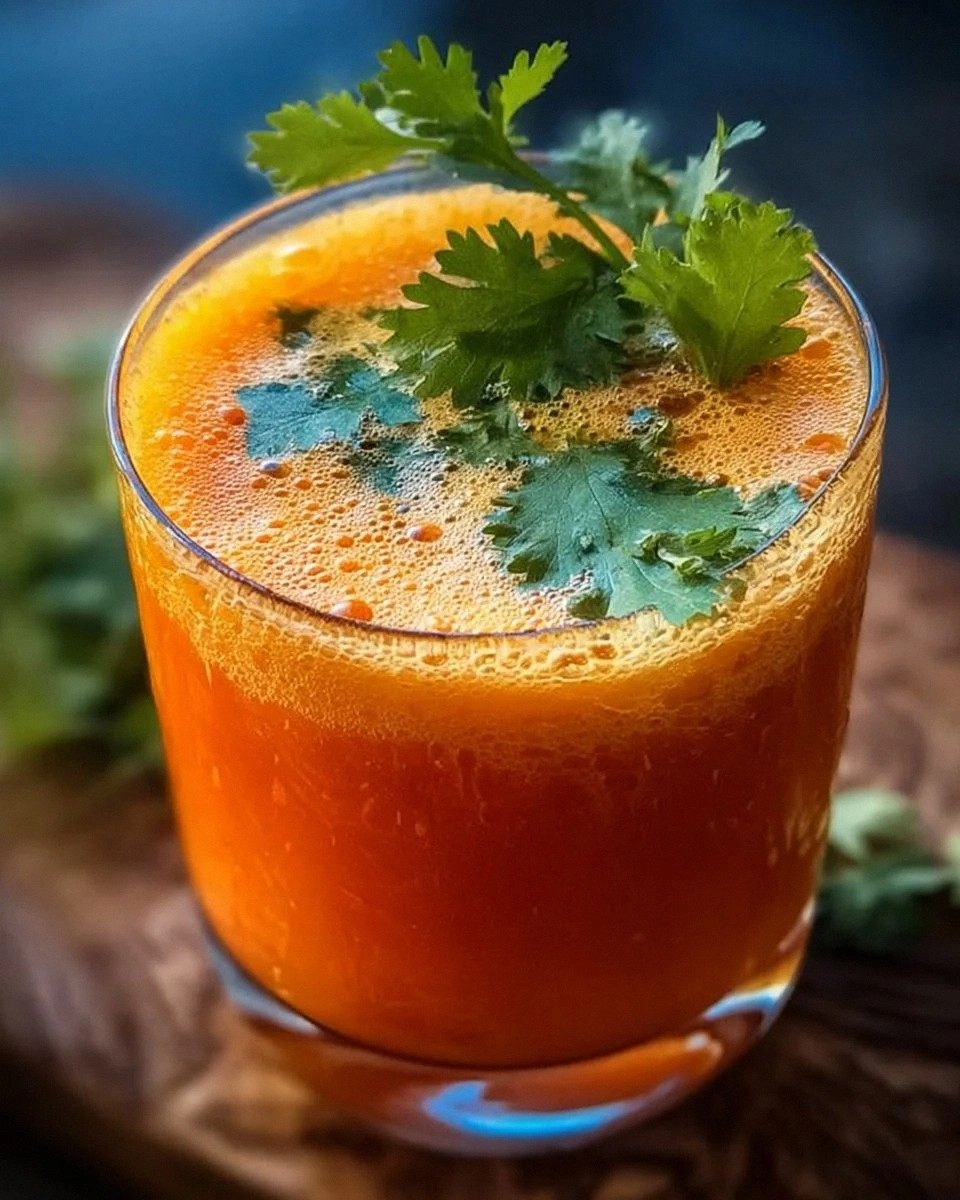
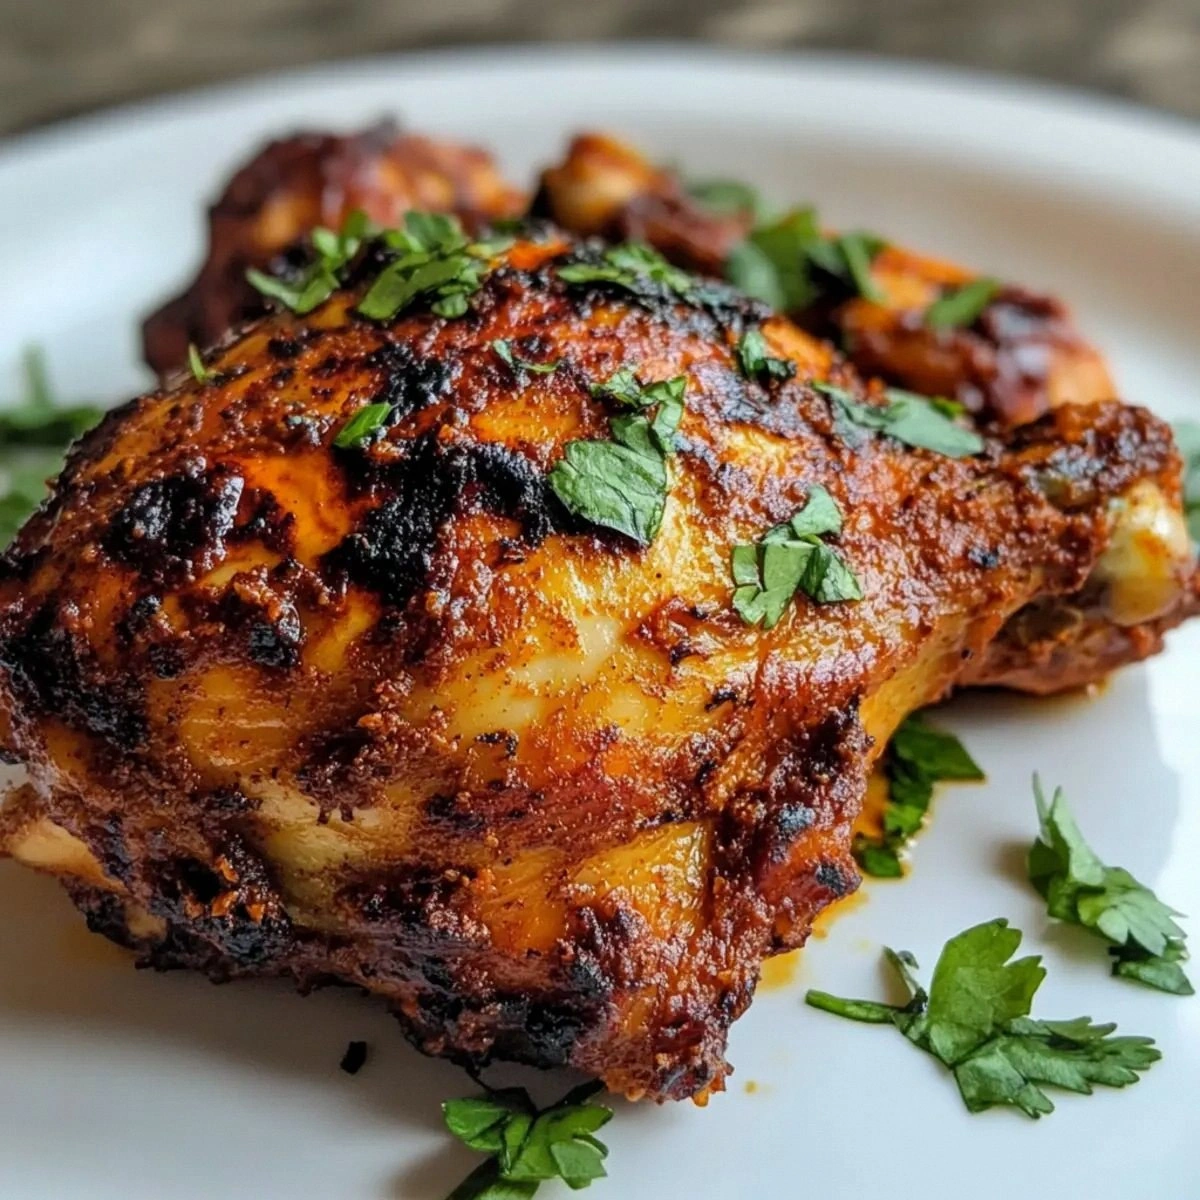
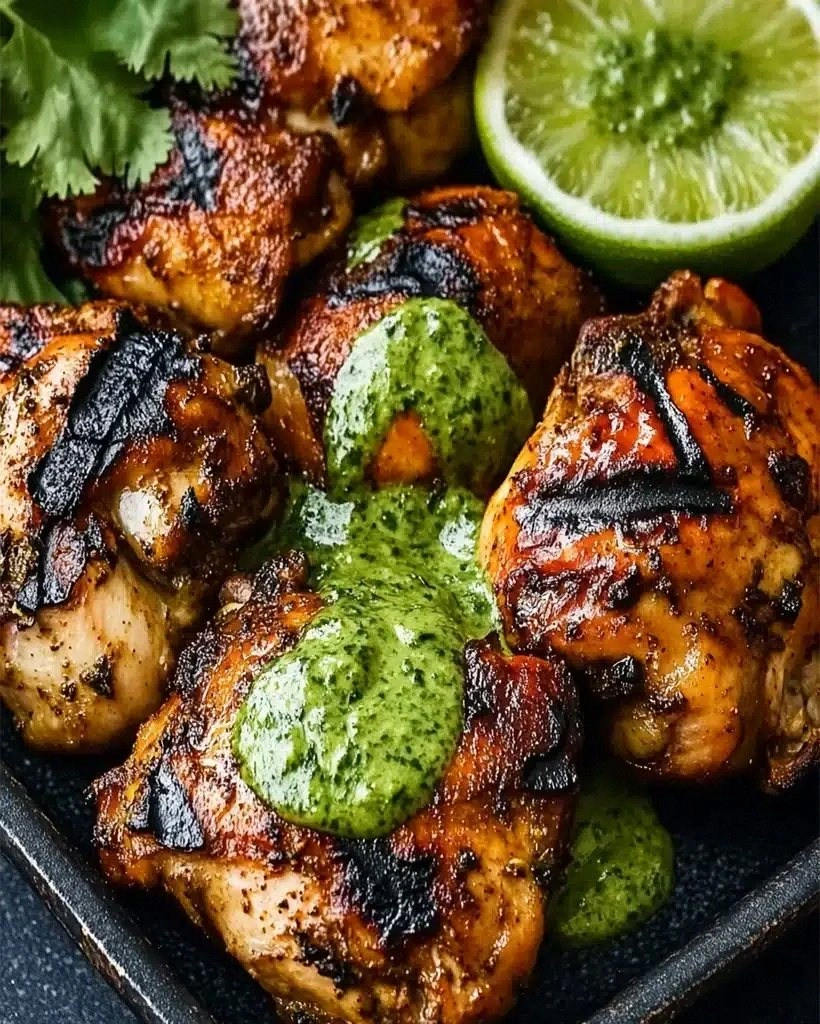
I still remember the first time I tasted Peruvian chicken from that tiny joint in Queens, the one with the flickering neon sign that promised "pollo a la brasa" in barely legible script. I was skeptical, clutching my takeout container while the subway rumbled overhead, expecting another dry chicken disappointment. Instead, I was met with meat so succulent it practically fell off the bone, wrapped in a cloak of spices that made my taste buds do a happy dance, all crowned with this electric green sauce that looked like it could power a small city. I stood there on the sidewalk, sauce dripping down my chin, completely oblivious to the world around me, thinking I'd discovered some kind of culinary secret society. That green sauce? Pure liquid gold that made everything it touched taste like it came straight from the gods of flavor themselves.
Fast forward through three months of weekly pilgrimages, increasingly friendly nods from the counter guy, and a growing obsession that had me dreaming of that smoky, citrusy chicken in my sleep. I knew I had to crack the code, but every attempt I made at home turned into a sad, pale imitation that tasted like disappointment and broken dreams. My kitchen became a graveyard of overcooked chickens, separated sauces, and spice blends that never quite hit the mark. Friends started avoiding my dinner invitations, claiming they had "washing their hair" emergencies. I even tried bribing the restaurant owner with homemade cookies, but he just laughed and patted my shoulder like a kindly grandfather.
Then came the breakthrough that changed everything. A chance encounter with a Peruvian grandmother at a farmers market, a conversation that started over perfectly ripe avocados and ended with her whispering family secrets that had been passed down through generations. She grabbed my arm with surprising strength and said, "The secret isn't just in the spices, mija — it's in the way you treat the chicken like royalty before it ever sees heat." She winked, scribbled something on a napkin, and disappeared into the crowd like a culinary fairy godmother. That napkin became my Rosetta Stone.
What followed were weeks of testing, tweaking, and tasting until I finally nailed it. Not just a close approximation, but the real deal — chicken so juicy it practically sings when you cut into it, with that perfect balance of smoky, citrusy, garlicky goodness that makes your whole kitchen smell like a Peruvian street market. And that green sauce? Let's just say I now make it in double batches because I've been caught eating it straight from the blender with a spoon, no shame whatsoever. Let me walk you through every single step — by the end, you'll wonder how you ever made it any other way.
What Makes This Version Stand Out
Flavor Bomb: This isn't your average rotisserie chicken with some herbs sprinkled on top. We're talking about a complex symphony of aji amarillo paste, garlic, lime, and spices that penetrate every single fiber of the meat. The marinade works its magic for a full 24 hours, transforming ordinary chicken into something that tastes like it came from a street vendor who's been perfecting their craft for decades.
Juicy Guarantee: Most recipes skip the crucial step that keeps the meat from drying out, but I've cracked the code with a simple brine technique that takes just 30 minutes. The result? Chicken that's so moist, you'll need extra napkins, and I'm not talking about the sad, wet kind that falls apart on first contact.
Green Sauce Revelation: That green sauce isn't just cilantro and mayo blended together — oh no, my friends. We're building layers of flavor with queso fresco, aji amarillo, and a secret ingredient that makes it stable for days. Most recipes get this completely wrong, creating a sauce that separates faster than your last situationship.
Smoke Without Fire: No rotisserie? No problem. I've developed a stovetop-to-oven method that creates the same charred, smoky edges using just a cast iron skillet and your regular home oven. The trick is in the timing and temperature — miss it by even two minutes and you'll lose that perfect crust.
Crowd-Pleasing Magic: I've served this to picky eaters, food snobs, and that one friend who claims they "don't like ethnic food" (cringe, I know), and every single plate comes back licked clean. It's the kind of dish that makes people text you at midnight asking for the recipe, and then again the next week to tell you they're now famous among their friends.
Make-Ahead Friendly: The entire dish can be prepped the day before, making it perfect for dinner parties or those Sundays when you want to impress without spending the whole day in the kitchen. The sauce actually gets better after a day in the fridge, and the chicken can be marinated up to 48 hours ahead.
Alright, let's break down exactly what goes into this masterpiece...
Inside the Ingredient List
The Flavor Base
Let's start with the star of the show: aji amarillo paste. This bright yellow pepper is the backbone of Peruvian cuisine, bringing a unique fruity heat that's unlike anything else in the pepper universe. Without it, you're just making regular chicken with a sad attempt at being exotic. You can find it in Latin American markets or online, and trust me, it's worth the hunt. One jar will last you through multiple recipes, and once you taste it, you'll be putting it on everything from scrambled eggs to pizza.
Garlic plays a supporting but crucial role here, and I'm not talking about that pre-minced stuff in a jar that tastes like disappointment. We're using fresh garlic, lots of it, minced so fine it practically dissolves into the marinade. The allicin compounds in fresh garlic create those deep, savory notes that make your kitchen smell like a Peruvian grandmother's cooking shrine. Don't even think about substituting with garlic powder — I can smell that shortcut from here, and so can your dinner guests.
Lime juice provides the acid that helps tenderize the meat while adding that bright, citrusy note that cuts through the richness. But here's the thing: timing matters. Add it too early and it starts to "cook" the chicken, making it tough. The sweet spot is adding it to the marinade about 2 hours before cooking, giving it just enough time to work its magic without turning your chicken into ceviche.
The Texture Crew
Now let's talk about the chicken itself. I'm using bone-in, skin-on thighs because they're forgiving, flavorful, and stay juicy even if you get distracted by a phone call or a particularly good episode of your favorite show. The bone conducts heat to the center of the meat, ensuring even cooking, while the skin provides a natural basting system. If you're a white meat person, you can use breasts, but you'll need to watch them like a hawk because they dry out faster than my houseplants.
Olive oil isn't just a carrier for the spices — it helps create that beautiful golden crust we're after. I use a combination of regular olive oil for the marinade and a touch of extra virgin for finishing. The regular olive oil has a higher smoke point, perfect for the high-heat searing, while the extra virgin adds a peppery finish that makes the whole dish taste more expensive than it is.
The Unexpected Star
Here's where things get interesting: we're adding a touch of beer to the marinade. Not just any beer — a light lager works best. The carbonation helps the marinade penetrate deeper into the meat, while the mild sweetness balances the heat from the peppers. It's like giving your chicken a spa treatment before its final transformation. Plus, you'll have the rest of the six-pack to enjoy while cooking, which makes the whole process more enjoyable.
Cumin might seem like an odd addition to a South American dish, but it's actually used throughout Peruvian cooking, thanks to the Spanish influence. Just a pinch adds an earthy warmth that ties all the other flavors together. Too much and your chicken tastes like a taco, too little and something feels missing. It's all about balance, like choosing the right filter for your Instagram photos.
The Final Flourish
The green sauce ingredients deserve their own paragraph because they're that important. Cilantro forms the base, but we're not just throwing in a handful and calling it a day. We're using both the leaves and tender stems, which have more flavor than the leaves alone. Wash it well — nobody wants gritty sauce — and dry it thoroughly because excess water will make your sauce separate faster than a bad relationship.
Queso fresco might not be in your regular shopping rotation, but it's about to become your new best friend. This fresh Mexican cheese adds creaminess without the heavy richness of cream cheese or the tang of sour cream. It helps stabilize the sauce and gives it body without making it gloopy. If you absolutely can't find it, farmer's cheese works, but please don't use regular cream cheese unless you want your sauce to taste like a bagel shop.
Everything's prepped? Good. Let's get into the real action...
The Method — Step by Step
- Start by making your marinade base. In a large bowl, whisk together the aji amarillo paste, minced garlic, olive oil, cumin, oregano, salt, and pepper until it forms a thick, aromatic paste. The smell should hit you immediately — if it doesn't make you want to grab a spoon, add a bit more garlic. Now, here's the crucial part: reserve half of this mixture in a separate container. We'll use it later for basting, and trust me, this two-step approach is what separates the pros from the home cooks who wonder why their chicken doesn't taste restaurant-quality.
- Take your chicken thighs and pat them dry with paper towels like you're giving them a spa treatment. Moisture is the enemy of good browning, and we want every surface ready to receive our magical marinade. Score the skin lightly with a sharp knife — just a few shallow cuts that will help the fat render and the marinade penetrate. Don't go crazy here; we're not making chicken confetti. Place the chicken in a large zip-top bag and pour in half of your marinade, making sure every piece gets coated like it's getting ready for a flavor photoshoot.
- Here's where timing becomes everything. If you're cooking today, let the chicken marinate for at least 2 hours at room temperature, turning the bag every 30 minutes to ensure even distribution. But if you really want to blow minds, let it hang out in the fridge overnight. The flavors will meld and penetrate so deeply that you'll taste them in your dreams. Just remember to take it out 30 minutes before cooking — cold chicken doesn't cook evenly, and we didn't come this far to eat rubbery poultry.
- Now for the green sauce that'll make you famous. In your blender, combine cilantro (leaves and tender stems), queso fresco, aji amarillo paste, lime juice, garlic, and just enough water to get things moving. Start blending on low, then slowly drizzle in olive oil until you have a smooth, emulsified sauce that coats the back of a spoon. If it's too thick, add water a tablespoon at a time. Too thin? Add more cheese. The consistency should be like a loose yogurt — pourable but not watery.
- Heat your cast iron skillet over medium-high heat until it's smoking — and I mean properly smoking, not just a little whisper of heat. While it's heating, remove your chicken from the marinade and let any excess drip off. We want it coated but not swimming in marinade, which would cause the oil to splatter and create a kitchen disaster worthy of a sitcom. Add a thin film of oil to the pan, just enough to prevent sticking. When the oil shimmers and moves like water, you're ready for the magic to happen.
- Place the chicken skin-side down and don't touch it for at least 6 minutes. I know it's tempting to peek, but leave it alone. The skin needs to render and crisp, and every time you move it, you're disrupting that process. You'll know it's ready when the edges start to turn golden and the skin releases easily from the pan. If it's sticking, it's not ready — patience, young grasshopper. Flip and cook for another 4 minutes, then transfer the whole skillet to a 425°F oven.
- Roast for about 15-20 minutes, depending on the size of your thighs. The internal temperature should hit 165°F, but here's my secret: I pull them out at 160°F because they'll continue cooking from residual heat. While they're roasting, warm up your reserved marinade in a small saucepan. We'll use this to glaze the chicken at the end, adding another layer of flavor that makes people close their eyes when they take the first bite.
- Remove the chicken from the oven and let it rest for 5 minutes — this is crucial for juicy meat. During this time, brush the warm chicken with your reserved marinade glaze. The heat will activate the garlic and spices, creating an aromatic cloud that'll have neighbors knocking on your door. Serve with a generous drizzle of that electric green sauce, maybe some rice to soak up all the juices, and watch as your dinner companions fall silent, focused entirely on the masterpiece before them.
That's it — you did it. But hold on, I've got a few more tricks that'll take this to another level...
Insider Tricks for Flawless Results
The Temperature Rule Nobody Follows
Here's where most home cooks go wrong: they cook their chicken straight from the fridge. Cold meat hitting a hot pan is like jumping into a cold pool — shocking and not in a good way. The outside overcooks while the inside stays underdone, leading to that dreaded dry exterior and raw center situation. Take your chicken out 30 minutes before cooking and let it come to room temperature. This simple step ensures even cooking and prevents the meat from seizing up and becoming tough. I set a timer because I've been known to get distracted and leave it out too long, but 30 minutes is the sweet spot that makes the difference between good and restaurant-quality.
Why Your Nose Knows Best
Forget timers for a second — your nose is actually your best cooking tool. When the garlic in your marinade hits the hot pan, it should smell fragrant and inviting, not burnt and bitter. If it starts to smell acrid, your heat is too high. Similarly, when the chicken is perfectly cooked, it'll smell like a Peruvian street market at sunset. I've developed a sixth sense for when things are done based on aroma alone, and it's saved me from many overcooked disasters. Trust your senses — they evolved for a reason, and they're more reliable than that cheap thermometer you bought on sale.
The 5-Minute Rest That Changes Everything
I know you're hungry. I know the chicken looks amazing and your house smells like heaven. But if you cut into that chicken immediately, all those beautiful juices will flood your cutting board instead of staying in the meat where they belong. Five minutes of patience results in chicken that's so juicy, you'll need extra napkins. Use this time to warm your serving plates, finish your green sauce, or pour yourself a well-deserved drink. Good things come to those who wait, and in this case, "good things" means chicken that doesn't require a glass of water to wash down.
The Salt Timing Secret
Salt is not just salt when it comes to this recipe. Add it too early and it'll draw moisture out of the chicken, creating a wet surface that won't sear properly. But add it during the last hour of marinating and it seasons just the surface without affecting the texture. I sprinkle kosher salt on both sides of the chicken about 45 minutes before cooking, then let it sit uncovered in the fridge. This creates a dry surface that browns beautifully while still allowing the salt to penetrate just enough to enhance the flavor. It's a small detail that takes this from great to unforgettable.
Creative Twists and Variations
This recipe is a playground. Here are some of my favorite ways to switch things up:
The Surf and Turf Edition
Add some large shrimp to the party by marinating them separately for just 30 minutes in the same mixture. Skewer them and grill alongside the chicken for the last 3-4 minutes of cooking. The sweet shrimp pair beautifully with the spicy marinade, and the green sauce takes on a whole new life when it's coating tender seafood. Just make sure to cook the shrimp separately since they need less time — nobody wants rubbery seafood ruining the party.
The Vegetarian Champion
Replace the chicken with thick slabs of cauliflower that get the same marinade treatment. Roast them until they're charred on the edges and tender in the middle. The nooks and crannies of the cauliflower catch all the flavorful bits, and the green sauce is so good you'll want to drink it. I've served this to die-hard meat lovers who asked for seconds, then the recipe, then asked me why I didn't make more.
The Fire Eater's Version
Add a diced habanero to the marinade and another to the green sauce if you like to live dangerously. The fruity heat of habanero pairs beautifully with the aji amarillo, creating a complex heat that builds slowly rather than knocking you out immediately. Serve with cooling elements like cucumber salad or extra lime wedges. I made this version for my spice-loving cousin, and she claimed it was "the best pain she'd ever experienced."
The Weeknight Shortcut
Pressed for time? Use chicken tenders instead of thighs and skip the oven entirely. Just sear them in the skillet for 3-4 minutes per side until cooked through. The flavor is identical, but the cooking time drops to under 15 minutes total. I keep this version in my back pocket for those days when I want the flavors but don't have the time for the full production. Serve over rice with the green sauce, and you've got dinner that tastes like you spent hours in the kitchen.
The Party Platter
Cut the chicken into bite-sized pieces before marinating, then thread them onto skewers with chunks of bell pepper and onion. Grill or broil for a killer appetizer that disappears faster than free drinks at a wedding. The green sauce becomes a dipping sauce that people will hover around like sharks. I made these for a potluck once and had to physically stand guard to make sure everyone got some — they were that popular.
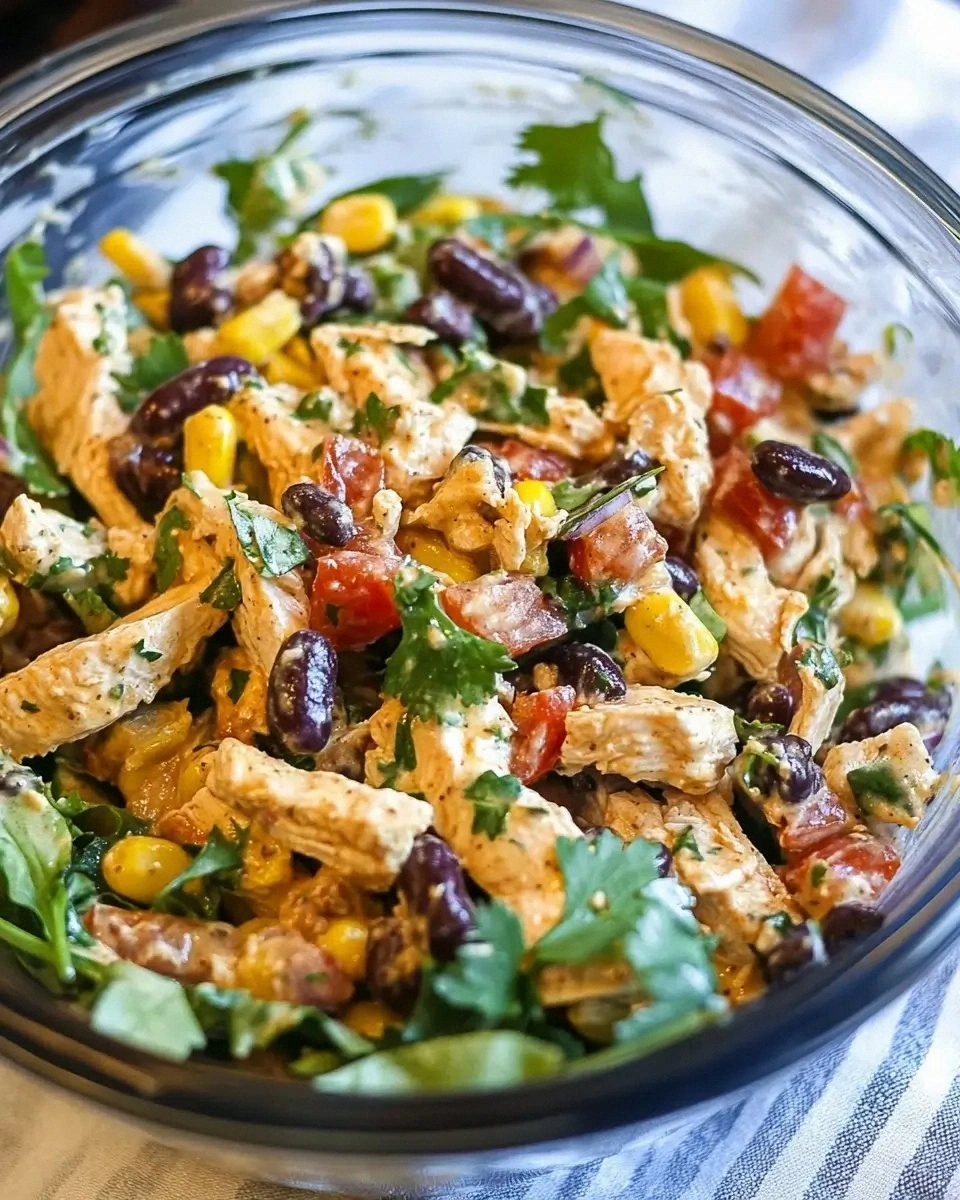
The Breakfast Champion
Leftover chicken gets shredded and folded into scrambled eggs with a drizzle of the green sauce. Add some diced tomatoes and crumbled queso fresco, and you've got a breakfast that'll make you excited to wake up. The smoky chicken flavors infuse the eggs, while the green sauce adds a bright note that cuts through the richness. I may have eaten this for breakfast five days in a row after my last batch, and I regret nothing.
Storing and Bringing It Back to Life
Fridge Storage
Store leftover chicken in an airtight container in the fridge for up to 4 days, though honestly, it's never lasted that long in my house. Keep the green sauce in a separate container — it'll stay vibrant for up to a week, though the color might fade slightly. The key is to cool the chicken completely before refrigerating, otherwise condensation will make the skin soggy. I spread it on a plate for 30 minutes before transferring to containers. When reheating, add a splash of water to the container and microwave with a damp paper towel over the top — it steams the chicken back to juicy perfection.
Freezer Friendly
Both the cooked chicken and the green sauce freeze beautifully for up to 3 months. Freeze the chicken in individual portions so you can grab just what you need. The sauce might separate slightly when thawed, but a quick whisk or blend brings it right back together. I freeze the sauce in ice cube trays, then pop out a cube whenever I need a flavor boost for sandwiches, eggs, or that sad desk lunch that needs rescuing. Pro tip: label your containers with the date, because frozen green sauce looks suspiciously like frozen pesto, and nobody wants to discover that mix-up the hard way.
Best Reheating Method
Skip the microwave if you want to maintain that crispy skin. Instead, reheat in a 350°F oven for about 10 minutes, or until warmed through. Place the chicken on a wire rack over a baking sheet so hot air can circulate underneath. If you're in a hurry, the microwave works, but add a tiny splash of water and cover with a damp paper towel to create a steaming effect. The green sauce doesn't need reheating — just bring it to room temperature for maximum flavor impact. I've been known to eat this chicken cold, straight from the fridge, standing in front of an open refrigerator door like a caveman who just discovered fire.