The kitchen was a battlefield that night, the stove overflamed, the oven misbehaving, and my confidence wobbling like a tortilla on a skillet. I stared at the pile of ingredients, half‑cooked chicken, a jar of ranch dressing, and a handful of bacon that had already betrayed me by turning into a greasy mess. A friend dared me to create something that would make my taste buds dance while still being simple enough for a week‑night dinner. That dare sparked a culinary experiment that would soon become a staple in my pantry. I was about to discover a recipe that would rewrite the rules of comfort food.
Picture the room: the air thick with the scent of melted cheese, the sound of sizzling bacon, and the faint hum of the refrigerator. My eyes darted to the can of diced tomatoes with green chilies, a splash of heat that promised to cut through the richness of the ranch. The textures already whispered promises—crisp bacon, creamy chicken, and the soft, pliable tortillas waiting to be folded. I could almost taste the first bite, the harmony of smoky, tangy, and creamy flavors colliding in a single, satisfying chew. The moment felt like a culinary revelation, and I was ready to dive in.
What sets this version apart is not just the combination of flavors, but the way each element is elevated to superstar status. The ranch dressing is thick and tangy, coating the chicken like a velvety blanket that keeps the filling moist and flavorful. The bacon is crumbled to the right consistency—crisp enough to add crunch, but soft enough to melt into the cheese for an umami boost. The blend of cheddar and Monterey Jack cheeses provides a rich, melty texture that balances the sharpness of the ranch and the heat of the chilies. Together, they create a dish that feels indulgent yet comforting, like a hug in a tortilla shell.
I was intrigued by a particular twist that I had never seen before: using a single can of diced tomatoes with green chilies to bring a subtle heat that doesn’t overpower the creamy base. The trick is to let the tomatoes simmer with the spices, releasing their juices and infusing the mixture with a bright, slightly sweet undertone. This technique gives the enchiladas a depth of flavor that feels both familiar and adventurous. The result is a sauce that coats the filling like a glossy, savory glaze. Let me walk you through every single step — by the end, you'll wonder how you ever made it any other way.
What Makes This Version Stand Out
- Flavor Fusion: The ranch dressing and diced tomatoes with green chilies combine to create a tangy, smoky base that feels like a party in your mouth. The spices mingle with the creamy ranch, delivering a subtle heat that lingers without overwhelming the palate. This balance makes the dish feel both bold and comforting.
- Texture Harmony: Crumbled bacon, shredded chicken, and a dual-cheese blend create layers that bite, melt, and ooze. The tortillas provide a soft, pliable foundation that holds the filling together while adding a gentle chew. The result is a multi‑sensory experience that satisfies on every level.
- Simplicity Wins: Every component is readily available in most pantries, and the assembly process is straightforward enough for novice cooks. No fancy sauces or exotic ingredients are required, making this a go‑to recipe for busy nights. The steps flow logically, reducing kitchen stress.
- Crowd Appeal: The combination of familiar flavors—cheese, bacon, and ranch—makes this dish a crowd‑pleaser at parties, potlucks, or family dinners. The heat from the green chilies adds a subtle kick that appeals to adventurous eaters without alienating the whole table. Guests will keep coming back for seconds.
- Ingredient Quality: Using high‑quality bacon and fresh cheeses elevates the dish beyond a generic recipe. The ranch dressing’s thickness ensures it coats each bite, while the tomatoes’ brightness cuts through the richness. Paying attention to quality pays off in flavor.
- Make‑Ahead Friendly: The filling can be prepared in advance and stored in the fridge or freezer, allowing you to assemble and bake on demand. The tortillas maintain their integrity even after refrigeration, thanks to their robust dough. This flexibility makes it ideal for meal prep.
- Heat Control: The green chilies provide a measured heat that can be dialed up or down by adjusting the amount of tomato or adding a splash of hot sauce. This control ensures the dish is suitable for all heat tolerances. You can tailor the experience to your taste.
Alright, let's break down exactly what goes into this masterpiece...
Inside the Ingredient List
The Flavor Base
The ranch dressing is the backbone of this dish, offering a creamy, tangy foundation that coats the chicken and balances the heat from the tomatoes. Garlic powder and onion powder add depth without the need for fresh aromatics, making the base robust and flavorful. Salt and pepper tie everything together, enhancing the inherent flavors of each ingredient. If you skip the ranch, the filling will feel dry and lack cohesion. Swapping ranch for a Greek yogurt mixture can lower the fat content while maintaining the creamy texture.
The Texture Crew
Shredded cooked chicken provides a protein core that absorbs the flavors of the dressing and spices. Crumbled bacon introduces a smoky crunch that contrasts with the softness of the cheese and tortillas. Cheddar and Monterey Jack cheeses melt together to create a gooey, golden layer that pulls apart when you take a bite. Flour tortillas act as the vessel, holding all the elements together while adding a chewy, comforting base. If you omit the chicken, the dish becomes a vegetarian delight, but the texture will shift toward a cheese‑centric experience.
The Unexpected Star
The can of diced tomatoes with green chilies is the secret sauce that gives this recipe its signature kick. The tomatoes’ acidity cuts through the richness of the cheese and bacon, while the green chilies provide a subtle heat that lingers on the tongue. Using fresh tomatoes would alter the flavor profile, making it sweeter and less tangy. The green chilies also add a bright green color that makes the filling visually appealing. If you prefer a milder version, replace the green chilies with mild poblano or sweet bell pepper.
The Final Flourish
Flour tortillas are chosen for their pliability and ability to hold the filling without tearing. Fresh tortillas provide a superior texture compared to store‑bought frozen ones, as they remain soft and easy to roll. If you’re short on time, pre‑heated tortillas can be warmed on a skillet for a minute to soften them. Using corn tortillas would shift the flavor toward a more authentic Mexican vibe, while whole‑wheat options offer a nuttier bite. The choice of tortilla ultimately sets the stage for the entire dish’s mouthfeel.
Everything's prepped? Good. Let's get into the real action...
The Method — Step by Step
- Begin by preheating your oven to 375°F (190°C). In a large bowl, combine the shredded chicken, ranch dressing, diced tomatoes with green chilies, garlic powder, onion powder, salt, and pepper. Mix until the chicken is evenly coated with the creamy sauce. The mixture should look like a thick, glossy slurry. This step ensures each bite is packed with flavor from the first contact.
- Heat a skillet over medium heat and add the crumbled bacon. Cook until the bacon is crisp and the fat has rendered, then transfer it to a paper towel to drain. The bacon fat should be collected in the skillet for later use. Once cooled, break the bacon into smaller pieces; this will help distribute the crunch throughout the filling. The aroma of bacon will already be teasing your senses.
- Add the shredded cheddar and Monterey Jack cheeses to the chicken mixture, stirring until the cheeses melt into a silky, golden blend. The cheeses should coat the chicken like a velvet coat, creating a rich mouthfeel. If the mixture feels too thick, add a splash of milk or chicken broth to loosen it. This step is crucial for achieving that luscious, gooey texture that melts in your mouth.
- Fold in the bacon pieces, ensuring every bite contains a burst of smoky crunch. The bacon will add a delightful contrast to the creamy filling. If you like a little extra flavor, sprinkle a pinch of smoked paprika over the mixture. The mixture should now resemble a decadent, savory casserole waiting to be wrapped.
Kitchen Hack: Use a stand mixer with a paddle attachment to mix the filling quickly and evenly, saving you time and effort.
- Lay a flour tortilla flat on a clean surface and spoon a generous ladle of the filling onto the center. Spread the filling evenly, leaving a small border around the edges to prevent leaks. The tortilla should be folded in half, then rolled tightly to create a neat, cylindrical shape. This rolling technique ensures the filling stays inside during baking.
- Place each rolled enchilada seam‑side down in a greased baking dish. The dish should be large enough to hold all the rolls without overcrowding. This arrangement allows the heat to circulate evenly around each enchilada, ensuring uniform cooking. The rolls should sit snugly but not touch each other too tightly.
- Sprinkle a light dusting of shredded cheddar over the tops of the enchiladas. The cheese will melt into a golden crust, adding an extra layer of flavor. If you prefer a crispier top, lightly broil the dish for the last 2 minutes, watching closely to avoid burning. The cheese should form a bubbly, golden finish that is both appetizing and delicious.
- Bake in the preheated oven for 25 minutes, or until the cheese is melted and the tortillas are slightly browned. The filling should be hot throughout, and the edges should appear golden. The aroma of melted cheese and sizzling bacon will fill the kitchen, creating an irresistible scent.
- Watch Out: When removing the baking dish, be careful of the hot steam that escapes. The steam can be intense and may cause burns if you’re not cautious. Use oven mitts and tilt the dish slightly to allow the steam to vent safely. This step ensures you stay safe while enjoying the aroma.
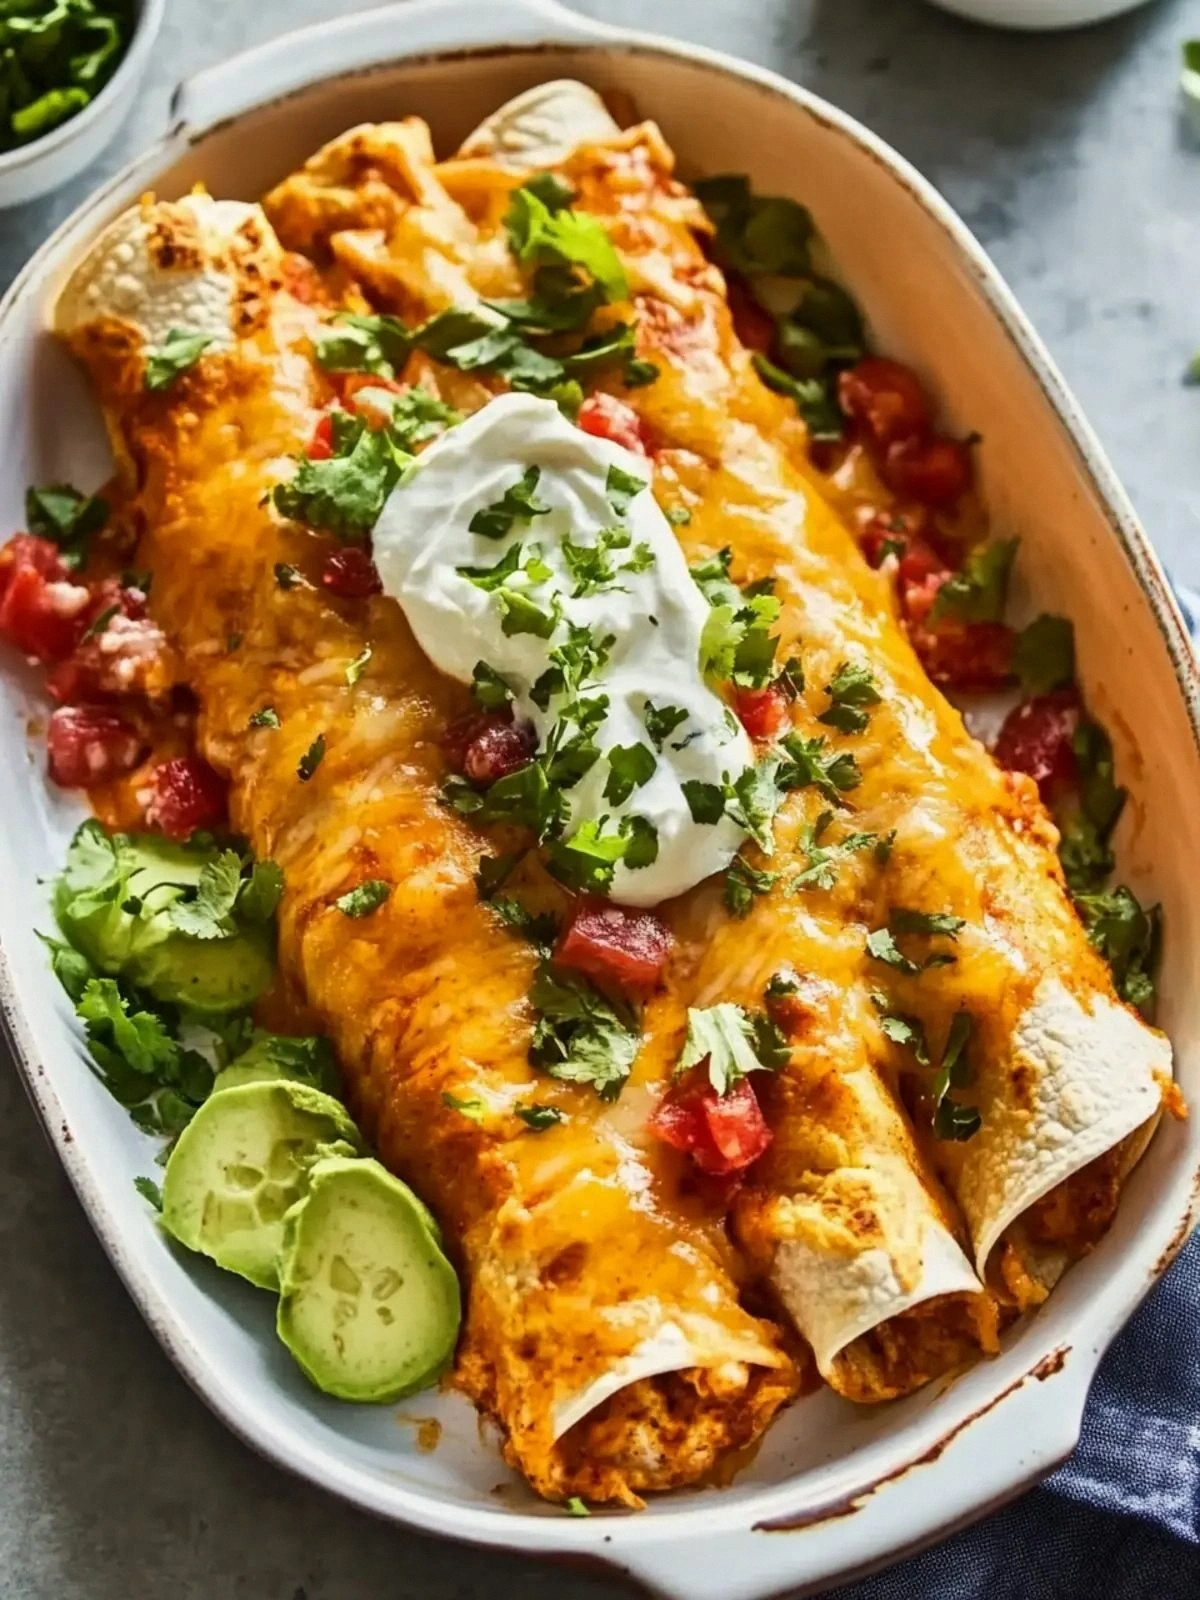
- Let the enchiladas rest for 5 minutes before serving. This allows the cheese to set slightly, making the rolls easier to slice. Slice each roll into bite‑sized pieces for individual servings. Serve hot, optionally topped with fresh cilantro or a dollop of sour cream. The final presentation should look inviting and comforting.
That's it — you did it. But hold on, I've got a few more tricks that'll take this to another level...
Insider Tricks for Flawless Results
The Temperature Rule Nobody Follows
Many cooks assume that a higher oven temperature always cooks faster, but that can cause the cheese to burn before the filling is heated through. Baking at 375°F (190°C) strikes a perfect balance between a golden crust and a molten interior. I once tried 425°F, and the result was a burnt exterior with a cold center. By sticking to the recommended temperature, you guarantee a uniformly cooked dish.
Why Your Nose Knows Best
Before you begin the baking process, give the dish a quick sniff. A faint scent of bacon and cheese indicates that the filling is ready to go. If the aroma feels off, you may need to add a splash of broth to loosen the mixture. Your nose is a reliable gauge of doneness, saving you from over‑cooking.
The 5-Minute Rest That Changes Everything
Allowing the enchiladas to rest after baking lets the cheese set and the flavors meld. This short pause prevents the cheese from sliding off when you cut the rolls. I once served them immediately, and the cheese slid off like a slippery pancake. The rest period gives the dish a polished finish.
The Fold That Saves the Day
When rolling each enchilada, press the seam firmly to seal the filling inside. A loose seam will cause the filling to leak during baking, creating a mess. Use a small dab of beaten egg on the seam for a tighter seal. This simple trick keeps the interior intact.
The Cheese Layer Secret
Adding an extra layer of cheese on top before baking creates a golden, bubbly crown that is both beautiful and flavorful. The cheese melts into a glossy glaze that invites you to dig in. If you’re watching calories, use a reduced‑fat cheese but still sprinkle enough to form a crust.
The Oven Turn Trick
Halfway through baking, rotate the dish to ensure even browning on all sides. The uneven heat distribution in many ovens can cause one side to brown faster. Rotating the dish also helps the cheese melt evenly, giving the enchiladas a uniform look.
Creative Twists and Variations
This recipe is a playground. Here are some of my favorite ways to switch things up:
Spicy Chipotle Twist
Swap the diced tomatoes with green chilies for a can of chipotle‑in‑adobo sauce. The smoky heat of chipotle adds depth and a slightly sweet undertone. Pair with a drizzle of lime juice to cut through the richness. This version is ideal for those who crave a bold, smoky flavor.
Veggie Power Upgrade
Add diced bell peppers and corn kernels to the filling for extra crunch and sweetness. The vegetables introduce a bright color palette and a fresh burst of flavor. They also boost the dish’s nutritional profile, making it a balanced meal. This variation is perfect for vegetarians or those looking to sneak in more veggies.
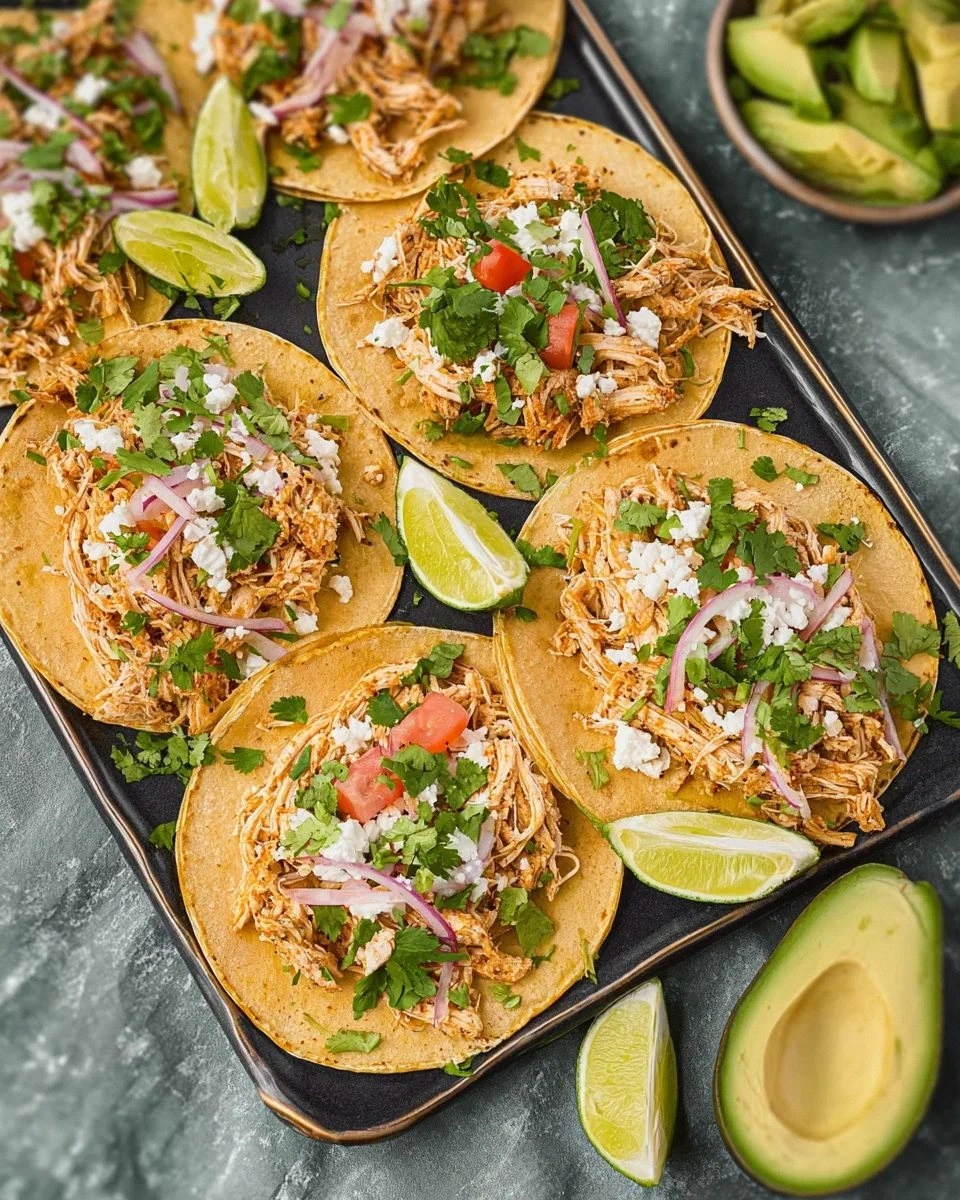
Mexican Street Taco Style
Serve the enchiladas on a bed of shredded lettuce with a dollop of guacamole. The lettuce adds a refreshing crunch that contrasts the warm, cheesy filling. A squeeze of fresh lime over the top enhances the Mexican vibe. This version turns the dish into a street‑food‑inspired feast.
Greek Yogurt Ranch Swap
Replace the ranch dressing with Greek yogurt for a tangier, lower‑fat option. The yogurt adds a creamy texture while cutting down on calories. Add a pinch of dill to give the dish a Mediterranean twist. This swap is great for those watching their weight but not willing to sacrifice flavor.
Low‑Calorie Cauliflower Wraps
Use thinly sliced cauliflower florets as the wrap instead of tortillas. The cauliflower adds a subtle earthiness and reduces carbs. Sauté the cauliflower slices lightly to keep them pliable. This version is ideal for low‑carb or keto diets.
Holiday Cranberry Bacon
Incorporate dried cranberries and a splash of balsamic glaze for a festive twist. The cranberries provide a sweet‑tart contrast to the savory filling. This variation is perfect for holiday gatherings or a unique Thanksgiving side dish.
Storing and Bringing It Back to Life
Fridge Storage
Store any leftover enchiladas in an airtight container in the refrigerator for up to 3 days. Keep the dish flat to prevent the tortillas from becoming soggy. When ready to eat, reheat in a preheated oven at 350°F (175°C) for 10 minutes, or until heated through. The cheese should be melted, and the tortillas should be warm and pliable. This method preserves the flavors without compromising texture.
Freezer Friendly
For longer storage, wrap each enchilada individually in foil and place them in a freezer bag. Freeze for up to 2 months. Thaw overnight in the refrigerator before reheating. When reheating, bake at 350°F (175°C) for 15 minutes, or until the cheese is bubbling. This approach ensures a fresh taste even after freezing.
Best Reheating Method
The oven is the best way to reheat, as it restores the crispness of the tortilla and melts the cheese evenly. Avoid microwaving, which can make the tortillas soggy and the cheese rubbery. If you’re short on time, use a skillet on medium heat for 3–4 minutes, flipping once. The result should be a warm, gooey, and satisfying meal.