I was halfway through a midnight snack raid when I realized I had an entire bag of shredded coconut, a handful of almonds, and a half‑pint of chocolate chips staring back at me like a dare. My stomach growled louder than a subway train, and I thought, “What if I could combine the nostalgic crush of an Almond Joy candy bar with the comforting chew of a cookie?” The result? A batch of Almond Joy Cookie Bars that turned my kitchen into a tropical bakery and my taste buds into a rave of sweet, salty, and buttery bliss. I’ll be honest — I ate half the batch before anyone else got a chance, and that’s a confession worth sharing because it proves just how addictive these bars are.
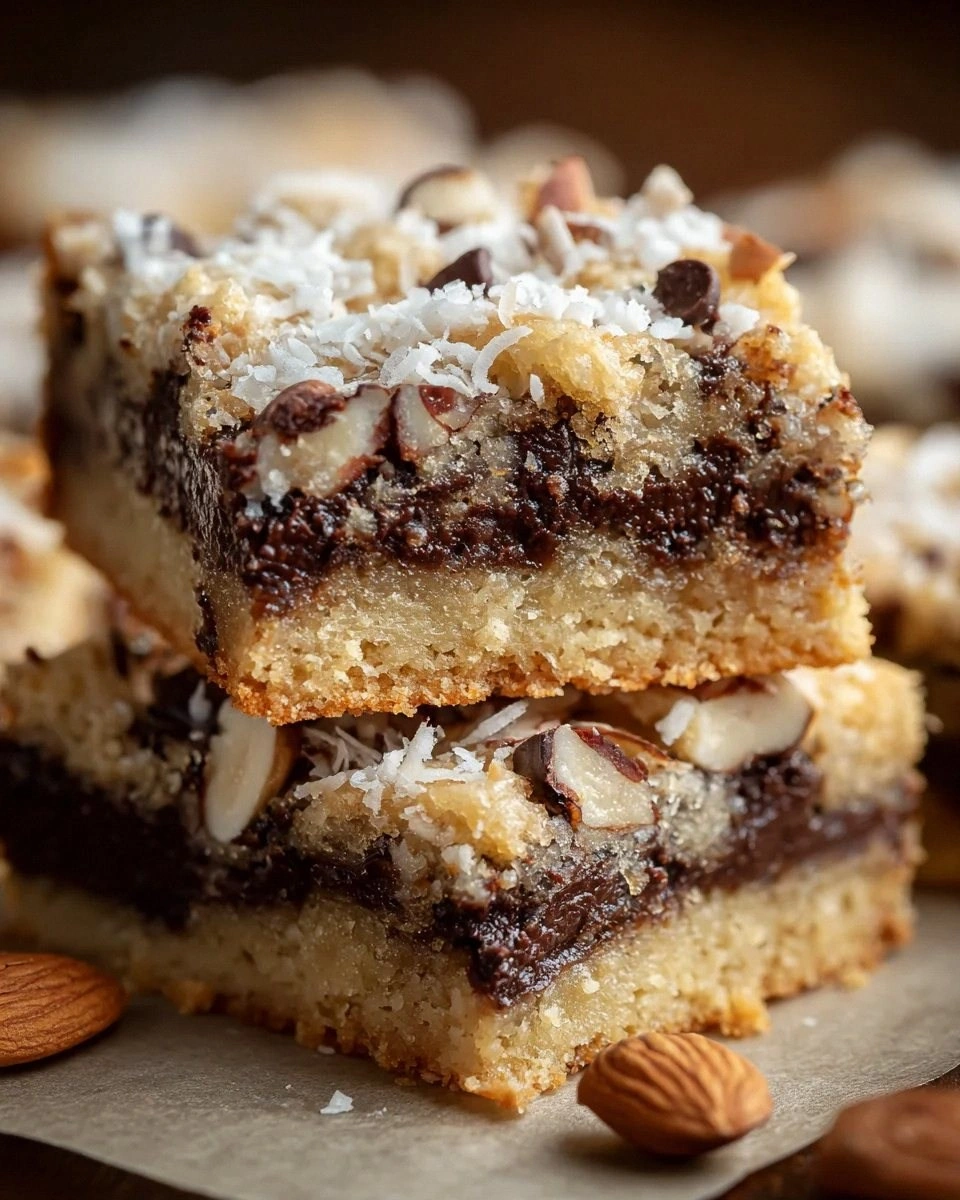
Picture this: the oven door swings open, releasing a wave of warm cocoa and toasted coconut that makes the whole house feel like a five‑star resort lobby. The bars themselves are a golden‑brown canvas, speckled with glossy chocolate chips that melt into ribbons, while crunchy almond slivers peek out like tiny, toasted confetti. The texture is a paradox—soft and chewy in the middle, with edges that crisp up just enough to give you that satisfying snap when you bite. The aroma? A sweet, buttery perfume that whispers “comfort” and “indulgence” in the same breath, making you wonder why you ever settled for ordinary cookies.
What sets this version apart from every other copy‑cat recipe floating around the internet is a secret technique: I fold the coconut and almonds into a butter‑sugar base that’s been gently warmed, allowing the fats to coat each morsel before the chocolate even meets the pan. Most recipes dump the dry ingredients straight into the wet, resulting in a dry, crumbly texture that never quite captures the true Almond Joy vibe. By toasting the coconut lightly and letting the butter melt just enough to become glossy, you get a bar that holds together like a well‑engineered bridge—strong enough to lift without crumbling, yet tender enough to melt in your mouth.
Let me walk you through every single step — by the end, you’ll wonder how you ever made it any other way. I dare you to taste this and not go back for seconds. Okay, ready for the game‑changer? This next part? Pure magic. Stay with me here — this is worth it.
What Makes This Version Stand Out
- Taste: The combination of semi‑sweet chocolate, caramel‑kissed brown sugar, and toasted coconut creates a layered flavor profile that evolves with every bite, making each mouthful feel like a new discovery.
- Texture: A buttery, chewy interior meets a crisp, caramelized edge, while the almond slivers add a satisfying crunch that contrasts beautifully with the soft center.
- Simplicity: Only eleven ingredients, all pantry staples, and a single bowl of mixing keep the process stress‑free, even for novice bakers.
- Uniqueness: Toasting the coconut before folding it in gives a depth of flavor most recipes miss, turning a simple bar into a gourmet treat.
- Crowd Reaction: These bars have a reputation for disappearing within minutes at parties, prompting frantic “who made these?” inquiries.
- Ingredient Quality: Using real vanilla extract and high‑quality dark chocolate elevates the bar from candy‑store level to bakery‑level indulgence.
- Cooking Method: Baking at a moderate temperature ensures the chocolate stays melty while the edges set perfectly, avoiding the dreaded soggy middle.
- Make‑Ahead Potential: The bars keep beautifully for up to a week, making them perfect for meal‑prep, lunchboxes, or a quick after‑school snack.
Inside the Ingredient List
The Flavor Base
Unsalted butter: This is the heart of the bar’s richness. When softened and creamed with sugars, it creates an airy matrix that traps air, giving the bars a tender crumb. Skipping the butter or substituting margarine will result in a greasy texture and a loss of that buttery depth that makes each bite melt on the tongue.
Granulated sugar: It provides the primary sweetness and contributes to the crisp edges as it caramelizes during baking. If you reduce the amount, the bars may taste flat; increase it too much and they become overly sweet, masking the coconut’s natural flavor.
Light brown sugar: Packed with molasses, it injects moisture and a subtle caramel undertone that balances the chocolate’s bitterness. A common swap is dark brown sugar for an even richer flavor, but be aware it will darken the bars slightly.
Egg: Acts as the binding agent, ensuring the flour and coconut cling together. If you’re allergic to eggs, a flax‑egg (1 tbsp ground flaxseed + 3 tbsp water) works, though the texture will be a tad denser.
Vanilla extract: A splash of pure vanilla adds depth and warmth, tying the chocolate, coconut, and almond flavors together. Avoid imitation vanilla; it can introduce a harsh, chemical aftertaste that ruins the harmony.
The Texture Crew
All‑purpose flour: The backbone that gives the bars structure. Too much flour makes them dry and cakey; too little leaves them crumbly and falling apart. Measuring by weight (120 g) is ideal for consistency.
Baking soda and baking powder: These leavening agents ensure the bars rise just enough to stay fluffy without becoming cake‑like. Baking soda also helps the brown sugar caramelize, while baking powder adds a light lift. Using only one of them will result in a denser, less airy bar.
Sea salt: A pinch enhances all the sweet flavors, balancing the richness and preventing the bars from tasting one‑dimensional. If you love a salty‑sweet contrast, sprinkle a tiny extra pinch on top before baking.
The Unexpected Star
Chocolate chips: Choose semi‑sweet or dark chips for a melty, slightly bitter contrast that prevents the bar from becoming cloyingly sweet. If you prefer a milk‑chocolate vibe, go ahead, but the overall balance will shift toward sugary.
Flaked coconut: This adds a tropical twist, giving you that nostalgic Almond Joy experience. Toasted lightly, it becomes crunchy on the outside while staying chewy inside, creating a textural surprise with every bite.
The Final Flourish
Almond slivers: Adds crunch and boosts that nutty flavor, making them downright irresistible. Lightly toasting them for 2 minutes enhances their aroma and prevents them from turning soggy during baking.
Everything's prepped? Good. Let's get into the real action…
The Method — Step by Step
Preheat your oven to 350°F (175°C) and line a 9×13‑inch baking pan with parchment paper, letting the edges hang over for easy lift‑out. While the oven warms, melt the butter in a medium saucepan over low heat until it’s just bubbling, then remove from heat. This gentle melt ensures the butter stays liquid without scorching, preserving its pure buttery flavor.
In a large mixing bowl, whisk together the granulated sugar, light brown sugar, and the melted butter until the mixture is glossy and slightly thickened. This is the moment where the sugar begins to dissolve, creating a caramel‑like sheen that will later translate into those coveted crispy edges.
Beat in the egg and vanilla extract, scraping the sides of the bowl to incorporate every buttery speck. The batter should look smooth and slightly glossy, a sign that the egg has emulsified the fats and sugars perfectly.
In a separate bowl, sift together the flour, baking soda, baking powder, and the remaining pinch of sea salt. Sifting aerates the dry ingredients and prevents lumps, ensuring a uniform rise. Watch Out: Over‑mixing once the flour is added can develop gluten, making the bars tough. Stir just until you no longer see streaks of flour.
Gently fold the dry mixture into the wet batter using a spatula, turning the bowl over a few times. The batter should be thick but spreadable; if it feels too stiff, add a tablespoon of milk to loosen it without compromising the texture.
Now fold in the toasted coconut, almond slivers, and chocolate chips, distributing them evenly but gently. You’ll hear a faint crunch as the coconut and almonds meet the batter—a promising sign that the texture will be spot‑on.
Spread the batter evenly in the prepared pan, smoothing the top with the back of a spoon. The surface should be slightly uneven; this will create a natural ridge that caramelizes beautifully. Place the pan in the oven and bake for 25‑30 minutes, or until the edges are golden brown and a toothpick inserted into the center comes out with a few moist crumbs.
While the bars bake, set a timer for the last 5 minutes and sprinkle a light dusting of extra almond slivers on top for an added crunch and visual appeal. The aroma at this stage is intoxicating—think toasted coconut meeting melted chocolate, a scent that makes you want to dance around the kitchen.
Remove the pan from the oven and let the bars cool in the pan for 10 minutes, then lift them out using the parchment overhang and transfer to a wire rack. Cooling fully (about 20‑30 minutes) allows the bars to set, making them easier to cut without crumbling.
That's it — you did it. But hold on, I've got a few more tricks that'll take this to another level…
Insider Tricks for Flawless Results
The Temperature Rule Nobody Follows
Always start with a fully preheated oven. The initial blast of heat creates steam inside the batter, which helps the bars rise and develop that coveted airy interior. If the oven is still warming, the bars will spread unevenly, resulting in a dense, gummy texture. Trust me, I once baked these at 325°F and learned the hard way that the edges never crisped.
Why Your Nose Knows Best
Instead of relying on a timer alone, listen for the subtle scent of toasted coconut turning golden. When the aroma shifts from “sweet butter” to “nutty caramel,” you’re within two minutes of perfect doneness. This sensory cue prevents over‑baking, which can dry out the interior and turn the chocolate chips into brittle shards.
The 5‑Minute Rest That Changes Everything
After removing the pan from the oven, let the bars rest for exactly five minutes before slicing. This short pause allows the chocolate to set just enough to hold its shape, while the interior continues to firm up from residual heat. Skipping this step leads to gummy edges that stick to the knife.
Almond Toasting Secret
Toast almond slivers in a dry skillet for just 2 minutes, shaking the pan constantly. Over‑toasting can make them bitter, while under‑toasting leaves them soft and soggy. The perfect toast adds a deep, nutty aroma that pairs exquisitely with the coconut.
The Double‑Layer Cool
If you love a super‑crisp top, transfer the baked bars to a cooling rack after the initial 10‑minute pan rest, then place a sheet of parchment on top and let them cool completely. This extra airflow dries the surface slightly, giving you that satisfying crack when you bite.
Creative Twists and Variations
This recipe is a playground. Here are some of my favorite ways to switch things up:
White Chocolate Coconut Dream
Swap the semi‑sweet chocolate chips for white chocolate chips and increase the shredded coconut by half a cup. The result is a milky, tropical bar that feels like a beach vacation in every bite. Perfect for those who love the buttery sweetness of white chocolate.
Double‑Nut Crunch
Add ¼ cup chopped pistachios alongside the almond slivers for a pop of color and an extra nutty dimension. The pistachios bring a subtle earthiness that balances the sweet coconut and chocolate.
Spiced Holiday Edition
Incorporate ½ tsp ground cinnamon and a pinch of ground ginger into the dry ingredients. This warm spice blend gives the bars a festive twist, making them ideal for holiday gatherings.
Vegan Friendly
Replace the egg with a flax‑egg (1 tbsp ground flaxseed + 3 tbsp water) and use coconut oil instead of butter. Use dairy‑free chocolate chips, and you’ll have a plant‑based version that still delivers the same chewy, crunchy experience.
Mocha Madness
Add 1 tbsp instant espresso powder to the wet mixture and swap half of the chocolate chips for dark espresso‑infused chips. The coffee notes deepen the chocolate flavor, turning the bars into an after‑dinner treat for caffeine lovers.
Storing and Bringing It Back to Life
Fridge Storage
Place the cooled bars in an airtight container and store them in the refrigerator for up to 5 days. The chilled environment keeps the chocolate from melting and preserves the crisp edges.
Freezer Friendly
Wrap individual bars in parchment paper, then place them in a zip‑top freezer bag. They’ll stay fresh for up to 3 months. When you’re ready to enjoy one, let it thaw at room temperature for 20 minutes, then give it a quick microwave zap of 10 seconds to revive the melt‑in‑your‑mouth texture.
Best Reheating Method
To bring a refrigerated bar back to its original glory, preheat the oven to 300°F (150°C), place the bar on a parchment‑lined tray, and add a tiny splash of water (about 1 tsp) around the edges. The steam created keeps the interior moist while the outer crust re‑crispes. In just 5‑7 minutes, you’ll have a bar that tastes like it just came out of the oven.