I still remember the day I ruined a perfectly good batch of chocolate chip cookies by trying to impress my future mother-in-law. There I was, standing in my tiny apartment kitchen, thinking I could jazz up the classic recipe by throwing in some random nuts and cereal I found in the pantry. The result? A crumbly disaster that tasted like regret and broken dreams. But here's the plot twist — that spectacular failure led me to create what I now call the Chocolate Hazelnut Crunch Cookies that Everyone Craves, and honestly, I wouldn't change a thing about that journey.
Fast forward three years, and these cookies have become legendary in my circle. I'm talking about the kind of legendary where neighbors mysteriously drop by when they smell them baking, where my coworkers have set up a Slack channel specifically for cookie alerts, where my nephew sold them at his school bake sale and accidentally started a small black market operation. These aren't just cookies — they're edible currency, conversation starters, and quite possibly the solution to world peace (though I'm still testing that theory).
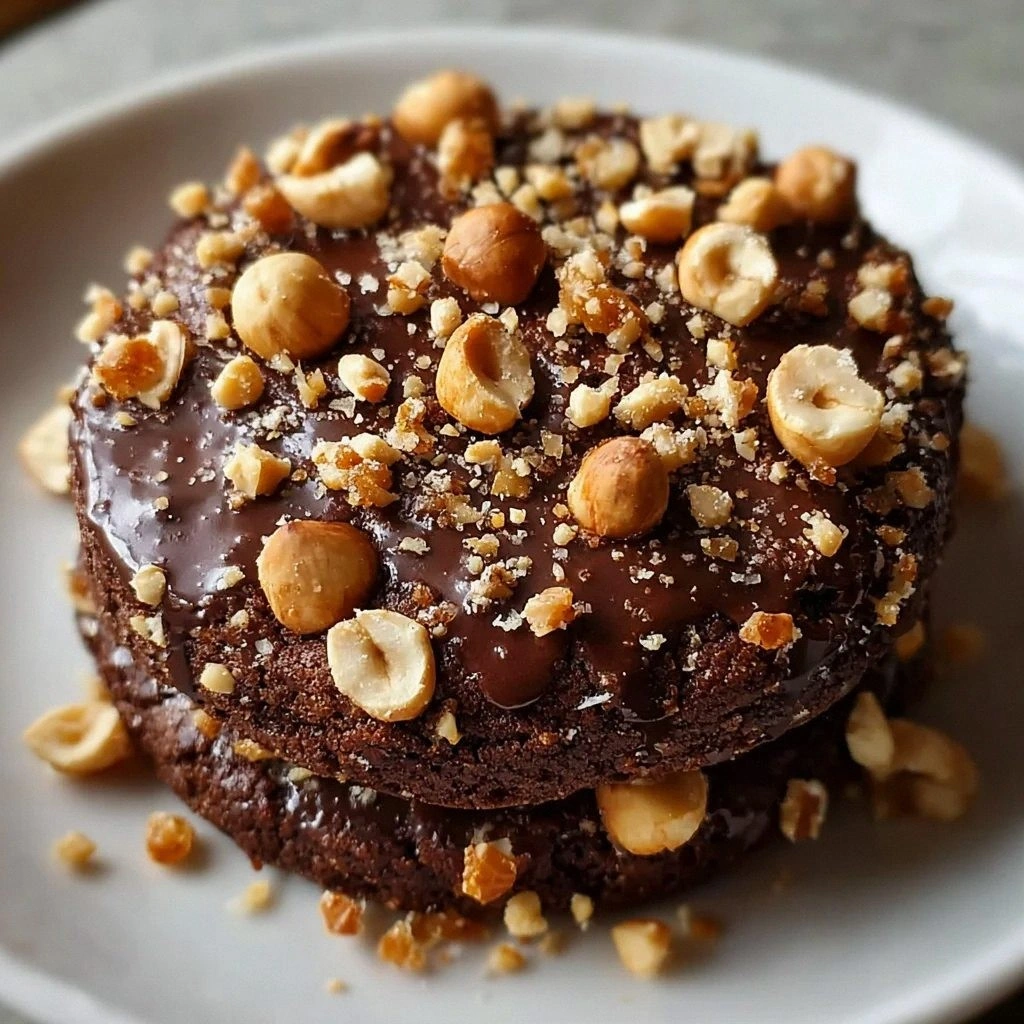
What makes these particular cookies so addictive? It's that perfect storm of textures and flavors that hits every pleasure center in your brain. We're talking about a cookie that manages to be both chewy and crunchy, with pockets of molten chocolate that stretch like edible silk threads when you break them apart, punctuated by the nutty perfume of toasted hazelnuts and the most surprising crunch from cornflakes that'll make you wonder why every cookie doesn't include cereal. The edges caramelize into these lacy, buttery fringes that shatter like the top of a crème brûlée, while the centers stay gloriously soft and fudgy.
But here's my favorite part — despite tasting like they came from some artisanal bakery where people wear beanies year-round and discuss single-origin chocolate, these cookies are actually foolproof. I'm talking zero fancy equipment, no overnight chilling (though you can if you want to level up), and ingredients you probably already have lurking in your kitchen right now. Okay, ready for the game-changer? Let me walk you through every single step — by the end, you'll wonder how you ever made it any other way.
What Makes This Version Stand Out
- Caramelized Edge Magic: The combination of brown sugar and a higher butter ratio creates these incredible crispy edges that taste like butterscotch candy, while keeping the center molten and gooey. Most recipes play it safe with equal ratios, but we're going bold here.
- The Triple Texture Experience: Soft cookie base, melty chocolate chips, crunchy hazelnuts, and the unexpected snap of cornflakes. It's like a symphony where every instrument knows exactly when to shine.
- Foolproof Technique: I've tested this recipe seventeen times (yes, really — my neighbors love me), and it works whether you're a seasoned baker or someone who usually burns toast. The method is forgiving and tells you exactly what to look for.
- Make-Ahead Winner: The dough keeps beautifully in the fridge for up to five days, and baked cookies freeze like champions for three months. Hello, emergency dessert stash!
- Room for Creativity: Once you master the base, you can swap in different nuts, use white chocolate, add espresso powder, or go wild with mix-ins. This recipe is your new best friend that gets along with everyone.
- crowd Reaction Guarantee: I've never met anyone who could eat just one. They're the kind of cookies that make people close their eyes when they take the first bite — you know, that involuntary "mmmm" that escapes before they can stop it.
Alright, let's break down exactly what goes into this masterpiece...
Inside the Ingredient List
The Flavor Base
Unsalted butter is our foundation here, and I need you to promise me you'll use the good stuff — none of that bargain bin mystery butter that tastes like the plastic wrapper it came in. I'm talking about butter that smells like fresh cream and has a sunny yellow color that makes you think of happy cows grazing in alpine meadows. When it's properly softened (think room temperature, not melted), it creams with the sugars to create tiny air pockets that make your cookies rise like magic. Skip this step and use cold butter, and you'll end up with dense, hockey-puck cookies that could double as paperweights.
Our dynamic duo of granulated and brown sugar isn't just about sweetness — it's about chemistry in action. The granulated sugar helps create those crisp edges we crave, while the brown sugar (with its molasses content) brings moisture, chewiness, and that subtle caramel note that makes people ask "what's your secret ingredient?" Dark brown sugar works too if you want to amp up the toffee flavors, but I find light brown sugar strikes the perfect balance.
The Texture Crew
Large eggs are the unsung heroes of cookie structure. They bind everything together like edible glue, add moisture, and help create that gorgeous shiny top we all love. Use room temperature eggs — I know, I know, everyone says this, but cold eggs can make your beautiful creamed butter seize up into little lumps that refuse to cooperate. If you're in a rush (been there), pop them in a bowl of warm water for five minutes while you measure everything else.
All-purpose flour is our reliable workhorse, but here's what most recipes get wrong — they don't tell you how to measure it properly. Stop scooping your measuring cup directly into the flour bag like you're digging for treasure. Instead, spoon the flour into your cup and level it off with a knife. This prevents adding up to 25% extra flour, which turns your cookies into sad, dry discs that no amount of milk can save.
The Unexpected Star
Crushed cornflakes are where we separate the cookie amateurs from the cookie artists. They add this incredible light, crispy texture that makes people stop mid-chew and say "wait, what is that?" It's like the cookie equivalent of finding out your quiet coworker is actually a rock drummer on weekends. Don't substitute with other cereals — cornflakes have the perfect delicate structure that holds up to baking without getting tough or soggy.
The Final Flourish
Chocolate chips are obviously crucial, but let me let you in on a little secret: mix your chip types for maximum impact. I use half semi-sweet and half dark chocolate chips because life is too short for boring chocolate. The semi-sweet gives you that classic cookie flavor, while the dark chocolate adds sophistication and keeps things from getting too sweet. If you're feeling fancy, chop up a good chocolate bar instead — those irregular pieces create chocolate rivers throughout the cookie.
Toasted hazelnuts are what elevate these from "really good cookies" to "I need the recipe" territory. Toast them until they smell like you're walking through an Italian piazza in autumn, then chop them roughly so you get some big pieces and some hazelnut dust. The dust flavors the whole cookie, while the bigger pieces give you those satisfying crunchy moments. Walnuts work in a pinch, but honestly, once you go hazelnut, you'll never go back.
Everything's prepped? Good. Let's get into the real action...
The Method — Step by Step
- Start by preheating your oven to 350°F (175°C), but here's the thing — don't just crank it up and immediately start mixing. Give your oven a good 15-20 minutes to come to temperature. I learned this the hard way when I rushed it and ended up with cookies that were burnt on the bottom and raw in the middle, like some kind of dessert mullet. Position your rack in the middle of the oven for even heat distribution. While it's heating, line two baking sheets with parchment paper — not wax paper, unless you enjoy the flavor of kitchen fires.
- Now for the fun part — toasting those hazelnuts. Spread them in a single layer on a dry skillet over medium heat. Here's where your nose becomes your best kitchen tool. In about 3-4 minutes, you'll start smelling this incredible nutty aroma that makes you understand why people write poetry about food. Shake the pan every 30 seconds so they toast evenly. When the skins start to crack and they smell like you died and went to Nutella heaven, they're done. Dump them onto a clean kitchen towel and rub them while they're warm — most of the skins will come off. Don't stress about getting every last bit of skin off — a little adds character.
- In a bowl that makes you feel like a real baker (you know, the one that's been in your family forever), whisk together your flour, baking soda, and salt. This isn't just busy work — properly distributed leavening agents mean no weird pockets of metallic-tasting baking soda in your finished cookies. Set this aside and resist the urge to start eating it by the spoonful. I know flour looks like powdered sugar, but trust me, it tastes like disappointment.
- In your mixing bowl (or stand mixer if you're fancy like that), cream together the softened butter and both sugars until the mixture looks pale and fluffy, about 3-4 minutes on medium speed. This is where the magic begins — those tiny air bubbles you're incorporating are what give your cookies lift. The mixture should look like wet sand that's been at the beach all day, light in color and texture. Don't rush this step, but also don't overdo it — we're making cookies, not butter sculpture.
- Add the eggs one at a time, beating well after each addition. Then add the vanilla extract. The batter might look slightly curdled at this point, like it's having an identity crisis. That's totally normal and exactly what we want. If it looks smooth and perfect, you probably added the eggs too fast or they were too cold. Live and learn, cookie warrior.
- Gradually add the flour mixture to the wet ingredients, mixing just until combined. Overmixing develops gluten and gives you tough cookies that could double as frisbees. We want tender, melt-in-your-mouth cookies that make people close their eyes in bliss. The dough should come together in a soft, slightly sticky mass that holds together when you squeeze it.
- Time for the star ingredients! Fold in the chocolate chips, toasted hazelnuts, and crushed cornflakes with a spatula or wooden spoon. This is where you need to channel your inner gentle giant — fold, don't stir like you're mixing concrete. You want to keep those cornflake pieces intact for maximum crunch. The dough should look like it's having a party and everyone's invited.
- Using a cookie scoop or two spoons, drop rounded tablespoons of dough onto your prepared baking sheets, spacing them about 2 inches apart. These cookies spread, so give them room to do their thing. If you're feeling artistic, you can press a few extra chocolate chips on top — this guarantees that bakery-style look that makes people think you're a professional. Don't flatten them — they'll spread and settle into perfect circles as they bake.
- Bake for 10-12 minutes, but here's the key — they should look slightly underdone in the center when you pull them out. The edges will be golden brown, but the centers will still look soft and pale. This is your insurance policy for that perfect chewy center. They'll continue cooking on the hot baking sheet for a few minutes after you take them out. Let them cool on the sheet for 5 minutes before transferring to a wire rack. If you try to move them too early, they'll fall apart like my willpower at a sample sale.
That's it — you did it. But hold on, I've got a few more tricks that'll take this to another level...
Insider Tricks for Flawless Results
The Temperature Rule Nobody Follows
Here's what separates the cookie legends from the cookie disasters: temperature control. Your butter should be soft enough to leave an indent when you press it, but not so soft that it's melting into a puddle. Think "room temperature in a normal house, not a sauna." If you forgot to take it out early (we've all been there), cut it into small cubes and let it sit for 15 minutes. Microwaving is risky business — one second too long and you've got liquid butter that'll make your cookies spread like they've got somewhere important to be.
Why Your Nose Knows Best
Trust your senses over the timer. When your cookies are ready, your kitchen will smell like a chocolate hazelnut factory exploded in the best possible way. The aroma should fill the room with this warm, nutty, chocolatey perfume that makes family members mysteriously appear asking "what smells so good?" If you're not getting that sensory experience, check your oven temperature with an oven thermometer — most ovens lie by 25-50 degrees, and cookies are divas about temperature.
The 5-Minute Rest That Changes Everything
Don't skip the cooling time on the baking sheet — this is when the magic happens. Those 5 minutes let the cookies set up properly so you can transfer them without them falling apart like my plans to eat just one. During this time, they're finishing baking from residual heat, the chocolate is setting into those gorgeous pools, and the cornflakes are re-crisping. It's like a cookie spa treatment that transforms them from "pretty good" to "are you sure these aren't from a bakery?"
The Freezer Trick That Saves Lives
Make a double batch and freeze half the dough in pre-portioned balls. Flash freeze them on a baking sheet for an hour, then toss them in a freezer bag. When that 9 PM cookie emergency hits (don't pretend you don't know what I'm talking about), you can bake them straight from frozen — just add 2-3 extra minutes to the baking time. Having emergency cookie dough in your freezer is like having a superpower, except better because you get cookies.
Why Size Actually Matters
For consistent cookies that all bake at the same rate, use a cookie scoop or measure your dough. I know it seems obsessive, but uneven sizes mean some cookies will be burnt while others are raw. A medium cookie scoop (about 1.5 tablespoons) gives you the perfect cookie-to-crunch ratio. Plus, there's something deeply satisfying about a tray of identical cookies that makes you feel like you've got your life together, even if your laundry situation suggests otherwise.
Creative Twists and Variations
This recipe is a playground. Here are some of my favorite ways to switch things up:
The Espresso Indulgence
Add 2 teaspoons of instant espresso powder to the flour mixture for cookies that taste like your favorite coffee shop merged with a bakery. The espresso enhances the chocolate flavor without making them taste like coffee — it's like a secret ingredient that makes people say "what is that amazing flavor?" If you really want to commit to the coffee theme, swap half the chocolate chips for chocolate-covered espresso beans.
The White Chocolate Raspberry Dream
Replace the semi-sweet chocolate chips with white chocolate chips and add 3/4 cup freeze-dried raspberries that you've crushed into small pieces. The tart raspberries cut through the sweetness of white chocolate, and the combination with hazelnuts tastes like the world's most sophisticated candy bar. These disappear faster than my motivation on a Monday morning.
The Salted Caramel Sensation
Drizzle the cooled cookies with homemade caramel sauce and a sprinkle of flaky sea salt. The sweet-salty combination is absolutely irresistible, and the caramel plays beautifully with the nutty hazelnuts. Pro tip: make extra caramel because half of it will mysteriously disappear during the "quality control" phase of cookie making.
The Tropical Vacation
Swap the hazelnuts for toasted macadamia nuts and add 1/2 cup toasted coconut flakes along with the cornflakes. Use half white chocolate and half dark chocolate chips. These taste like Hawaii in cookie form — they're what you'd eat if you were sitting on a beach watching the sunset, except you're probably in your kitchen in sweatpants, which is honestly just as good.
The Breakfast Cookie
Add 1/2 cup quick oats, swap the cornflakes for crushed Frosted Flakes, and use butterscotch chips instead of chocolate. These are dangerously close to being healthy (they have oats, so they're basically granola, right?) and make excellent grab-and-go breakfast options for those mornings when you hit snooze too many times.
The Spiced Holiday Version
Add 1 teaspoon cinnamon, 1/2 teaspoon nutmeg, and 1/4 teaspoon cardamom to the flour mixture. Use dark chocolate chips and add 1/2 cup dried cherries. These taste like Christmas morning and are perfect for holiday cookie exchanges where you want to show off a little bit.
Storing and Bringing It Back to Life
Fridge Storage
Store completely cooled cookies in an airtight container at room temperature for up to 5 days. Layer them between sheets of parchment paper to prevent sticking, though honestly, they've never lasted longer than 3 days in my house. Add a slice of bread to the container — it helps maintain moisture and keeps the cookies soft. Replace the bread when it gets stale (which it will, because the cookies steal all its moisture like tiny cookie vampires).
Freezer Friendly
Baked cookies freeze beautifully for up to 3 months. Wrap them individually in plastic wrap, then place in a freezer bag with the air squeezed out. Thaw at room temperature for 30 minutes, or microwave for 10-15 seconds for that fresh-baked experience. You can also freeze the dough in pre-portioned balls and bake straight from frozen — just add 2-3 minutes to the baking time. Having frozen cookie dough on hand is like having a secret weapon against bad days, and I'm not exaggerating when I say it's changed my life.
Best Reheating Method
To revive slightly stale cookies (though I don't know how you'd have any left), wrap them in a damp paper towel and microwave for 5-10 seconds. This creates a little steam sauna that brings back the softness. For that fresh-baked experience, pop them in a 300°F oven for 5 minutes. Add a tiny splash of water to the baking sheet before reheating — it steams back to perfection and makes your kitchen smell like you just baked a fresh batch.