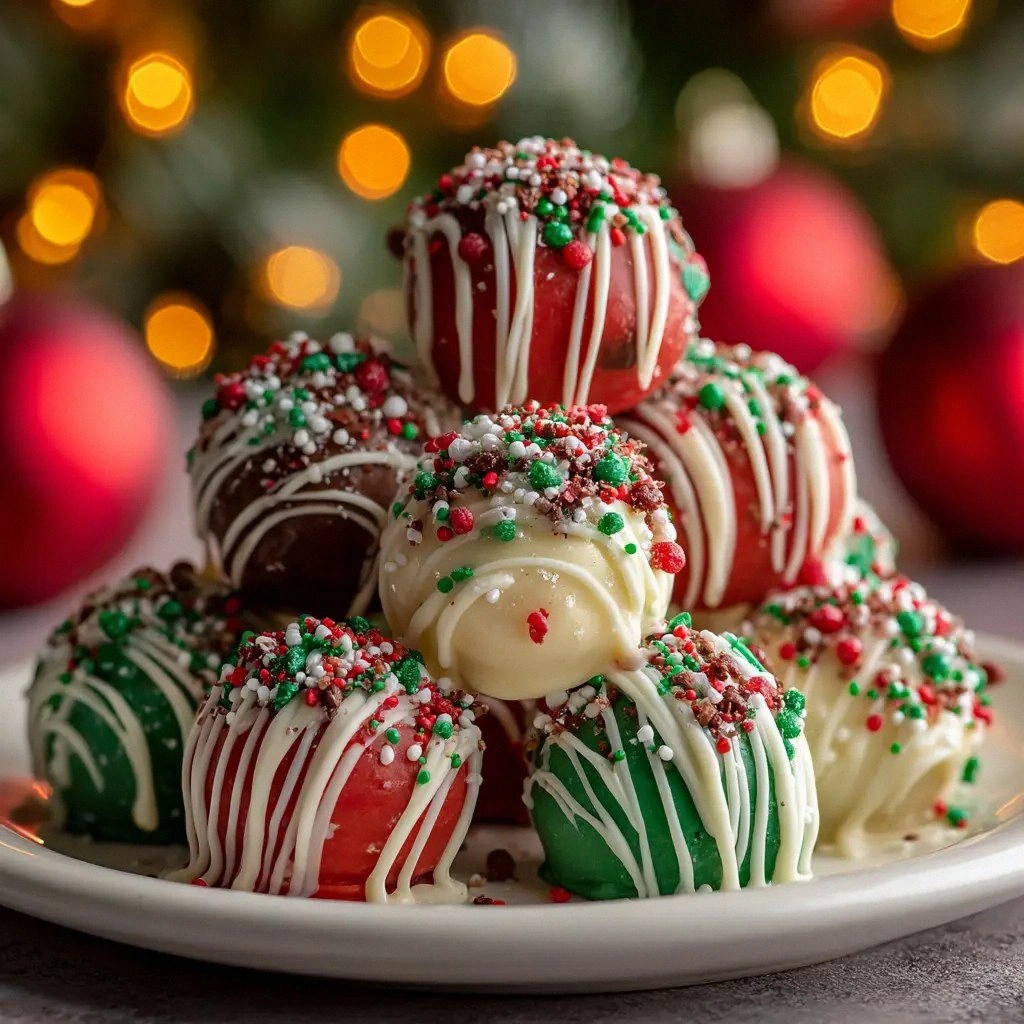
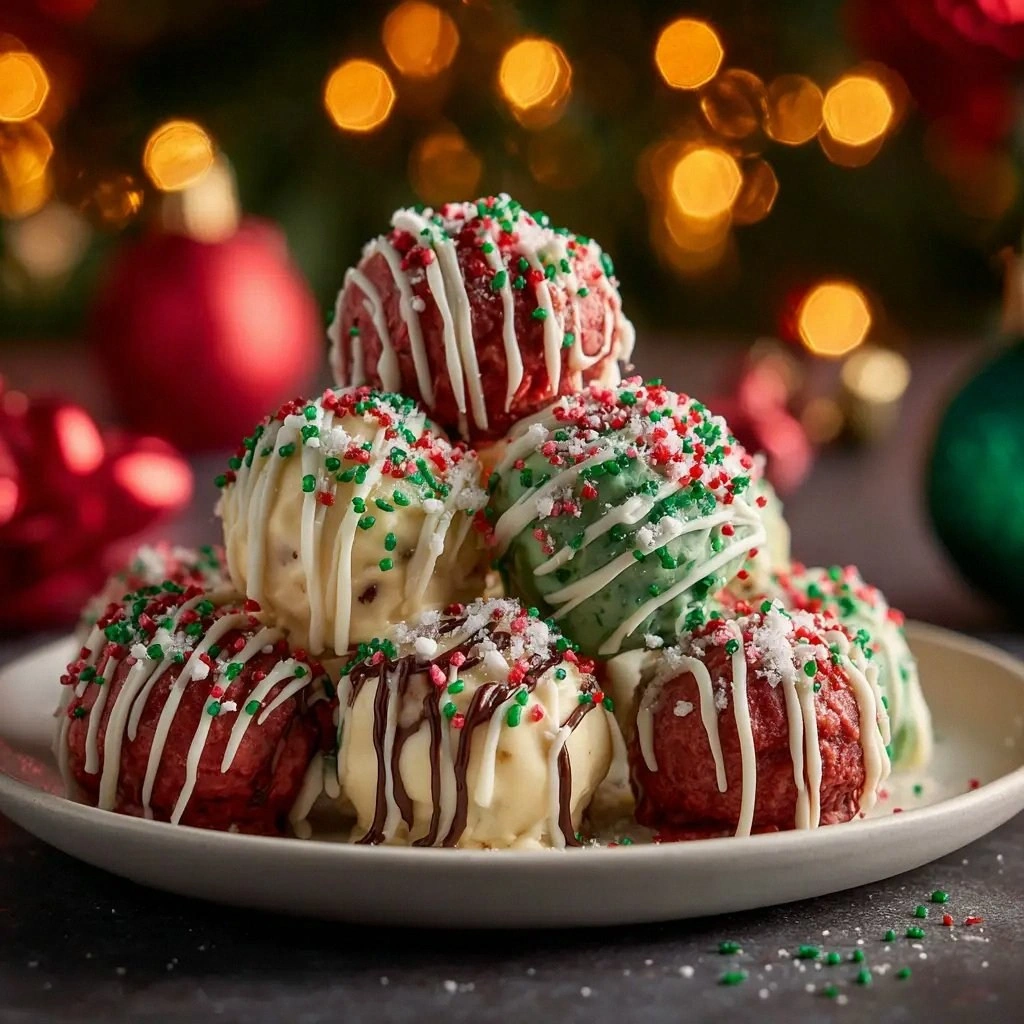
When the holiday lights flickered and the scent of pine drifted through my apartment, I found myself staring at an empty fridge and a craving that felt like a full‑blown culinary dare. I had just survived a week of burnt lasagna and soggy cookies, and my taste buds were begging for something that would make the kitchen feel like a festive playground again. That night, I decided to channel my inner pastry wizard and conjure a dessert that would be so irresistibly simple, even a beginner could whip it up and still win over the whole family. The result? No‑Bake Christmas Cheesecake Bites – the kind of bite‑size treat that melts in your mouth and makes your heart do a little happy dance.
Picture this: a bowl of creamy, velvety filling that’s sweet enough to satisfy a sugar craving but light enough to keep the palate fresh. The moment the first bite hits the tongue, you’re met with a silky smoothness that feels like a holiday hug, followed by a subtle crunch from the graham cracker base. The aroma of melted white chocolate and vanilla wafts through the air, instantly turning a simple kitchen into a cozy winter wonderland. The texture is a delightful contrast – the buttery crust gives way to a luscious, airy cream that’s almost too soft to hold. This is not just another cheesecake; it’s a handheld celebration of holiday indulgence.
What makes this version stand out is that it’s a no‑bake wonder, so you can skip the oven entirely and still achieve that classic cheesecake flavor. I dare you to taste this and not go back for seconds; the first bite will have you reaching for another. Most recipes get this completely wrong by over‑mixing the filling or using too much sugar, but I’ve cracked the secret to a silky finish that holds together without a single crumb falling apart. I’ll be honest – I ate half the batch before anyone else got a chance to try it, and the rest of the family begged for the recipe. If you’ve ever struggled with cheesecake textures, you’re not alone – and I’ve got the fix. This is hands down the best version you’ll ever make at home, and I’m about to show you why.
Let me walk you through every single step – by the end, you’ll wonder how you ever made it any other way. From the moment you gather the ingredients to the last garnish, we’ll keep the process light, playful, and full of flavor. This isn’t just a recipe; it’s an experience that turns a simple snack into a holiday highlight. So grab your mixing bowl, pre‑heat your imagination, and let’s dive into the magic of No‑Bake Christmas Cheesecake Bites.
What Makes This Version Stand Out
- Texture: The combination of graham cracker crumbs and melted white chocolate wafers creates a base that is both crunchy and buttery. The cream cheese filling is whipped to a silky consistency, ensuring every bite is smooth and decadent. Unlike traditional cheesecakes that can be dense, this version feels light on the tongue.
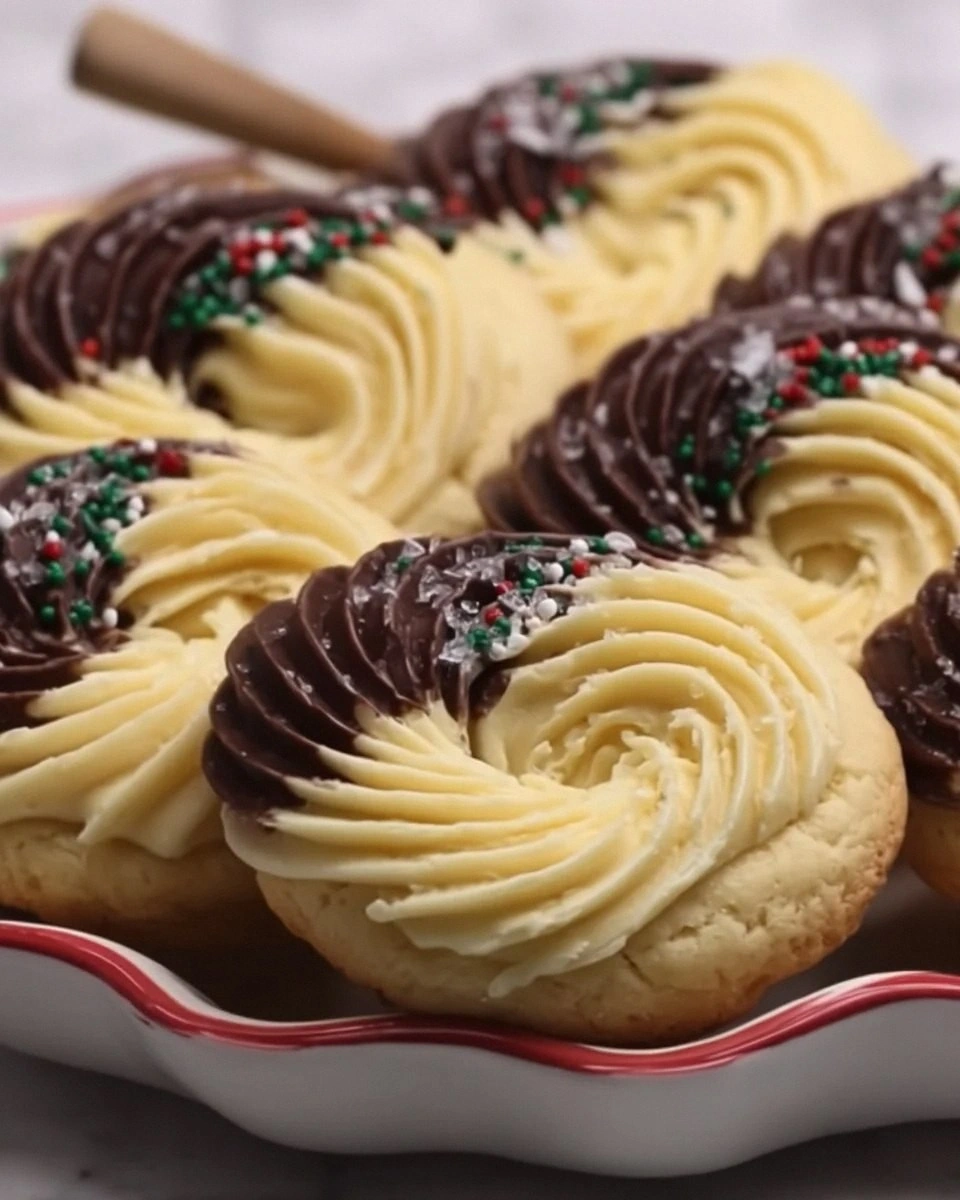
- Flavor: The vanilla extract adds a subtle warmth, while the white chocolate brings a creamy sweetness that balances the tang of the cream cheese. The festive sprinkles add a playful pop of color and a hint of crunch that makes each bite a visual and gustatory delight.
- Convenience: No oven required means you can whip up these bites in minutes, making them perfect for last‑minute holiday gatherings. The recipe’s simplicity lets you focus on the fun of decorating rather than worrying about baking times.
- Make‑ahead Potential: These bites hold up beautifully in the refrigerator for up to 48 hours, making them ideal for pre‑making and serving at a holiday party. The filling stays firm, and the sprinkles retain their texture.
- Ingredient Quality: Using high‑quality cream cheese and premium white chocolate wafers elevates the flavor profile, ensuring each bite tastes like a luxury dessert.
- Visual Appeal: The bright festive sprinkles give an instant holiday vibe, turning a simple bite into a decorative treat that looks as good as it tastes.
Alright, let's break down exactly what goes into this masterpiece…
Inside the Ingredient List
The Flavor Base
The graham cracker crumbs are the backbone of the crust, providing a subtle sweetness and a familiar crunch. They absorb the melted butter and coconut oil, creating a cohesive structure that holds the filling in place. If you skip the crumbs, the bites become too soft and the filling will slide out. For a gluten‑free version, use almond flour or a gluten‑free graham cracker mix, but keep the texture by adding a teaspoon of cornstarch to bind.
The Texture Crew
The unsalted butter is the binder that glues everything together. It melts into the crumbs, giving the crust a buttery richness that’s essential for that classic cheesecake feel. If you’re watching calories, you can substitute a tablespoon of coconut oil, but the butter’s flavor profile is irreplaceable for the best taste. A tip: let the butter sit at room temperature for 10 minutes before melting so it doesn’t scorch.
The Unexpected Star
The white chocolate melting wafers are the sweet surprise that turns an ordinary cheesecake into a holiday treat. They melt into a silky glaze that coats the filling, adding a smooth, buttery sweetness that’s not overpowering. If you can’t find white chocolate wafers, you can melt a white chocolate bar and stir it in, but the wafers give a subtle crunchy texture when they set.
The Final Flourish
The festive sprinkles are not just decorative; they add a burst of color and a slight crunch that contrasts with the creamy filling. They’re the finishing touch that makes each bite feel like a holiday ornament. If you prefer a more subdued look, use sugar crystals or a sprinkle of edible glitter. Remember to press them gently onto the surface before the filling sets to ensure they stick.
Everything's prepped? Good. Let's get into the real action…
The Method — Step by Step
- Start by melting the butter in a small saucepan over low heat. Keep the heat gentle; you want the butter to liquefy without reaching a boil. Once melted, remove from heat and let it cool slightly – this prevents the cream cheese from curdling when it’s added later.
- In a medium bowl, combine the graham cracker crumbs, coconut oil, and the melted butter. Stir until the crumbs are evenly coated and the mixture looks like wet sand. Press the mixture into the bottom of a 9x9-inch baking dish, creating an even layer. This will be the foundation of your cheesecake bites.
- Let the crust set in the refrigerator for 10 minutes while you prepare the filling. This brief chill helps the crumbs firm up and makes the filling easier to spread. Now, in a large mixing bowl, beat the cream cheese until it’s smooth and creamy. If you have a stand mixer, use the paddle attachment on low speed for 2-3 minutes.
- Add the powdered sugar and vanilla extract to the cream cheese, and continue beating until the mixture is light and fluffy. The sugar should dissolve completely; if you see any lumps, pulse the mixture a few more times. The filling should feel airy, almost like whipped cream, but with the richness of cheesecake.
- Now it’s time for the white chocolate wafers. Place them in a heat‑proof bowl and melt them over a pot of simmering water, stirring constantly until smooth. This creates a glossy glaze that coats the filling. Be careful not to let the water boil over, as that can cause the chocolate to seize.
- Fold the melted white chocolate into the cream cheese mixture until fully incorporated. The filling should be glossy and silky, with a hint of white chocolate flavor. If the mixture looks too thick, add a splash of milk or heavy cream to reach the desired consistency.
- Spread the filling evenly over the chilled crust, smoothing the top with a spatula. Press the festive sprinkles onto the surface of the filling while it’s still soft, ensuring they stick. The sprinkles should be pressed lightly to avoid sinking into the filling.
- Refrigerate the cheesecake for at least 4 hours, preferably overnight, until the filling is firm and the sprinkles are set. The longer you chill, the better the flavors meld and the more the texture sets. When ready to serve, cut into bite‑sized squares and enjoy.
That's it — you did it. But hold on, I've got a few more tricks that'll take this to another level…
Insider Tricks for Flawless Results
The Temperature Rule Nobody Follows
Keeping the butter at the right temperature is critical. If it’s too hot, the crumbs will clump; if it’s too cold, they won’t bind. A simple way to test is to drop a crumb into the butter; if it sinks and stays there, you’re good. If it floats and forms a clump, let it cool a bit more. This small step ensures a smooth, even crust that won’t crumble when you cut the bites.
Why Your Nose Knows Best
When you’re mixing the filling, you’ll notice a faint vanilla aroma. That smell is a good indicator that the sugar has dissolved and the mixture is smooth. If you still smell raw sugar, give it a few more minutes of mixing. Your nose is your best friend in the kitchen, especially when you’re aiming for that perfect, silky texture.
The 5-Minute Rest That Changes Everything
After you’ve added the white chocolate glaze, let the mixture rest for 5 minutes before folding it into the filling. This brief pause allows the chocolate to thicken slightly, making it easier to incorporate without creating lumps. If you rush the process, the glaze can separate, leading to an uneven texture.
Don’t Skip the Chill
Many people think the filling can set at room temperature, but that’s a recipe faux pas. The refrigerator does more than just cool the cheesecake; it allows the flavors to meld and the texture to firm up. Skipping this step results in a runny filling that can spill out when you cut a bite.
Use a Silicone Mould for Easy Removal
If you’re worried about the bites sticking to the pan, line your baking dish with parchment paper or use a silicone mould. This not only makes removal easier but also gives a clean, professional look to the finished product. I’ve found that a 9x9-inch silicone pan works great for this recipe.
Keep the Sprinkles Fresh
Sprinkles can dry out over time. Store them in an airtight container away from moisture to keep them crisp. If you’re making a large batch, consider dividing the sprinkles into separate containers so you can use fresh sprinkles for each batch.
Creative Twists and Variations
This recipe is a playground. Here are some of my favorite ways to switch things up:
Chocolatey Delight
Swap the white chocolate wafers for dark chocolate chips and use dark chocolate ganache instead of the glaze. The result is a richer, more intense chocolate flavor that pairs well with a splash of espresso. This version is perfect for chocolate lovers who want a deeper taste.
Nutty Crunch
Add chopped toasted almonds or pecans to the crust for a nutty crunch. The nuts add a satisfying bite and a subtle buttery flavor that complements the creamy filling. Sprinkle a pinch of sea salt on top for a sweet‑and‑salty finish.
Minty Fresh
Stir in a teaspoon of peppermint extract to the filling for a minty twist. The cool mint flavor pairs wonderfully with the white chocolate and gives the bites a refreshing finish. Garnish with a few extra sprinkles to keep the festive look.
Caramel Swirl
Fold a swirl of caramel sauce into the filling before spreading it over the crust. The caramel adds a buttery sweetness that contrasts with the tang of the cream cheese. Drizzle a little extra caramel on top before chilling for an indulgent touch.
Fruit‑Infused
Blend a handful of frozen berries into the cream cheese mixture for a fruity variation. The berries add a pop of color and a burst of natural sweetness. Finish with a sprinkle of crushed pistachios for an extra layer of texture.
Spiced Holiday
Add a pinch of ground cinnamon and nutmeg to the filling for a warm, spiced flavor. This variation is reminiscent of holiday cookies and adds a cozy, aromatic element to the bites. Top with a dusting of powdered sugar for a classic look.
Storing and Bringing It Back to Life
Fridge Storage
Store the cheesecake bites in an airtight container in the refrigerator for up to 48 hours. The filling will stay firm, and the sprinkles will retain their texture. Keep the container away from strong odors, as the cheesecake can absorb them.
Freezer Friendly
For longer storage, wrap each bite individually in plastic wrap and place them in a freezer bag. They’ll keep well for up to 3 months. When you’re ready to serve, let them thaw in the refrigerator for a few hours to regain their creamy texture.
Best Reheating Method
If you prefer a slightly warm bite, place the cheesecake in a microwave-safe dish and heat on low for 10–15 seconds. Add a tiny splash of water before reheating; it steams the filling back to perfection and prevents it from drying out. Be careful not to overheat, or the filling will become runny.