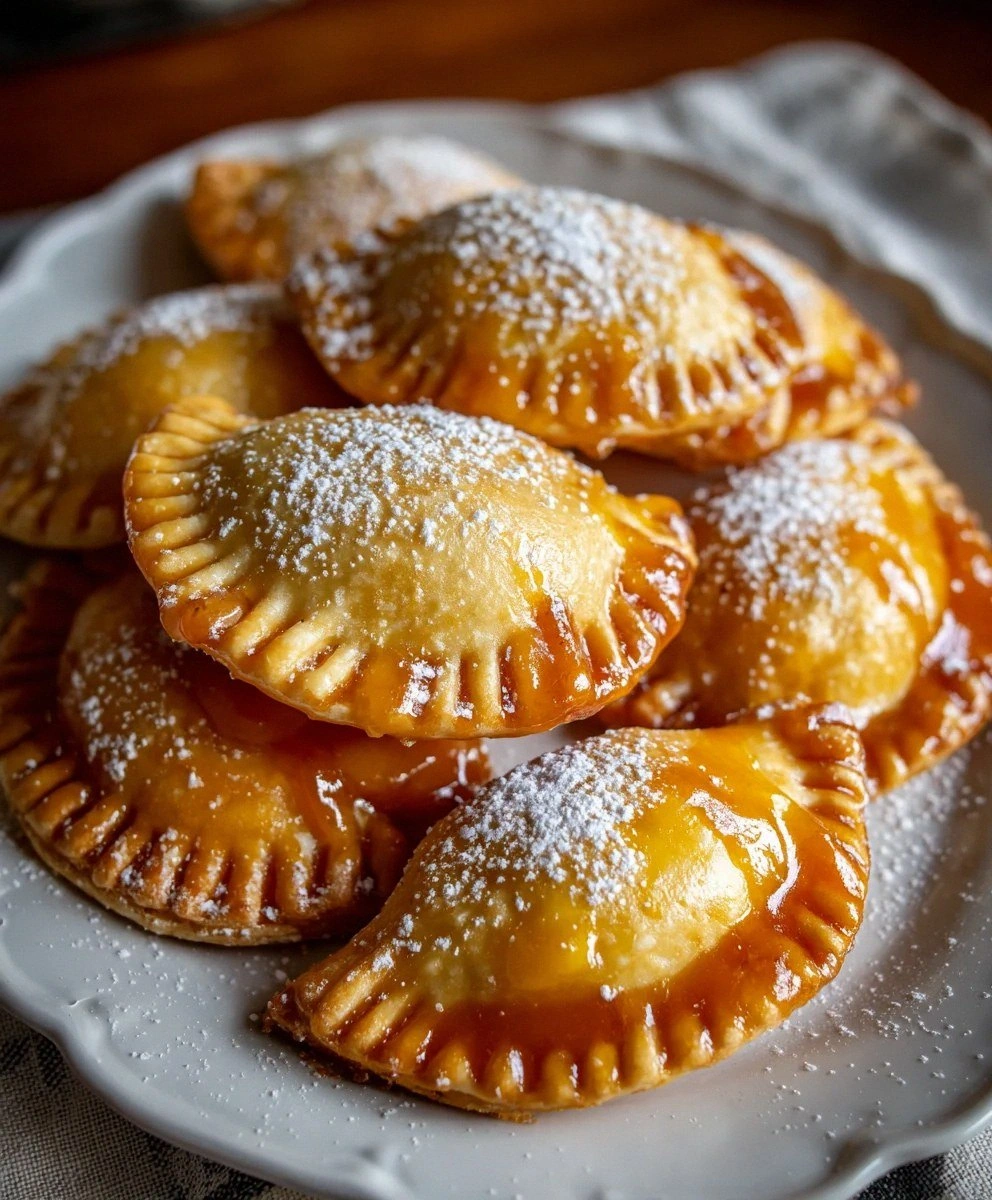
I burned my first batch of hand pies so badly that the smoke alarm became my kitchen soundtrack for a solid week. There I stood, waving a dish towel like a maniac, while charred pastry casualties stared back at me from the countertop. But here's the thing — that kitchen disaster led me to create what I now call my redemption recipe: Peach Hand Pies Easy Fry. These golden pockets of joy have since become my signature move at every backyard barbecue, potluck, and midnight snack attack.
Picture this: it's 11 PM on a Tuesday, you're craving something warm and sweet, but the thought of making pie crust from scratch makes you want to cry into your apron. Enter these beauties. We're talking flaky, crispy shells that shatter like autumn leaves under your fork, revealing molten peach filling that tastes like summer sunshine captured in dessert form. The best part? You can go from zero to hero in under 45 minutes using ingredients you probably already have lurking in your pantry.
Most recipes complicate what should be simple pleasure. They want you to make dough from scratch, create elaborate fillings, and basically turn a quick dessert into a weekend project. Not here, friend. I've cracked the code on convenience without sacrificing that homemade magic. These hand pies deliver all the satisfaction of grandma's peach pie, but they're portable enough to sneak into movie night and elegant enough to serve at brunch.
What really sets this version apart is the frying technique I stumbled upon after watching a street vendor in New Orleans work his magic. The oil temperature, the timing, the way you flip them — it's all been perfected through trial, error, and more taste tests than my waistline cares to admit. Let me walk you through every single step — by the end, you'll wonder how you ever made it any other way.
What Makes This Version Stand Out
Speed Demon: From pantry to plate in 45 minutes flat. While other recipes demand hours of chilling, rolling, and waiting, these babies are practically instant gratification. Perfect for when surprise guests announce they're "just five minutes away."
Texture Paradise: We're achieving the impossible here — exterior so crispy it practically sings when you bite into it, while the inside stays tender and never greasy. It's like the pastry equivalent of a perfect French fry meeting a pie crust.
Foolproof Filling: Using canned peach pie filling isn't cheating — it's genius. The peaches are already perfectly sweetened, consistently tender, and you don't have to stand over a hot stove making filling when you'd rather be eating dessert.
Party Hero: These disappear faster than free samples at Costco. I dare you to put out a plate at your next gathering and watch grown adults turn into competitive eating machines. The individual portions mean no awkward "who gets the bigger slice" drama.
Kitchen Confidence Builder: If you've ever struggled with pie crust or feared deep frying, this recipe will turn you into a believer. The refrigerated dough is forgiving, and the frying process is surprisingly zen once you know the signs to watch for.
Make-Ahead Magic: These beauties freeze like champions. Make a double batch on Sunday, freeze half, and you'll have instant dessert happiness ready for any weekday emergency. Future you will thank present you profusely.
Customizable Canvas: Once you master the technique, the filling possibilities are endless. Apple, cherry, chocolate, or even savory versions — this method is your new secret weapon for impressing anyone who enters your kitchen.
Alright, let's break down exactly what goes into this masterpiece...
Inside the Ingredient List
The Flavor Foundation
Canned peach pie filling is the unsung hero of weeknight desserts. Don't let anyone shame you for not peeling fresh peaches at midnight — this stuff is consistently delicious, perfectly sweetened, and ready when you are. The peaches are packed at peak ripeness, swimming in a glossy syrup that transforms into molten gold when heated. If you're feeling fancy, grab the "extra fruit" variety for a more generous filling-to-crust ratio that'll make your hand pies look like they're bursting with summer.
Refrigerated pie crust is your new best friend. These pre-rolled sheets are consistently thin, perfectly buttery, and save you from flour explosions all over your kitchen. Look for the kind in the red box — it rolls out to exactly the right thickness for hand pies. Pro tip: buy them when they're on sale and stash in your freezer. They thaw in about 20 minutes on the counter, making spontaneous dessert decisions totally reasonable.
The Texture Team
Vegetable oil is doing the heavy lifting here, and quality matters. You want something with a high smoke point that won't impart weird flavors to your precious pastries. I'm partial to peanut oil for its neutral taste and how it makes everything extra crispy, but regular vegetable oil works perfectly. The key is maintaining that sweet spot temperature — too low and your pies become oil-soaked sponges, too high and you get raw dough with burnt edges.
Powdered sugar isn't just for show — it creates that bakery-style finish that makes these look like they came from a professional shop. The ultra-fine texture dissolves instantly on your tongue, creating a sweet cloud that complements the warm peaches perfectly. Don't substitute regular sugar here unless you want gritty, sad hand pies that look like they have dandruff.
The Binding Agents
Light corn syrup might seem like an odd addition, but it's the secret to that glossy, professional-looking glaze that makes people ask "wait, did you really make these?" It prevents the powdered sugar from absorbing moisture and getting sticky, keeping that beautiful white finish intact even hours later. If corn syrup isn't your thing, honey works but will add a floral note that competes with the peaches.
Water is the unsung hero that brings everything together. Just a splash transforms powdered sugar and corn syrup from a thick paste into a pourable glaze that sets up perfectly. Too much and it becomes a watery mess, too little and you're trying to spread concrete on your hand pies. Start with less than you think you need — you can always thin it out.
Everything's prepped? Good. Let's get into the real action...
The Method — Step by Step
- Start by clearing a workspace about the size of a cutting board — you're going to need room to work without feeling cramped. Unroll your first pie crust on a lightly floured surface, but here's the thing: don't go crazy with the flour. You want just enough to prevent sticking, not so much that it burns in the oil later. Take your rolling pin and give the crust one or two gentle rolls to smooth out any cracks from the package. The dough should be pliable but still cool to the touch — if it feels warm or sticky, pop it back in the fridge for 10 minutes.
- Now comes the fun part: cutting out your hand pie shapes. A 4-inch round cutter works perfectly, but in a pinch, use a wide-mouth mason jar or even trace around a small bowl with a sharp knife. You'll get about 5-6 circles per crust, depending on how close you nestle them together. Gather the scraps, reroll gently, and cut again — but only once more. Overworking the dough makes it tough, and we're after tender, flaky results here. Arrange your circles on a parchment-lined baking sheet and keep them in the fridge while you work on the rest.
- Time to fill these babies up. Grab your canned peach filling and give it a gentle stir — sometimes the fruit settles to the bottom, and you want a good mix of peaches and syrup. Place about 1 tablespoon of filling in the center of each dough circle. Resist the urge to overfill, I beg you. Too much filling and they'll explode like tiny peach bombs in the oil, creating a mess that'll haunt your stove for weeks. The filling should sit in a neat mound, leaving about ½ inch of clear dough around the edges for sealing.
- Here's where most people mess up: the sealing process. Dip your finger in water and run it around half the edge of each circle — this creates the glue that keeps everything together. Fold the dough over to create a half-moon shape, pressing gently to push out any trapped air. Then, and this is crucial, use a fork to crimp the edges with authority. Don't be dainty about it. Really press those tines in there, creating a tight seal that looks rustic and professional at the same time. Place each finished pie on a clean plate and refrigerate for 15 minutes while you heat the oil.
- Heat about 2 inches of oil in a heavy-bottomed pot over medium-high heat. You're aiming for 350°F, but here's the thing: most home cooks don't have a deep-fry thermometer, and that's okay. The oil is ready when a wooden spoon handle inserted creates tiny bubbles that dance up the sides. Too vigorous and it's too hot, too slow and it needs more time. This is the moment of truth — don't walk away from the stove here. The oil can go from perfect to dangerous in the time it takes to check your phone.
- Gently lower 3-4 hand pies into the hot oil using a slotted spoon — don't crowd the pot or the oil temperature will plummet, resulting in greasy, sad pies. They should start sizzling immediately, and this sound? Pure kitchen symphony. Watch them carefully, turning once, until they reach that perfect golden-brown color. This takes about 2-3 minutes per side, but trust your eyes over the clock. When they look like the most beautiful pie crust you've ever seen, they're done.
- Remove the pies with your slotted spoon and let them drain on a wire rack set over paper towels. Don't skip this step — resting here is what keeps them crispy instead of turning into oil-soaked disappointments. While they're still warm but not screaming hot, make your glaze by whisking together powdered sugar, corn syrup, and water until smooth and pourable. It should coat the back of a spoon but still flow easily. Drizzle or dip each pie, letting the excess drip off before placing back on the rack to set.
- The final flourish is all about timing. The glaze sets up in about 10 minutes, creating that professional bakery finish that makes people think you slaved away for hours. Stack them on a pretty plate, dust with extra powdered sugar if you're feeling fancy, and prepare for the compliments to roll in. These are best served the day they're made, but honestly? They've never lasted more than a few hours in my house. The combination of crispy shell, warm spiced peaches, and sweet glaze is absolutely irresistible.
That's it — you did it. But hold on, I've got a few more tricks that'll take this to another level...
Insider Tricks for Flawless Results
The Temperature Rule Nobody Follows
Here's the thing about frying that most recipes gloss over: temperature management is everything. Your oil should hover between 340-360°F, but here's the secret — add your pies when the oil reads 375°F on a thermometer. The temperature drops immediately when cold dough hits hot oil, and starting higher compensates for this drop. If you add them at exactly 350°F, you'll end up with oil-logged disasters that taste like regret. I learned this the hard way after serving what my friends now call "peach oil sponges" at game night.
Why Your Nose Knows Best
Your sense of smell is the most underrated kitchen tool for perfect hand pies. When the oil is ready, you'll smell a faint, nutty aroma — not acrid or burnt, just warm and inviting. As the pies fry, they should smell like the best bakery you've ever visited. If you catch a whiff of something sharp or bitter, your oil is breaking down and it's time to refresh it. This smell test has saved more batches than I can count, especially during marathon frying sessions when the oil starts getting tired.
The 5-Minute Rest That Changes Everything
After frying, resist every urge to immediately glaze your hand pies. Let them rest for exactly 5 minutes — enough time for the exterior to set but while they're still warm enough for the glaze to adhere properly. Glaze too soon and it melts into a thin, sad coating. Wait too long and it won't stick, creating a gloppy mess that slides off in sheets. Set a timer if you must, but don't rush this step. Your patience will be rewarded with that thick, bakery-style coating that cracks slightly when you bite into it.
The Crimping Secret That Prevents Leaks
Here's where most hand pie recipes fail: they don't seal properly and you lose all your filling to the oil. After you've folded and pressed the edges, run your finger along the inside edge of the seam, pressing gently. You're looking for any thin spots or air pockets that could burst under frying pressure. Then, and this is key, press the fork tines all the way through the dough edge in a few spots. These tiny holes allow steam to escape, preventing the pies from puffing up like angry balloons and splitting open.
The Storage Trick That Keeps Them Crispy
If you somehow have leftovers (I don't understand you, but okay), store them uncovered on the counter for up to 24 hours. Wrapping them while warm creates steam that ruins the crispy exterior. For longer storage, freeze them unglazed on a baking sheet, then transfer to a freezer bag. To reheat, pop them in a 400°F oven directly from frozen for 8-10 minutes, then glaze while warm. They'll taste almost as good as fresh, which is basically kitchen wizardry.
Creative Twists and Variations
This recipe is a playground. Here are some of my favorite ways to switch things up:
The Apple Pie Mashup
Swap the peach filling for apple pie filling and add a pinch of cardamom to the glaze. The result tastes like someone took the best parts of apple pie and peach cobbler and made them have beautiful, crispy babies. Serve these at fall gatherings and watch people lose their minds over the autumn flavor explosion.
The Tropical Vacation Version
Use mango pie filling (yes, it exists, and yes, it's amazing) and add a tablespoon of rum to your glaze. The tropical fruit pairs perfectly with the buttery crust, and the rum adds a grown-up note that makes these perfect for summer parties. Garnish with toasted coconut for extra vacation vibes.
The Chocolate Lover's Dream
Fill with cherry pie filling mixed with mini chocolate chips, then drizzle with chocolate glaze instead of vanilla. It's like someone took a Black Forest cake and transformed it into portable happiness. These are dangerous — I once ate four in a row and felt no shame whatsoever.
The Breakfast Hand Pie
Fill with lemon curd and serve warm with coffee. The bright, tangy filling wakes up your taste buds better than any donut, and the portable nature makes them perfect for rushed mornings. Add a sprinkle of coarse sugar instead of glaze for extra crunch.
The Savory Surprise
Use the same technique but fill with chicken pot pie filling or seasoned ground beef with cheese. These make incredible game day food, and the handheld nature means no plates required. Just remember to label them clearly — nobody wants to bite into what they think is dessert and get chicken instead.
The Holiday Special
Mix canned peach filling with a spoonful of cranberry sauce and a pinch of cinnamon for a festive twist that tastes like Thanksgiving and summer had a delicious baby. These are perfect for holiday potlucks when you want to bring something that stands out from the usual pumpkin pie parade.
Storing and Bringing It Back to Life
Fridge Storage
Here's the thing about refrigeration — it's actually the enemy of crispy fried foods. The cold, humid environment turns your beautiful golden hand pies into soggy, disappointing shadows of their former selves. If you must refrigerate (though I can't imagine why), place them in a single layer on a paper towel-lined plate, uncovered, for maximum 2 days. Let them come to room temperature before attempting to reheat, or you'll end up with weird, rubbery pastry that no amount of oven time can fix.
Freezer Friendly
These hand pies freeze like absolute champions, but timing is everything. Freeze them unglazed on a baking sheet until solid, about 2 hours, then transfer to a freezer bag with parchment between layers. They'll keep for up to 3 months, though honestly, mine never last more than a week because I develop sudden cravings at inconvenient hours. To reheat, place frozen pies on a baking sheet in a 400°F oven for 10-12 minutes until heated through and crispy, then glaze while warm for that fresh-made magic.
Best Reheating Method
The microwave is your enemy here — it'll turn your crispy masterpieces into sad, steamy messes faster than you can say "leftovers." Instead, use a toaster oven or regular oven at 375°F for 6-8 minutes. If you're in a rush, the air fryer works wonders at 350°F for 3-4 minutes. Pro tip: add a tiny splash of water to the baking sheet before reheating — it creates steam that warms the filling without drying out the crust, bringing them back to almost-fresh glory.