I still remember the day I ruined my grandmother's famous chocolate chip cookies. There I was, sixteen years old and armed with more confidence than kitchen sense, substituting margarine for butter because I thought "fat is fat." The result? Cookies that spread into greasy puddles, edges burnt beyond recognition, centers raw enough to make Gordon Ramsay weep. My family ate them anyway—out of pity, I suspect—but that failure sparked an obsession that would consume my weekends, my grocery budget, and honestly, most of my sanity for the next decade.
Picture this: It's 2 AM on a Tuesday, and I'm standing in my kitchen wearing mismatched socks and flour in my hair, surrounded by twelve different batches of chocolate chip cookies. My roommate stumbles in, takes one look at the chaos, and asks if I'm conducting some kind of baking science experiment. She wasn't wrong. I'd been chasing the perfect soft-batch cookie for months, trying every trick in the book—cornstarch, pudding mix, chilling the dough for three days straight, even (don't judge me) microwaving the flour. Nothing delivered that bakery-soft texture that melts on your tongue like cotton candy at the state fair.
Then came the breakthrough. Not from some fancy cookbook or celebrity chef's Instagram, but from a late-night conversation with my neighbor's grandmother, who mentioned something about "the temperature of your butter matters more than your oven temperature." That night, I discovered the holy trinity of cookie perfection: properly creamed butter that feels like cool clay, brown sugar that gets a full five-minute solo in the mixer, and chocolate chips that get folded in by hand like you're tucking them into bed. The result? Cookies so tender they bend like leather instead of breaking like ceramic, with centers that stay chewy for days and edges that maintain just enough structure to keep them from dissolving into pure goo.
Let me walk you through every single step—by the end, you'll wonder how you ever made it any other way. This isn't just another chocolate chip cookie recipe; it's the accumulation of hundreds of failed experiments, countless sleepless nights, and one very patient roommate who endured my cookie-fueled rants about the molecular structure of butter. These cookies will ruin you for all others, and I say that without a hint of exaggeration.
What Makes This Version Stand Out
Butter Temperature Perfection: Most recipes tell you to use "room temperature" butter, but what does that even mean? I've discovered the sweet spot is when your butter yields to gentle pressure but still feels cool to the touch—around 65°F. Too warm and your cookies spread into sad, flat puddles. Too cold and they stay stubbornly doughy in the center while the edges over-brown.
The Double Sugar Strategy: Using equal parts granulated and brown sugar isn't revolutionary, but here's the twist: I add the brown sugar first and let it whip with the butter for a full three minutes before the granulated sugar joins the party. This creates tiny air pockets that give you lift without cakey texture, resulting in cookies that stay soft for days instead of turning into hockey pucks overnight.
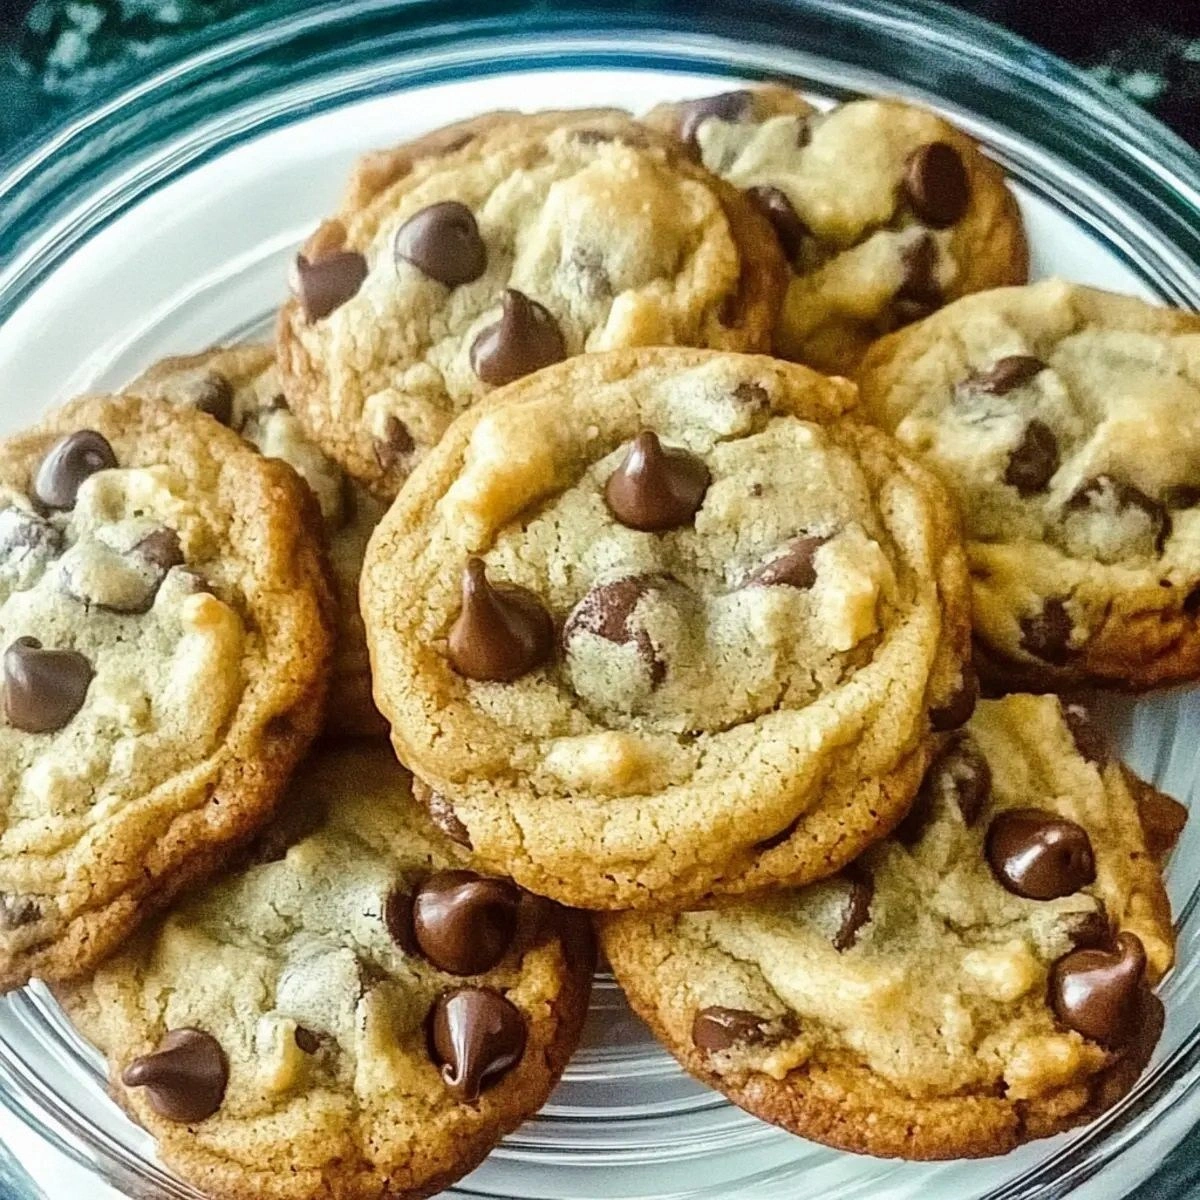
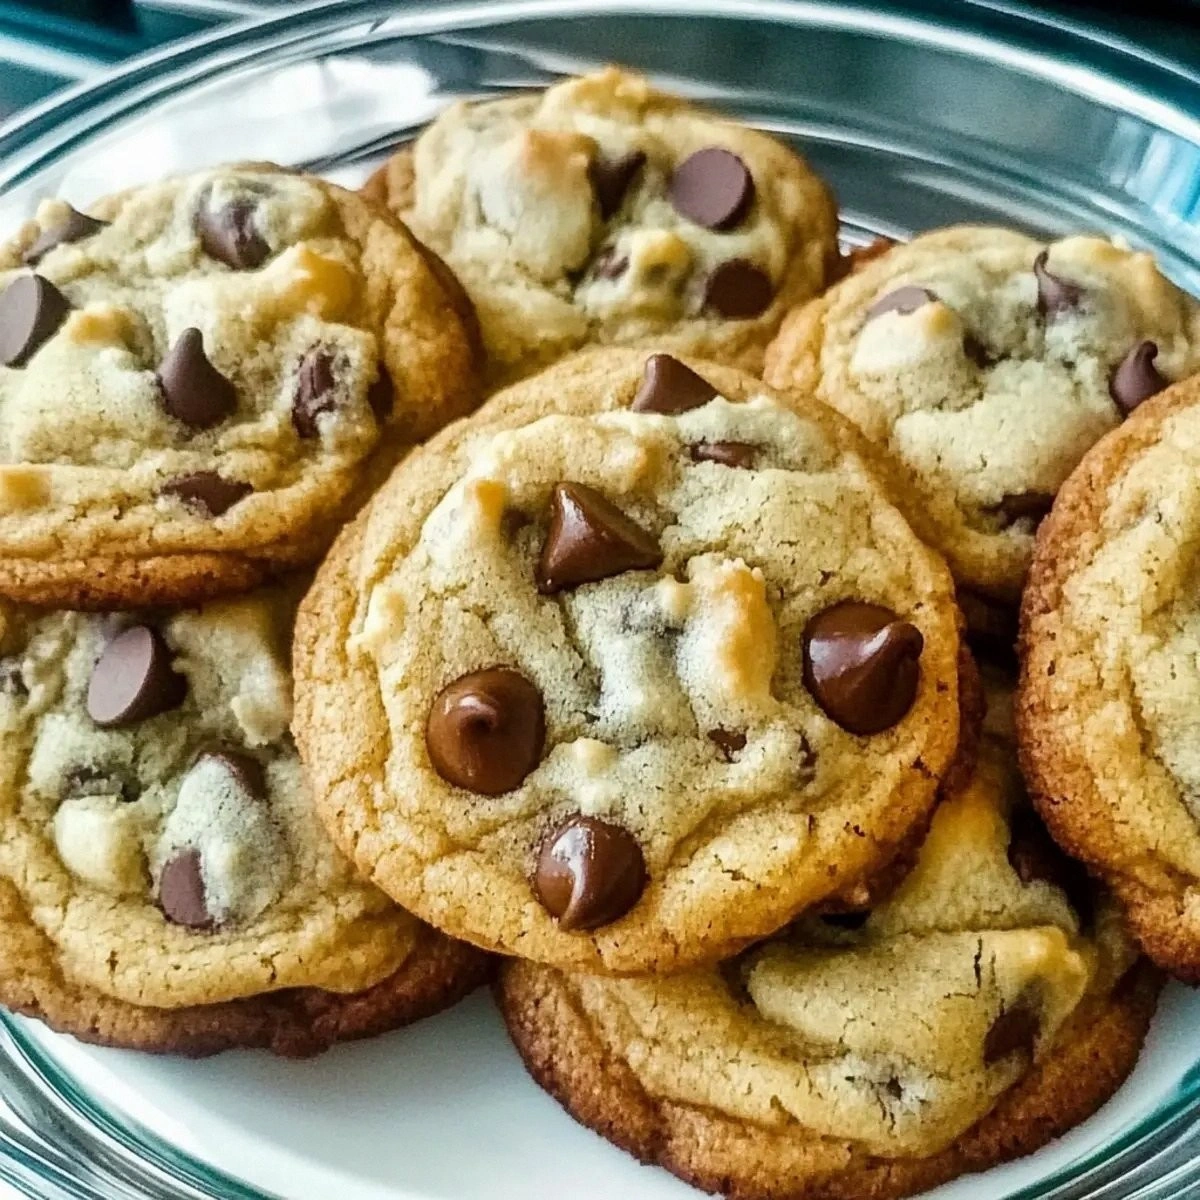
Chocolate Chip Distribution: Instead of dumping in all the chips at once, I fold in half by hand, then reserve the rest to press into the tops right before baking. This ensures every cookie looks like it belongs on a bakery display case, with chocolate visible in every bite instead of sinking to the bottom like buried treasure.
The Chilling Game: Here's where I lose most people—they want cookies NOW, not in two hours. But trust me on this: a brief 30-minute chill transforms your dough from greasy and unmanageable into something that scoops like ice cream and bakes like a dream. The butter firms up, the flour hydrates, and suddenly you're working with dough instead of cookie soup.
Underbaking is Everything: Most recipes tell you to bake until "golden brown," but that's cookie suicide. Pull them when the edges look set but the centers still look slightly underdone—they'll finish cooking on the hot sheet outside the oven, leaving you with that coveted soft center that bends instead of breaks.
The Secret Ingredient: A half-cup of peanut butter or Nutella doesn't make these taste like peanut butter cookies—it just adds this mysterious depth that makes people say, "I can't quite put my finger on it, but these are incredible." It's like adding a bass note to a song; you don't necessarily hear it, but you'd miss it if it were gone.
Crowd Psychology: I've served these at office parties, family gatherings, and that awkward neighborhood potluck where nobody knows each other. Every single time, without fail, someone asks for the recipe within the first five cookies. They disappear faster than free pizza at a college dorm, and I've witnessed grown adults hide the last few in napkins "for the drive home."
Alright, let's break down exactly what goes into this masterpiece...
Inside the Ingredient List
The Flavor Base
Butter is the foundation of everything good in this world, and I refuse to apologize for that philosophy. But not all butter is created equal—I splurge on the European-style stuff with 82% fat content because those extra two percentage points translate to cookies that taste like they came from a Parisian bakery instead of your suburban kitchen. The higher fat content means less water, which means more tender, flaky layers in your final cookie. If you're stuck with regular grocery store butter, no worries—just promise me you won't substitute margarine or those "buttery spreads" that come in tubs. They contain more water than a swimming pool, and your cookies will spread like gossip in a small town.
Vanilla extract seems straightforward until you realize most bottles on supermarket shelves contain more corn syrup than actual vanilla. I learned this the hard way when I ran out mid-recipe and grabbed the cheap stuff from the corner store. The resulting cookies tasted like they were flavored with disappointment and artificial sadness. Now I keep two bottles: the good stuff for recipes where vanilla shines, and the really good stuff (you know, the kind that costs more than a fancy coffee) for these cookies. The difference isn't subtle—it's like comparing a symphony to a kazoo.
The Texture Crew
Brown sugar isn't just white sugar with a tan—it's white sugar that's been blessed with molasses, and that molasses is your secret weapon for chewy cookies that stay soft for days. Light brown sugar gives you subtle caramel notes, while dark brown sugar brings deeper, almost toffee-like flavors that make grown men weep. I use light brown because it lets the chocolate shine without competing for attention, but if you want cookies that taste like they contain liquid gold, go dark and never look back.
All-purpose flour is the reliable friend who never lets you down, but here's what most recipes don't tell you: how you measure it matters more than the brand you buy. That scoop-and-sweep method your grandmother taught you? It's packing up to 25% more flour into your cup, resulting in cookies that could double as paperweights. Instead, spoon the flour into your measuring cup and level it off with the back of a knife. Better yet, invest in a kitchen scale and never wonder "is this right?" again.
The Unexpected Star
Peanut butter or Nutella isn't just a random addition—it's the ingredient that makes people say "what's your secret?" without being able to identify it. The fat content in these spreads helps create that melt-in-your-mouth texture, while the roasted nut flavors add complexity that plain butter can't achieve alone. I rotate between peanut butter for a subtle nuttiness and Nutella when I want hints of chocolate-hazelnut that play off the chocolate chips like they're dancing partners. The key is using just enough to enhance without overwhelming—think of it as the bass line in your favorite song, not the lead guitar.
Chopped nuts might seem old-school, like something your grandmother added because "that's how we've always done it," but they serve a crucial textural purpose. Those little nut pieces create tiny pockets of crunch that contrast beautifully with the soft cookie base, preventing monotony in every bite. Walnuts bring bitter notes that balance sweetness, pecans add buttery richness, and almonds provide a clean, crisp snap. Toast them first—just five minutes in a dry pan until they smell like you'd want your house to smell forever—and they'll transform from afterthought to essential.
The Final Flourish
Chocolate chips aren't just chocolate chips, and anyone who tells you otherwise has never tasted the difference between the waxy supermarket brands and the good stuff. I'm talking about chips that contain actual cocoa butter, not hydrogenated oils and artificial vanilla flavoring. The premium brands melt into these gorgeous puddles that stay soft even when cooled, while the cheap ones retain their shape like stubborn little pebbles. Semi-sweet is classic for a reason—it provides enough bitterness to balance the sweet dough without making children cry—but if you want to get fancy, try mixing semi-sweet with a handful of bittersweet for depth.
Eggs do more than just bind everything together—they're your leavening agents, your moisture source, and your golden color all rolled into one fragile shell. Large eggs are the standard for a reason, but if yours run small, add an extra yolk for richness. If they're jumbo, whisk them before adding so you don't accidentally create scrambled egg pockets in your beautiful dough. And always add them one at a time, letting each incorporate fully before the next joins the party. Rush this step and you'll be playing "find the egg white chunk" later.
Everything's prepped? Good. Let's get into the real action...
The Method — Step by Step
- Start with butter that's been out of the fridge for exactly 45 minutes—set a timer because precision matters here. It should feel like a ripe avocado: yielding to gentle pressure but still cool in the center. Cut it into tablespoon-sized chunks and drop them in your mixing bowl. If your kitchen is warmer than 72°F, chill your bowl first by filling it with ice water, then drying it thoroughly. This isn't being fussy—this is the difference between cookies that hold their shape and ones that spread into greasy frisbees.
- Beat the butter on medium speed for a full two minutes—yes, actually time it. You're not just mixing; you're incorporating air that will give your cookies lift without making them cakey. The butter should lighten in color from bright yellow to pale cream, like the difference between butter and butter that's seen better days. Scrape down the bowl religiously; unmixed butter pockets are the enemy of uniform texture. When done, it should look like thick frosting that holds soft peaks when you lift the beater.
- Add the brown sugar and watch the magic happen. Beat on medium-high for three minutes—again, set that timer because your eyes will lie to you. The mixture will transform from grainy and separated into something that looks like caramel-flavored clouds. This step dissolves the sugar partially, creating that glossy top you see on bakery cookies. If you rush this, your cookies will have the texture of sand mixed with disappointment.
- Now add the granulated sugar and beat for just 30 seconds—you want it incorporated but not overmixed. This sugar provides structure and that slight crackle on top, but too much mixing makes it dissolve completely, costing you that beautiful texture contrast. The mixture should look like beige-colored buttercream, smooth and inviting. If it starts to look greasy or separated, you've gone too far—pop the bowl in the fridge for 10 minutes and start again.
- Add the eggs one at a time, beating on medium speed for 30 seconds between each addition. The first egg will take longer to incorporate—be patient and resist the urge to turn up the speed. After the second egg, add the vanilla and beat just until combined. The mixture should look like thick cake batter that falls off the beater in lazy ribbons. If it looks like scrambled eggs, your butter was too cold—warm the bowl gently with your hands while beating until it comes together.
- In a separate bowl, whisk together the flour, baking soda, and salt for 30 seconds—this distributes the leavening evenly so you don't get cookies with weird volcanic eruptions. Add this to your wet ingredients all at once, then mix on the lowest speed just until the flour disappears. Overmixing develops gluten, which gives you tough cookies that could double as dog treats. When done, you should still see a few streaks of flour—the chocolate chips will finish the mixing.
- Here's where most people mess up: fold in the chocolate chips, peanut butter/Nutella, and nuts by hand using a rubber spatula. This isn't just being precious—mixing distributes them unevenly, breaks the chips, and overworks the dough. Fold like you're tucking in a sleeping baby: gently, methodically, with love. The dough should be thick enough that you need to use some muscle, but not so stiff that it fights back. If it seems too soft, chill for 15 minutes before proceeding.
- Cover the bowl with plastic wrap pressed directly onto the surface—air is the enemy of soft cookies—and refrigerate for 30 minutes. This isn't optional; it allows the flour to hydrate and the butter to firm up, preventing spread. While you wait, line your baking sheets with parchment paper (not wax paper, unless you enjoy the flavor of melted wax) and position your oven rack in the center. Preheat to 350°F, and yes, use an oven thermometer because most ovens lie worse than politicians.
- Scoop the dough using a medium cookie scoop or two spoons into rounded mounds about 2 inches apart. Don't flatten them—these aren't peanut butter cookies, and you want that beautiful dome shape. If you're feeling fancy, press a few extra chocolate chips into the tops for that bakery look. Slide them into the oven and set your timer for 9 minutes exactly. When the edges look set but the centers still appear underdone, pull them out. They'll finish cooking on the hot sheet, leaving you with that perfect soft center that bends instead of breaks.
- Let them cool on the sheet for 5 minutes—they'll continue cooking from residual heat, so resist the urge to transfer immediately. During this time, they'll firm up enough to move without falling apart. Slide a spatula under each cookie and transfer to a wire rack to cool completely, or eat them warm while the chocolate is still molten and dangerous. Store cooled cookies in an airtight container with a slice of bread to maintain softness—yes, this actually works, and no, the bread won't get moldy before the cookies disappear.
That's it—you did it. But hold on, I've got a few more tricks that'll take this to another level...
Insider Tricks for Flawless Results
The Temperature Rule Nobody Follows
Your oven temperature is lying to you, and it's not even sorry about it. I discovered this when I bought three different oven thermometers and got three different readings, all varying from the oven's display by 25-50 degrees. Now I use an infrared thermometer to check the actual surface temperature of my baking sheet before sliding cookies in—game changer. If your oven runs hot (and most do), your cookies will brown on the outside while staying raw inside. If it runs cool, you'll get pale, doughy cookies that spread into sad puddles. The solution? Know your oven's personality and adjust accordingly. Mine runs 25 degrees hot, so I bake at 325°F on the display to get the actual 350°F my cookies crave.
Why Your Nose Knows Best
Forget timers—your nose is the most reliable baking tool you own. When cookies are nearly done, they'll start releasing this incredible aroma that fills your kitchen with promises of better decisions and softer cookies. This happens about 60-90 seconds before they're perfect, giving you just enough time to pull them before they cross into overbaked territory. I can't tell you how many batches I've saved by trusting my nose over the timer. That moment when the smell hits is your cue to start checking edges for that perfect set-but-not-brown appearance.
The 5-Minute Rest That Changes Everything
After mixing your dough, let it rest for exactly five minutes before adding chocolate chips. This brief pause allows the flour to start hydrating, which means your chips won't sink to the bottom like chocolate anchors. The dough thickens slightly, creating better suspension for your mix-ins. I discovered this by accident when my doorbell rang mid-mix, and I came back to find the dough had transformed from loose and greasy to perfectly scoopable. Those cookies had the most even chocolate chip distribution I'd ever achieved, and I've never looked back.
The Freezer Trick for Bakery-Style Tops
Want those gorgeous, wrinkly tops you see in bakery cookies? Here's the secret: freeze your dough balls for 10 minutes before baking. The cold exterior sets quickly in the oven's heat, while the inside stays soft and continues spreading slightly, creating those beautiful ripples and cracks. It's like giving your cookies a mini face-lift that makes them look professionally baked instead of homemade by someone who might have been distracted by Netflix. The contrast between the set edges and soft centers also creates that perfect textural experience that makes people close their eyes when they take the first bite.
The Storage Method That Keeps Them Soft for Days
Everyone knows the bread slice trick, but here's what really works: store cookies with a slightly damp paper towel in an airtight container. Not wet—just barely damp, like you've waved it near running water. The moisture slowly releases, keeping your cookies soft without making them soggy. Replace the paper towel every day, and your cookies stay bakery-fresh for up to five days. I've served week-old cookies using this method, and nobody could tell they weren't baked that morning. The key is using a container that's just big enough—too much air space means the moisture disperses too thinly to be effective.
Creative Twists and Variations
This recipe is a playground. Here are some of my favorite ways to switch things up:
The Salty Sweet Addiction
Replace half the chocolate chips with chopped dark chocolate and sprinkle flaky sea salt on top before baking. The salt crystals don't dissolve, giving you little bursts of salinity that make the chocolate taste more chocolatey. It's like turning the flavor dial up to eleven without changing anything else. Use Maldon salt if you're fancy, kosher salt if you're not—both work, but the big flakes of Maldon give you that satisfying crunch that makes people ask "what's that amazing flavor?"
The Campfire Classic
Swap the chocolate chips for chopped dark chocolate and fold in crushed graham crackers and mini marshmallows. The marshmallows caramelize in spots, creating these toasted sugar bits that taste like summer camp and childhood memories. The graham crackers stay slightly crisp, giving you that s'mores experience without the sticky mess. Pro tip: tear the marshmallows into smaller pieces so they distribute evenly—nobody wants to bite into a giant marshmallow pocket that throws off the cookie-to-mix-in ratio.
The Breakfast Cookie (Don't Judge Me)
Add a tablespoon of instant espresso powder to the dry ingredients and replace the nuts with chopped toasted pecans. The coffee enhances the chocolate flavor without making them taste like mocha—it just deepens everything into something sophisticated. I've served these at brunch alongside actual coffee, and people lose their minds. Something about the combination of coffee, chocolate, and the implied permission to eat cookies before noon makes people incredibly happy.
The Tropical Escape
Replace the peanut butter with coconut cream and swap the chocolate chips for white chocolate, then fold in toasted coconut flakes and chopped macadamia nuts. These taste like vacation in cookie form—rich and buttery with tropical notes that transport you to a beach somewhere. The coconut cream keeps them extra soft, while the toasted coconut adds crunch. They're dangerously good when it's cold outside and you need to pretend you're somewhere warm.
The Spicy Sophisticate
Add a teaspoon of cinnamon and a quarter teaspoon of cayenne to the dry ingredients, then use Mexican chocolate instead of regular chips. The heat builds slowly, hitting you in the back of the throat after you've already committed to the cookie. It's not enough to make you reach for water—just enough to make the chocolate taste more intense and keep people guessing. These are the cookies you serve to people who think they've tried everything.
The Everything Bagel Cookie
Replace half the chocolate with butterscotch chips and add everything bagel seasoning to the tops before baking. It sounds weird until you realize that the sesame, poppy, and garlic notes actually complement the caramel flavors beautifully. The key is using just enough seasoning to make people curious but not enough to overwhelm. These are conversation starters—people will either love them or spend an hour trying to figure out what makes them so addictive.
Storing and Bringing It Back to Life
Fridge Storage
Contrary to everything your grandmother taught you, these cookies should never see the inside of a refrigerator. The cold air sucks moisture out faster than a desert wind, leaving you with cookies that snap instead of bend. Keep them at room temperature in an airtight container, away from direct sunlight and heat sources. If your kitchen runs warm, find the coolest room in your house—even if it's your bedroom closet. These cookies are worth the real estate. Stored properly, they stay soft for up to five days, though I've never personally witnessed them lasting that long.
Freezer Friendly
Both the dough and baked cookies freeze beautifully, but here's the insider trick: freeze the dough balls on a sheet pan first, then transfer to a freezer bag once solid. This prevents them from sticking together in one giant cookie blob that requires a chisel to separate. Frozen dough goes straight from freezer to oven—just add two extra minutes to the baking time. Baked cookies should be wrapped individually in plastic wrap, then stored in a freezer bag with as much air removed as possible. They thaw in about 15 minutes at room temperature, or 30 seconds in the microwave if you're impatient and don't mind slightly warm centers.
Best Reheating Method
The microwave works in a pinch, but it makes the chocolate seize up into weird, chalky bits. Instead, wrap cookies in foil and warm them in a 300°F oven for 5-7 minutes. This gently heats them through without drying them out, returning them to that just-baked softness with melty chocolate. For the full experience, serve with a glass of cold milk that's been out of the fridge for 10 minutes—ice-cold milk makes warm cookies taste even warmer by comparison, creating that perfect temperature contrast that makes people close their eyes in appreciation.