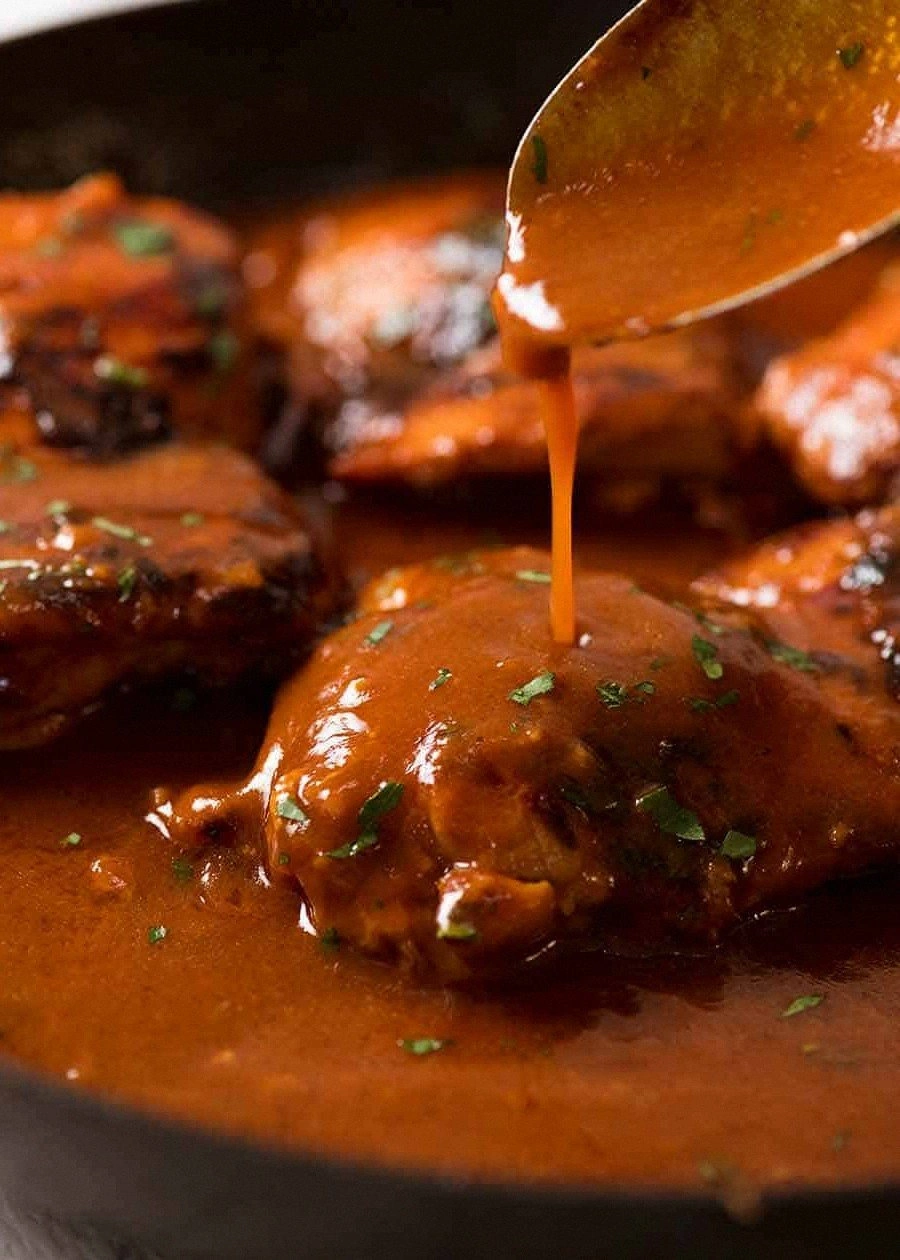
Okay, picture this: I’m halfway through a marathon of “one‑pot wonders” when my pantry decides to stage a mutiny. The ketchup bottle is half‑empty, the soy sauce is clinging to the bottom of its jar, and I’ve got a pack of chicken thighs that have been chilling in the fridge for a week, begging for redemption. I tossed a daring idea at myself – “What if I turn these leftovers into something that sticks to the spoon like a love‑letter, but with a kick that could wake the dead?” The result? Sticky Pantry Chicken Thighs r, a dish that turned my kitchen into a sweet‑spicy battlefield of aromas.
The moment the oil hit the pan, you could hear a sizzle that sounded like applause. The chicken thighs hit the surface and instantly released a caramelized perfume that made my nose do a little dance. As the sauce simmered, the honey melted into a glossy glaze that clung to the meat like a second skin, while the hot sauce whispered promises of heat that never overpowered. When you finally pull the pan from the stove, the kitchen smells like a blend of a backyard barbecue and a late‑night take‑out joint – smoky, tangy, and undeniably addictive.
Why does this version stand out from the endless sea of “sticky chicken” recipes? Most of them rely on a single sweet element or drown the meat in a sugary swamp. I, on the other hand, balance the sweet with acidity, heat, and a dash of mustard that cuts through the richness like a razor‑sharp knife. The result is a multilayered flavor profile that keeps you guessing with every bite, and a texture that’s crisp on the edges yet juicy in the middle – the kind of contrast that makes you pause, stare, and then devour.
And there’s a secret weapon hidden in this recipe that most cooks overlook: a splash of water added at just the right moment to coax the sauce into a silky sheen without turning it into a watery mess. I dare you to taste this and not go back for seconds. Let me walk you through every single step — by the end, you’ll wonder how you ever made it any other way.
What Makes This Version Stand Out
- Flavor Harmony: The marriage of ketchup’s sweet tang, soy sauce’s umami depth, and hot sauce’s heat creates a balanced chorus that sings on the palate without any single note drowning the others.
- Texture Contrast: A quick sear gives the thighs a crisp, caramelized crust that shatters like thin ice, while the interior stays buttery‑soft and moist.
- Simplicity: All ingredients live in the pantry; no fancy herbs or exotic spices required, making it perfect for a weeknight scramble.
- Unique Glaze: The honey‑vinegar combo creates a glossy finish that clings to the meat like velvet, ensuring every bite is coated in sticky perfection.
- Crowd‑Pleaser: Even the pickiest eaters can’t resist the sweet‑heat combo; it’s the kind of dish that disappears from the plate faster than you can say “second helping.”
- Ingredient Quality: Using bone‑in, skin‑on thigh fillets adds richness and flavor that boneless breasts simply can’t match.
- One‑Pan Efficiency: From sear to sauce in the same skillet, cleanup is minimal – a win for anyone who hates washing dishes.
- Make‑Ahead Magic: This dish actually improves after a short rest, allowing flavors to meld and the glaze to set, perfect for meal‑prep warriors.
Inside the Ingredient List
The Flavor Base
The star of the show is ketchup – its tomato‑rich sweetness forms the backbone of the glaze. If you swap it for barbecue sauce, you’ll get a smokier profile, but you’ll lose that bright acidity that balances the honey. Soy sauce brings depth with its salty umami; a low‑sodium version works if you’re watching sodium, but the flavor won’t be as punchy. Vinegar (I use a plain white or apple cider) cuts through the sweetness, preventing the sauce from becoming cloying and adding a subtle tang that lifts the whole dish.
The Sweet‑Heat Duo
Honey is the sweet anchor, and its floral notes pair beautifully with the smoky undertones of the ketchup. If you’re allergic or vegan, swap it for maple syrup – you’ll still get that sticky sheen. Hot sauce provides the heat; I recommend a medium‑level sauce like Sriracha for a balanced kick. If you love fire, crank it up, but remember the sauce will intensify as it reduces.
The Unexpected Star
Mustard (dijon or American) is the secret weapon. Its sharp, slightly bitter edge cuts through the richness of the thigh meat and prevents the glaze from feeling one‑dimensional. Skip it, and you’ll end up with a sauce that’s sweet‑heavy and flat. A teaspoon of whole‑grain mustard can add texture if you enjoy little seeds popping in your mouth.
The Final Flourish
Garlic cloves get minced fine and sautéed in the oil, releasing aromatic oils that perfume the entire pan. Fresh garlic is crucial; pre‑minced jars lose that punch and can become bitter when overcooked. Oil (I use a neutral vegetable oil) ensures the chicken browns evenly and prevents sticking. Salt and black pepper season the meat before searing, enhancing the natural flavor of the chicken and forming that coveted crust.
Everything's prepped? Good. Let’s get into the real action…
The Method — Step by Step
Pat the chicken thigh fillets dry with paper towels – moisture is the enemy of a good sear. Season each piece generously with the ½ tsp of kosher salt and ½ tsp of black pepper, pressing the seasoning into the flesh so it adheres. Heat 1 tbsp of oil in a large, heavy‑bottomed skillet over medium‑high heat until it shimmers. When the oil is hot, lay the thighs skin‑side down and listen for that immediate sizzle that signals a perfect caramelization. Let them cook undisturbed for 5–6 minutes, or until the edges start pulling away and the skin is golden‑brown.
Flip the thighs and sear the other side for another 4 minutes, just enough to develop a nice crust without overcooking. Once both sides are beautifully browned, remove the thighs and set them on a plate. Okay, ready for the game‑changer? In the same pan, add the minced garlic and let it sauté for 30 seconds, releasing its fragrant oils but being careful not to let it burn – burnt garlic turns bitter in seconds.
Now it’s time for the sauce. Stir in 1/3 cup ketchup, 2 tbsp soy sauce, 1 tbsp mustard, 2 tbsp hot sauce, 2 tbsp vinegar, and 2 ½ tbsp honey. The mixture will bubble and steam, filling the kitchen with a sweet‑spicy perfume that makes you want to lick the spoon. This next part? Pure magic. Add ½ cup water to loosen the mixture, then bring everything to a gentle boil, stirring constantly to dissolve any caramelized bits stuck to the pan.
Return the seared thighs to the skillet, nestling them into the bubbling sauce. Reduce the heat to low, cover the pan, and let the chicken simmer for 12–15 minutes. During this time, the meat absorbs the sauce, and the glaze begins to thicken, coating each piece like a glossy lacquer. Keep an eye on the sauce; you want it to cling but not dry out.
Watch Out: If the sauce starts to scorch, lower the heat immediately and add a tablespoon of water. Scorched sauce turns bitter and can ruin the entire dish. Stir occasionally, and you’ll notice the glaze becoming sticky and glossy – that’s the sweet spot.
Uncover the pan and increase the heat to medium‑high for the final glaze. Toss the thighs a few times, allowing the sauce to reduce further and cling to the meat, creating that signature sticky coating that looks like caramelized amber. The edges of the chicken should begin to crisp, pulling away from the pan with a slight crackle.
When the glaze reaches a thick, lacquered sheen and the chicken is cooked through (internal temp 165°F/74°C), remove the pan from heat. Let the thighs rest for 5 minutes – this rest lets the juices redistribute and the glaze set, delivering that “burst of flavor” with every bite.
Plate the thighs, spoon any remaining sauce over the top, and garnish with a sprinkle of freshly cracked black pepper if you like extra bite. Serve with steamed rice, quinoa, or a crisp green salad to balance the richness. And now the fun part. Dive in, and I promise you’ll be back for seconds, maybe even thirds. This is hands down the best version you’ll ever make at home.
Insider Tricks for Flawless Results
The Temperature Rule Nobody Follows
Never start with a cold pan. Preheat the skillet for at least a minute before adding oil; a hot surface guarantees an instant sear that locks in juices. I once tried tossing the chicken into a lukewarm pan, and the result was soggy, flavor‑less meat that stuck to the bottom. The lesson? Heat is your friend, and patience is a virtue. If you’re in a rush, crank the burner to high for the first minute, then dial back to medium‑high once the oil shimmers.
Why Your Nose Knows Best
Your sense of smell is the ultimate doneness gauge. When the garlic turns golden and the sauce releases a sweet‑spicy aroma, you’re close to perfection. If the kitchen starts smelling like burnt sugar, you’ve over‑reduced. Trust that nose. A quick sniff of the simmering sauce will tell you if it’s thickening at the right rate or heading for a bitter demise.
The 5‑Minute Rest That Changes Everything
After you’ve achieved that glossy glaze, resist the urge to dive in immediately. Let the thighs rest, loosely covered with foil, for exactly five minutes. This pause allows the internal juices to settle and the glaze to firm up just enough to stay on the meat without sliding off. I once cut into a hot thigh right away; the sauce pooled on the plate and the meat was slightly dry. That five‑minute window is the difference between “good” and “wow‑worthy.”
Sauce Rescue: The Water Splash
If during simmering the sauce looks like it’s heading toward a caramel disaster, add a tablespoon of water and stir vigorously. The water re‑hydrates the caramelized sugars, turning them back into a glossy glaze. This trick saved me more than once when I got distracted by a phone call and the heat slipped away. It’s a quick fix that restores balance without diluting flavor.
Garlic Timing – Not Too Early, Not Too Late
Adding garlic too early scorches it, turning the sauce bitter; too late and you miss the flavor infusion. The sweet spot is right after you’ve removed the chicken, while the pan is still hot but before you add the wet ingredients. This timing lets the garlic release its aromatic oils without burning, ensuring the sauce has a deep, savory backbone.
The Final Glaze Flick
When you’re down to the last minute of reduction, give the pan a quick flick of the wrist to toss the thighs. This movement coats every nook and cranny with the glaze, creating a uniform sheen. It sounds theatrical, but it’s a pro technique that ensures no bite is left dry. Trust me, you’ll see the sauce cling like a second skin, and that’s when you know you’ve nailed it.
Creative Twists and Variations
This recipe is a playground. Here are some of my favorite ways to switch things up:
Maple‑Mustard Madness
Swap the honey for an equal amount of pure maple syrup and keep the dijon mustard. The result is a deeper, woody sweetness that pairs beautifully with pork tenderloin if you want to change the protein.
Asian‑Inspired Soy‑Ginger
Add a tablespoon of freshly grated ginger and replace the vinegar with rice vinegar. This gives the dish a bright, tangy lift that feels like a quick trip to a street market in Bangkok.
Smoky Chipotle Kick
Replace half of the hot sauce with chipotle in adobo sauce. The smoky heat adds depth and works wonderfully with roasted corn on the side.
Herbaceous Green
Stir in a handful of chopped fresh cilantro or parsley right before serving. The herb adds a fresh burst that cuts through the richness, perfect for summer evenings.
Coconut Curry Fusion
Add a splash of coconut milk and a teaspoon of curry powder to the sauce. The creamy, aromatic twist turns the dish into a tropical delight, especially good with jasmine rice.
Storing and Bringing It Back to Life
Fridge Storage
Cool the chicken to room temperature, then transfer to an airtight container. It will keep for 3‑4 days. When reheating, add a tablespoon of water, cover, and warm on low heat for 5‑7 minutes, allowing the sauce to re‑glaze.
Freezer Friendly
Portion the cooked thighs into freezer‑safe bags, removing as much air as possible. They freeze well for up to 2 months. To defrost, place them in the fridge overnight, then reheat in a skillet with a splash of water, letting the glaze revive.
Best Reheating Method
For the ultimate texture, reheat in a preheated oven at 350°F (175°C) for 10‑12 minutes, covered with foil for the first half to retain moisture. Remove the foil for the last 3 minutes to re‑crisp the skin. The result is as close to fresh‑cooked as you’ll get.