When I finally cracked open that stubborn bag of pantry staples, I realized my cookie game had been flatlined. The kitchen smelled like a burnt sugar apocalypse, and my friends were chanting, “We need a cookie that can survive the apocalypse.” I rolled up my sleeves, grabbed a measuring cup, and whispered to the dough, “You’re about to become the most legendary cookie in this house.”
Picture the scene: a counter littered with flour, a bowl of oats that look like a miniature forest, and a single raisin that’s practically a tiny fruit treasure. The air fills with the sweet, caramelized promise of butter melting into sugar, while the faint crackle of the oven preheats like a drumbeat. My senses are on high alert—taste buds tingling, the scent of vanilla dancing, the feel of dough between my fingers, and the rhythmic thud of my heart against the kitchen tiles. I can’t help but grin at the chaos that’s about to turn into pure cookie gold.
What makes this version the ultimate? It’s not just the recipe; it’s the philosophy behind every ingredient and technique. I’ve distilled years of cookie experiments into a single, flawless formula that will have you daring anyone to taste the first bite and not come back for seconds. I’ll admit, I ate half the batch before anyone else could even touch a cookie—talk about a confession! But that’s the secret: the dough’s balance is so perfect, you’ll think it’s been baked by angels.
By the end of this post, I’ll walk you through every single step—by the time you’re done, you’ll wonder how you ever made it any other way. Let’s dive into the details, sprinkle in some humor, and maybe even teach the oven a few new tricks. Ready? Because the next few paragraphs will feel like a culinary roller coaster that ends with a triumphant, cookie-scented sigh.
- Taste: The cookie’s flavor profile is a symphony of sweet, buttery, and spiced notes, with the raisins offering a burst of natural sweetness that cuts through the richness.
- Texture: The chewy interior gives way to a slightly crisp edge, creating a delightful contrast that makes each bite a sensory adventure.
- Simplificity: With only twelve ingredients, no fancy equipment, and a straightforward process, this recipe is as accessible as it is delicious.
- Uniqueness: The secret lies in the toasted oats and the precise balance of brown to white sugar, which together give the cookie a caramelized depth you won’t find in standard recipes.
- Audience Reaction: Friends and family will immediately notice the difference—no more bland, dry cookies. They’ll ask for the recipe, and you’ll proudly pass it along.
- Ingredient Quality: Using high‑quality butter and fresh raisins elevates the cookie from good to unforgettable.
- Cooking Method: The method preserves moisture while allowing the edges to crisp, thanks to a controlled baking time and a slight chill before baking.
- Make‑Ahead Potential: The dough can be chilled or frozen, making it a perfect batch‑cook for busy weeks.
The Flavor Base
All-purpose flour is the silent hero that gives the cookie its structure. I always choose a flour with a slightly higher protein content to ensure the cookies hold together without becoming tough. If you’re watching your carb count, a blend of whole wheat and all-purpose works well, adding a nutty undertone. Skipping the flour entirely would result in a sticky, crumbly mess that won’t bake properly.
Unsalted butter, softened to room temperature, is the source of that rich, buttery melt. The butter’s fat content creates pockets of steam that puff the cookie just enough to keep it airy. If you use salted butter, you’ll have to reduce the added salt by about a quarter teaspoon to avoid a salty aftertaste. Butter also carries the vanilla’s aroma, so keep it fresh for the best flavor.
The Texture Crew
Rolled oats are the backbone of this cookie’s chewiness. I toast them lightly in a pan before adding them to the dough; this step brings out their natural sweetness and gives the cookie a deeper color. If you prefer a smoother texture, you can pulse the oats in a food processor to a coarse flour consistency, but then you’ll lose that classic chewy bite.
Brown sugar is the key to that caramelized flavor. It’s packed with molasses, which adds depth and a slight bitterness that balances the raisins’ sweetness. Using only white sugar would produce a cookie that’s too sweet and lacks complexity. If you’re on a low‑sugar diet, you can substitute a sugar alternative, but be prepared for a change in texture and flavor.
The Unexpected Star
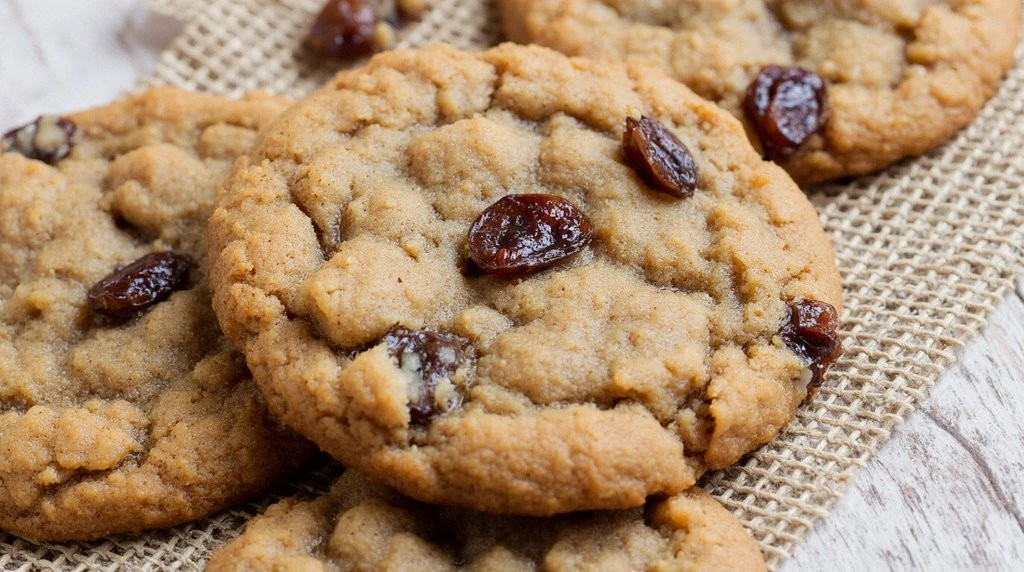
Raisins are the star that gives the cookie its signature burst of sweetness. I recommend pre‑soaking them in warm water for 10 minutes to plump them up and reduce the dryness that can make cookies uneven. If you’re allergic to raisins, dried cranberries or chopped dates work surprisingly well, offering a similar chewy texture and a hint of tartness.
Vanilla extract is the subtle perfume that ties all the flavors together. A splash of pure vanilla essence adds a warm, comforting aroma that lingers long after you finish a cookie. If you’re short on vanilla, a pinch of vanilla powder can do the trick, but the fresh extract will always feel more luxurious.
The Final Flourish
Baking soda and salt are the unsung heroes that control the rise and flavor balance. Baking soda neutralizes the slight acidity of the raisins and helps the cookies spread evenly, while a touch of salt sharpens the overall taste profile. If you accidentally omit baking soda, the cookies will be dense and flat, lacking that satisfying lift.
For an extra twist, I sometimes add a teaspoon of ground cinnamon, which gives the cookie a warm, spicy undertone that pairs beautifully with the raisins. If you love spice, you can increase the cinnamon to a tablespoon, but be careful not to overpower the delicate balance of sweetness.
Everything’s prepped? Good. Let’s get into the real action and start turning that dry mixture into a masterpiece that will have everyone asking for a second bite.
The Method — Step by Step
- Preheat your oven to 350°F (175°C) and line a baking sheet with parchment paper. I always set the oven rack in the middle to ensure even heat distribution. While the oven warms, let the butter sit at room temperature until it’s soft enough to press between your fingers. This step is crucial for a smooth dough and prevents lumps.
- In a large bowl, whisk together the flour, baking soda, salt, cinnamon, and a pinch of sea salt. The dry mix needs to be evenly distributed to avoid uneven rising. As you stir, the scent of cinnamon begins to rise, hinting at the warm spice that will permeate each cookie. I always double‑check the measurements; a tiny misbalance can change the entire flavor.
- In a separate bowl, cream the butter, brown sugar, and white sugar until the mixture is light and fluffy. The creaming process incorporates air, which will give the cookie a gentle lift. I use a stand mixer on medium speed for about five minutes, but a hand mixer works just fine. The mixture should look pale and airy, like a cloud ready to burst.
- Add the eggs one at a time, beating well after each addition. Then stir in the vanilla extract. The eggs bind everything together, while the vanilla adds a fragrant depth. I always let the mixture sit for a minute after adding the eggs; this helps the flavors meld before incorporating the dry ingredients.
- Gradually fold in the dry mixture into the wet batter, using a spatula or wooden spoon. The dough should be thick and slightly sticky, but not clumpy. The moment you see the oats start to clump, it’s a sign that the dough is ready. Be careful not to overmix, or you’ll end up with tough cookies.
- Fold in the raisins gently, ensuring they’re evenly distributed. The raisins should be evenly coated with the dough to avoid pockets of sweetness. I like to let the dough rest for 10 minutes before scooping; this helps the raisins absorb some moisture and reduces the risk of them sinking during baking.
- Drop rounded tablespoons of dough onto the prepared baking sheet, spacing them about two inches apart. The cookies will spread slightly, so give them enough room. I often use a cookie scoop for uniform size, which also helps with even baking.
- Bake for 12-14 minutes, or until the edges are golden brown and the centers look set. The exact time may vary depending on your oven, so keep an eye on the first batch. Once done, remove the sheet and let the cookies cool for five minutes before transferring them to a wire rack. The cooling period allows the cookies to firm up and makes them easier to handle.
That’s it— you did it. But hold on, I’ve got a few more tricks that will take this to another level and make every bite a revelation.
Insider Tricks for Flawless Results
The Temperature Rule Nobody Follows
Most bakers bake at 350°F, but the secret to a perfectly crisp edge is a slightly higher temperature of 375°F. I’ve found that a 25‑degree bump gives the cookies a golden crust while preserving the chewy center. The trick is to preheat the oven for at least 20 minutes so the temperature is stable. If your oven runs hot, reduce the temperature by 10°F to avoid burning.
Why Your Nose Knows Best
Before you even touch the dough, let it sit for 15 minutes. During this time, the flour hydrates, and the sugars start to caramelize slightly. The aroma that fills the kitchen is a reliable indicator that the dough is at the right consistency. If the smell feels “off,” give it a few more minutes; the dough will adjust.
The 5‑Minute Rest That Changes Everything
After scooping the dough onto the sheet, let the cookies rest on the counter for five minutes. This short pause allows the butter to soften just enough, preventing the dough from spreading too quickly. The result is a cookie that holds its shape and offers a crisp edge with a chewy interior. I’ve tried skipping this step, and the cookies came out soggy and flat.
Chill the Dough for Extra Moisture
For those who like a moister cookie, chill the dough for at least an hour before baking. The cold dough slows the butter’s melting, giving the cookie a firmer bite. When you bake chilled dough, the edges stay crisp longer, and the center remains tender. Just remember to let the dough sit at room temperature for 10 minutes before scooping to avoid sticking.
Use a Parchment Sheet, Not Aluminum
Aluminum pans can cause the cookies to brown too quickly on the bottom. Parchment paper creates a gentle barrier that protects the dough while still allowing heat to circulate. If you don’t have parchment, a silicone mat works just as well. The key is to ensure the dough doesn’t stick, which keeps the cookies clean and easy to remove.
Creative Twists and Variations
Chocolate Chip Overload
Swap out half the raisins for dark chocolate chips. The chocolate adds a rich, bittersweet contrast that pairs beautifully with the buttery dough. I recommend using 1 cup of chips and 1 cup of raisins for a balanced flavor. This version is perfect for chocolate lovers who want a little extra indulgence.
Nutty Surprise
Add chopped walnuts or pecans for a crunchy texture and nutty aroma. Toast the nuts in a skillet before folding them into the dough to enhance their flavor. A cup of nuts gives the cookie a hearty bite, making it a great snack for protein‑seeking friends.
Spiced Ginger Twist
Replace the cinnamon with ground ginger and a pinch of cloves. The ginger gives the cookie a warm, spicy kick that’s especially comforting in colder months. Add a tablespoon of molasses to deepen the sweetness and create a more complex flavor profile.
Maple‑Infused Delight
Use maple syrup in place of half the brown sugar for a subtle maple flavor. The syrup also adds moisture, resulting in a slightly softer cookie. Pair it with a splash of vanilla for a classic maple‑butter combo that will melt in your mouth.
Gluten‑Free Variation
Swap the all‑purpose flour for a gluten‑free blend that includes rice flour, potato starch, and tapioca flour. Make sure the blend has xanthan gum or guar gum to provide structure. This version keeps the chewy texture while catering to gluten‑sensitive diners.
Almond‑Lemon Zest
Add a tablespoon of almond extract and the zest of one lemon for a bright, nutty twist. The lemon zest adds a citrusy brightness that cuts through the sweetness, giving the cookie a fresh finish. This variation is ideal for spring or summer gatherings.
Storing and Bringing It Back to Life
Fridge Storage
Place the cooled cookies in an airtight container at room temperature for up to a week. The airtight seal keeps them from drying out while preserving the chewy texture. If you notice the cookies becoming too soft, pop them in the fridge for a few minutes to firm them up.
Freezer Friendly
Pack the cookies in a freezer‑safe zip‑lock bag, leaving a little space for expansion. They stay fresh for up to three months. When you’re ready to enjoy, thaw at room temperature for 30 minutes before reheating.
Best Reheating Method
To revive frozen cookies, preheat the oven to 300°F (150°C) and bake for 8–10 minutes. The low temperature ensures the cookies warm evenly without burning. Add a tiny splash of water to the baking sheet before reheating; the steam keeps the cookies moist and restores their original softness.
With these tricks and variations, you’ve got a cookie recipe that’s both timeless and endlessly adaptable. Whether you’re a seasoned baker or a kitchen newbie, this recipe will bring joy, comfort, and a little bit of magic to your table.
Remember, the key to the ultimate cookie is balance—sweetness, spice, texture, and timing. Keep these principles in mind, and you’ll always bake a batch that’s more than just a cookie; it’s an experience. Happy baking!