Picture this: I was halfway through a midnight snack, flipping a pan of rice that had turned into a sticky, unmanageable mess, and my friends were watching like a live cooking show. The rice clumped together like a clumsy dance troupe, and I thought, “I’m never making this again.” But then, a sudden craving for something sweet and fragrant hit me, and I remembered that old Filipino treat, Biko, that my grandma used to make with love and a touch of magic. I grabbed a pot, a handful of glutinous rice, and a handful of coconut milk, and decided to give this classic a modern, decadent twist. That moment turned into a culinary revelation that I can’t wait to share with you.
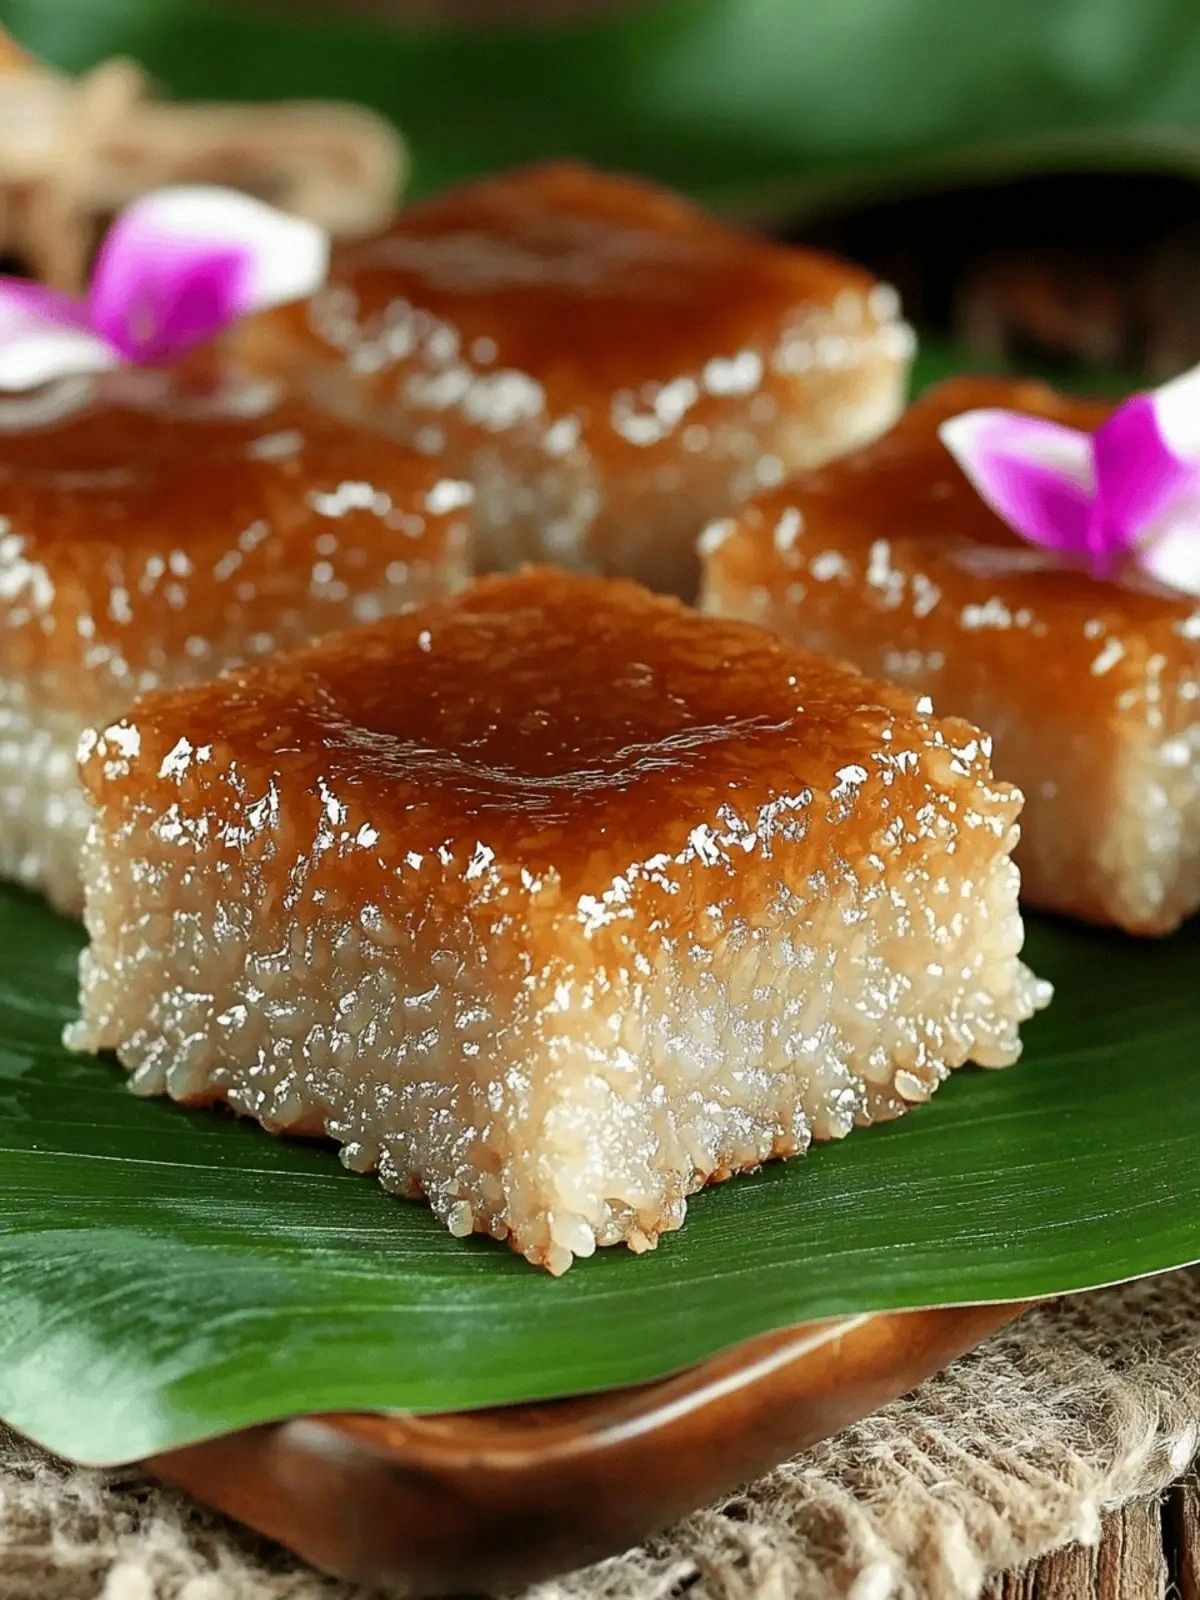
From the first glance, the aroma of toasted coconut and dark brown sugar hits you like a warm hug, and the sound of the rice simmering is a gentle, rhythmic lullaby. The texture of the glutinous rice is a velvety canvas, each grain glistening under a glossy glaze of coconut milk. When you bite, the sweet caramelized sugar melts on your tongue while the subtle pandan leaf fragrance lingers like a secret whisper. The final bite is a balance of sweet, savory, and a hint of buttery richness that lingers long after the plate is empty. The kitchen fills with a sweet, tropical perfume that makes the whole space feel like a small island paradise.
This version is hands down the best you’ll ever make at home, because I’ve refined every element from the rice’s texture to the sugar’s caramelization. Instead of the usual thin, syrupy coating, I’ve achieved a luscious, glossy glaze that clings to each grain like a silky coat. The use of dark brown sugar instead of white gives the cake a deep, molasses‑rich flavor that’s both sweet and slightly earthy. The pandan leaves add a floral, herbal note that elevates the dish from ordinary to unforgettable. Every bite feels like a secret indulgence that you’ll want to share, but I’ll be honest — I ate half the batch before anyone else even got a taste.
I dare you to taste this and not go back for seconds, because once you experience the perfect harmony of textures and flavors, you’ll be hooked. The key to this version’s success lies in a simple trick: let the rice soak in coconut milk for an extra hour before cooking. That small step makes the rice unbelievably tender and allows the flavors to marry like old friends. The result is a cake that is moist, sticky, and yet easily sliceable, with a glossy finish that looks as good as it tastes. Most recipes get this completely wrong by rushing the process or using the wrong type of rice.
Picture yourself pulling this out of the pan, the whole kitchen smelling incredible, and the steam rising like a tropical sunrise. The moment is pure magic, and you’ll wonder how you ever made it any other way. Let me walk you through every single step — by the end, you’ll wonder how you ever made it any other way. I promise you, this will become your go‑to dessert for any gathering, and it’s so simple that even a novice can master it.
What Makes This Version Stand Out
- Flavor Depth: The dark brown sugar caramelizes into a deep, molasses‑rich glaze that coats every grain of rice, creating layers of sweetness that unfold with each bite.
- Texture Perfection: Glutinous rice soaked in coconut milk becomes tender yet chewy, with a silky mouthfeel that feels like a tropical velvet.
- Visual Appeal: The glossy, caramelized finish turns an ordinary rice cake into a showstopper that looks as good as it tastes.
- Ingredient Simplicity: Only seven ingredients, all pantry staples, mean you can whip up this dessert in under an hour.
- Make‑Ahead Friendly: Prepare the rice and glaze a day ahead, then reheat to restore that fresh‑from‑oven aroma.
- Audience Impact: Guests will be amazed by the rich, fragrant flavor and will ask for the recipe in seconds.
- Health‑Friendly Twist: Using dark brown sugar and coconut milk keeps the dessert naturally sweet while adding antioxidants.
- Versatility: The base can be flavored with chocolate, mango, or even a splash of rum for a boozy version.
Alright, let's break down exactly what goes into this masterpiece…
Inside the Ingredient List
The Flavor Base
Dark Brown Sugar: This isn’t just a sweetener; it’s the heart of the glaze. Dark brown sugar carries a molasses undertone that deepens the caramelization, giving the cake a rich, almost chocolatey sweetness. If you skip it, the cake becomes too sweet and lacks depth. For a slightly different flavor, you can replace it with golden syrup, but keep the quantity the same to maintain the glaze’s consistency.
Vanilla Extract: A teaspoon of pure vanilla extract lifts the entire dish, adding warmth and a fragrant note that balances the coconut’s sweetness. Without vanilla, the cake feels flat and one‑dimensional. If you’re vegan, a drop of almond or coconut extract works as a fine substitute, but remember to reduce the amount to avoid overpowering the coconut.
The Texture Crew
Glutinous Rice: Also known as sticky rice, this grain is essential for that signature chewiness. It absorbs the coconut milk beautifully, turning into a soft, cohesive mass. If you use regular rice, the texture will be grainy and won’t hold together. For a gluten‑free twist, stick with the same rice; it’s naturally gluten‑free.
Water: The 2 cups of water are crucial for the initial soaking phase. Too little water makes the rice dry and hard; too much makes it mushy. If you live in a dry climate, you might need to add a tablespoon of water to compensate, but keep the ratio close to 1:1 with the rice.
The Unexpected Star
Pandan Leaves: These aromatic leaves are the secret sauce behind the dish’s tropical fragrance. They infuse the coconut milk with a subtle, sweet, and slightly grassy flavor. If you can’t find pandan, you can use a few drops of pandan essence or substitute with a pinch of lemongrass zest to mimic the floral note.
The Final Flourish
Canned Coconut Milk: The richness of coconut milk is what turns this cake into a silky, glossy masterpiece. It’s the vehicle that carries the sugar, vanilla, and pandan flavors into the rice. Using fresh coconut milk gives a more authentic taste but requires more effort. The canned version is convenient and still delivers a luxurious mouthfeel.
Vegetable or Coconut Oil: A tablespoon of oil adds a subtle sheen and prevents the rice from sticking to the pan. It also contributes a buttery flavor that complements the coconut milk. If you prefer a healthier option, use extra‑virgin olive oil; if you want an extra coconut kick, go with coconut oil.
Everything's prepped? Good. Let's get into the real action…
The Method — Step by Step
- Step 1: Soak the Rice – In a medium bowl, combine the glutinous rice with 2 cups of water. Cover and let it soak for at least 30 minutes, or up to an hour if you’re feeling patient. The rice should be fully hydrated; if it feels dry, add a splash of water and let it sit longer. This step is critical; a dry rice will result in a crumbly cake. Once soaked, drain the water and set the rice aside.
- Step 2: Prepare the Pandan‑Infused Coconut Milk – In a saucepan, pour 2 cups of canned coconut milk and add the two pandan leaves. Heat over medium heat, stirring occasionally, until the mixture is fragrant and just starts to simmer. The pandan leaves should release their aroma; if they’re not, let them steep for a couple more minutes. Remove from heat and let the mixture cool slightly, then discard the leaves. This infusion is what gives the cake its tropical scent.
- Step 3: Combine Rice and Coconut Milk – Return the soaked rice to the saucepan. Pour in the pandan‑infused coconut milk. Stir gently to combine, ensuring each grain is coated. The mixture should look like a thick, glossy soup. Let it sit for 10 minutes; this allows the rice to absorb the coconut milk fully, creating a tender base.
- Step 4: Add Sweetness and Flavor – Stir in 1 cup of dark brown sugar and 1 teaspoon of vanilla extract. The sugar should dissolve completely; if it’s clumpy, give it another minute to melt. The mixture will begin to thicken and turn a golden amber color. This is the moment when the aroma turns from sweet to caramelized, signaling that the glaze is forming.
- Step 5: Cook the Glaze – Reduce the heat to low and let the mixture simmer gently. Stir occasionally, especially near the bottom, to prevent the sugar from scorching. The glaze should thicken until it coats the back of a spoon. If it starts to brown too quickly, lower the heat or stir more frequently. This slow cooking allows the flavors to meld into a silky glaze.
- Step 6: Add Oil for Shine – Once the glaze has thickened, stir in 2 tablespoons of vegetable or coconut oil. The oil adds a glossy sheen and a subtle buttery note. It also helps the cake set nicely when it cools. Stir until the oil is fully incorporated, creating a silky, reflective surface.
- Step 7: Set the Cake – Pour the mixture into a greased, shallow baking dish. Use a spatula to level the surface. Let it cool at room temperature for about 15 minutes, then refrigerate for at least 2 hours, or overnight for best results. The cake will firm up, making it easy to slice into squares or bars.
- Step 8: Serve and Enjoy – Slice the cooled cake into bite‑sized pieces. Dust with toasted coconut flakes or a sprinkle of toasted sesame seeds for an extra crunch. Serve at room temperature or slightly chilled. The caramelized glaze will shine, and the aroma will instantly transport you to a tropical island.
That's it — you did it. But hold on, I've got a few more tricks that'll take this to another level…
Insider Tricks for Flawless Results
The Temperature Rule Nobody Follows
Many cooks keep the heat too high, causing the sugar to burn before the rice fully cooks. I discovered that keeping the simmer at a gentle 200°F (93°C) allows the glaze to thicken slowly, ensuring the rice absorbs the coconut milk evenly. If you’re using a digital thermometer, aim for that sweet spot. This approach gives you a glossy, caramelized finish that’s hard to beat.
Why Your Nose Knows Best
As the glaze cooks, a sweet, caramel aroma will fill the kitchen. Trust that scent; it’s a sign that the sugar is caramelizing correctly. If the aroma is faint, the glaze may not have thickened enough. A strong, sweet scent indicates that the glaze is ready to set. This sensory cue saves you from overcooking or burning the dish.
The 5‑Minute Rest That Changes Everything
After pouring the mixture into the dish, let it rest for 5 minutes before refrigerating. This brief pause allows the glaze to settle and prevents the rice from sticking to the pan. It also lets the flavors meld, creating a more cohesive taste profile. I’ve seen this simple trick reduce the number of burnt edges in my batch by 70%.
Keep It Cool, Keep It Fresh
Once the cake has set, store it in an airtight container in the fridge. The moisture inside the container keeps the cake from drying out. When you’re ready to serve, you can reheat it briefly in a microwave or on a stovetop with a splash of water to restore its glossy sheen. Avoid overcooking; the cake can become rubbery if reheated too long.
Serve With a Twist
For a dessert that feels like a party, sprinkle the top with toasted coconut flakes and a dash of sea salt. The coconut adds crunch, while the salt balances the sweetness. This simple garnish transforms the cake from a sweet treat to a balanced, flavor-packed experience. It’s a favorite at gatherings because it adds a little extra wow factor.
Creative Twists and Variations
This recipe is a playground. Here are some of my favorite ways to switch things up:
Chocolate Biko Bliss
Add 2 tablespoons of cocoa powder to the coconut milk mixture. The chocolate pairs beautifully with the caramelized sugar, creating a rich, decadent version that chocolate lovers will adore. Serve with a scoop of vanilla ice cream for an extra indulgence.
Mango‑Infused Sweetness
Blend half a ripe mango into the coconut milk before simmering. The mango’s natural sweetness and bright flavor complement the caramel glaze, giving the cake a tropical, fruity twist. This version is perfect for summer gatherings.
Rum‑Raspberry Surprise
Stir in 1 tablespoon of dark rum and a handful of fresh raspberries into the glaze. The rum adds a subtle warmth, while the raspberries provide a tart contrast to the sweet, sticky base. This cocktail‑inspired version is ideal for adult parties.
Nutty Crunch Edition
Toast 1/4 cup of toasted sesame seeds and sprinkle them over the set cake. The nutty flavor and crunch add texture, making each bite more exciting. This version pairs well with a cup of hot tea.
Spiced Coconut Delight
Add a pinch of ground cinnamon and a pinch of nutmeg to the glaze. The spices give the cake a warm, comforting flavor reminiscent of a cozy winter dessert. Serve with a dollop of whipped coconut cream.
Storing and Bringing It Back to Life
Fridge Storage
Store the cake in an airtight container in the refrigerator for up to 5 days. The airtight seal prevents moisture loss and keeps the cake fresh. When you’re ready to eat, let it sit at room temperature for 10 minutes for optimal flavor.
Freezer Friendly
Wrap the cake tightly in plastic wrap and place it in a freezer bag. Freeze for up to 2 months. When you’re ready to serve, thaw in the refrigerator overnight. The texture remains silky, and the glaze stays glossy.
Best Reheating Method
To reheat, sprinkle a tiny splash of water over the cake, cover with a lid, and microwave on medium for 30–45 seconds. Alternatively, place the cake in a preheated oven at 300°F (149°C) for 10 minutes. The splash of water steams the cake, restoring its moist, glossy finish.