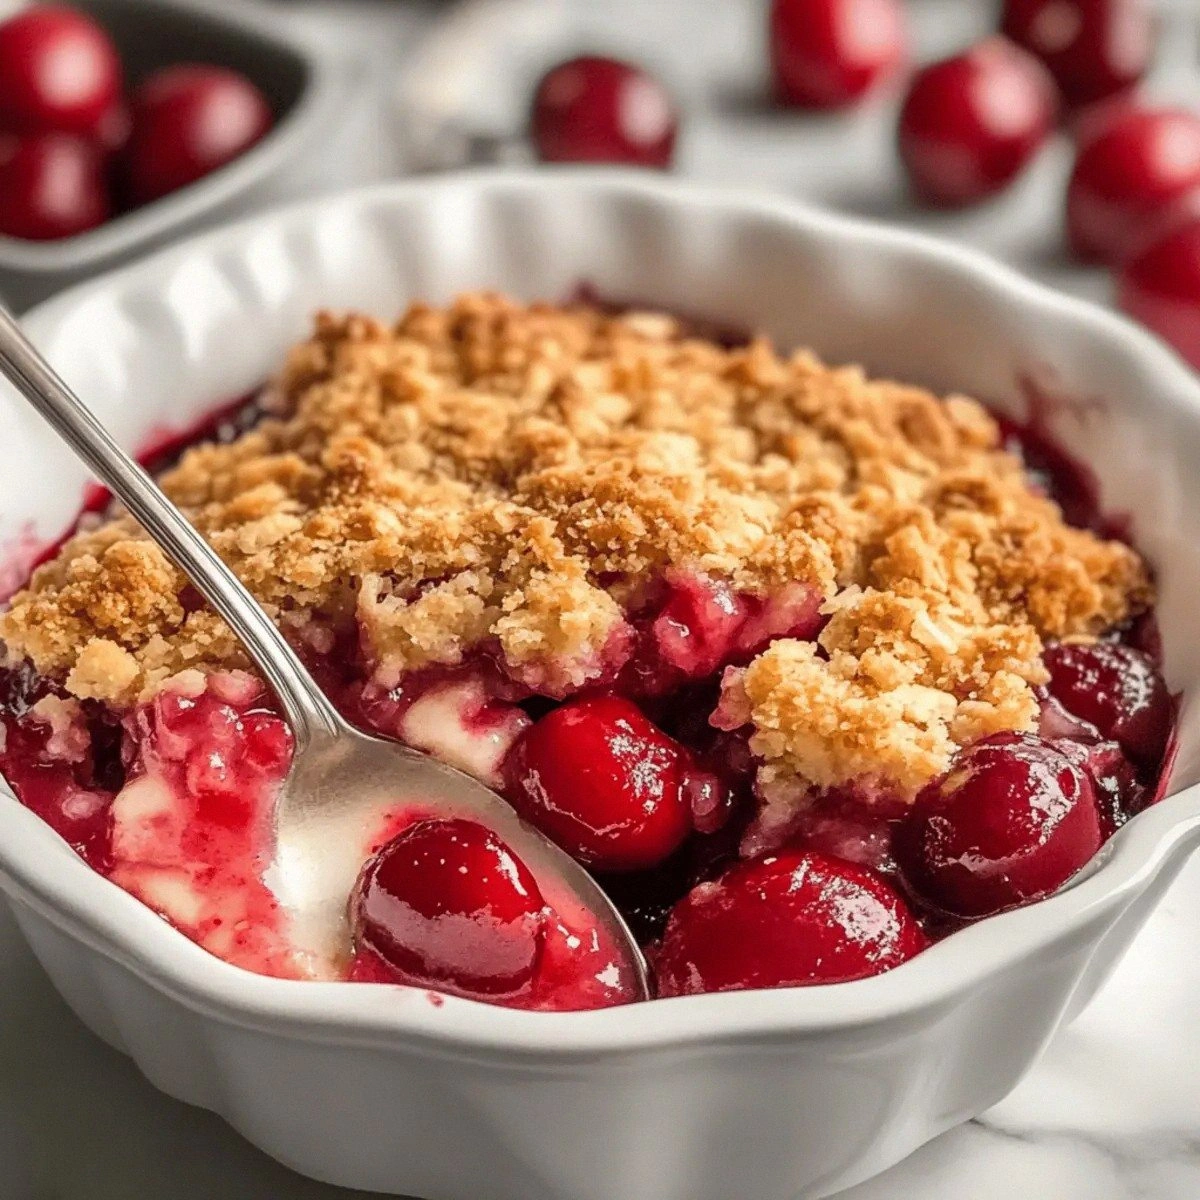
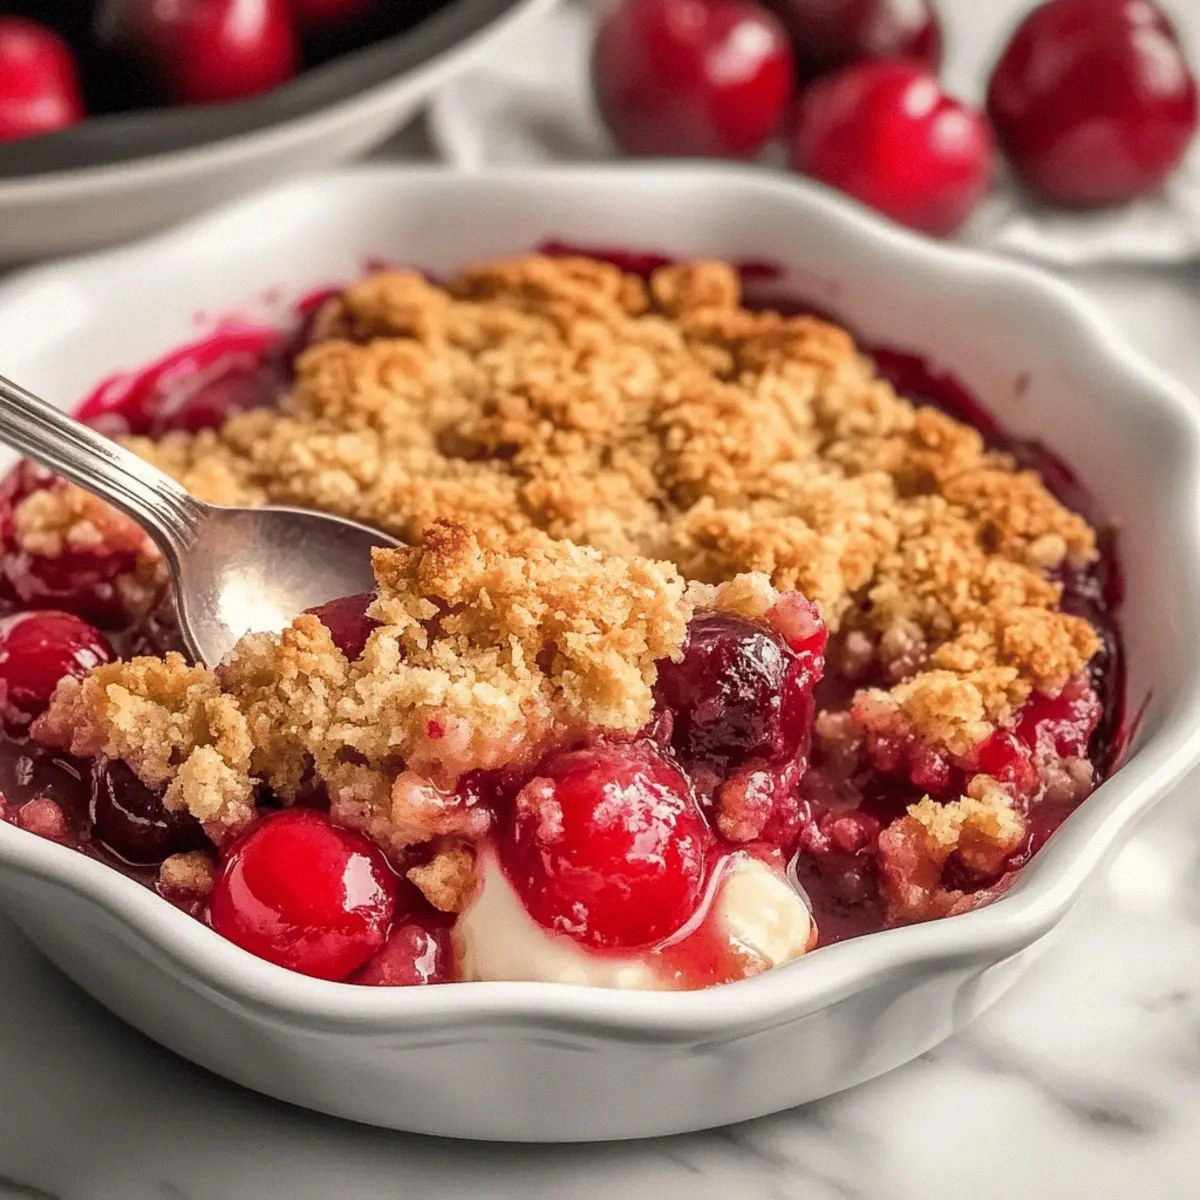
I still remember the day I ruined my first cherry crumble. Picture this: a kitchen that looked like a crime scene, flour dusting every surface like fresh snow, smoke billowing from the oven, and me frantically waving a dish towel at the smoke detector while my neighbors pounded on the walls. The culprit? I got cocky and tried to wing it without a recipe, figuring "how hard could it be?" Famous last words in any kitchen. That disaster led me down a three-month rabbit hole of testing, tweaking, and taste-testing my way through what felt like every cherry crumble recipe on the internet. Most were either too sweet, too soggy, or tasted like someone just dumped a can of pie filling under some flour and called it a day. But then, in a moment of pure kitchen magic at 2 AM (because all great recipes happen at 2 AM), I stumbled upon a combination that made my taste buds do a happy dance. The first time I pulled this version from the oven, the aroma hit me like a warm hug — tart cherries bubbling up through a golden, buttery crumble that looked like edible sunshine. My roommate materialized from thin air, spoon in hand, and we stood there in the kitchen, burning our tongues because we couldn't wait for it to cool. That first bite? Pure revelation. The tart cherries balanced perfectly with the sweet crumble, creating this symphony of textures and flavors that made every previous attempt taste like cardboard in comparison.
Here's the thing about most cherry crumble recipes floating around — they're playing it way too safe. They treat the cherry filling like an afterthought, just opening a can and dumping it in a dish. But we're not doing that today, my friend. No, we're building layers of flavor that will make your taste buds stand up and salute. We're talking about that perfect balance between the jammy, slightly tart cherry filling that tastes like summer in a bowl, and a crumble topping that's so buttery and crisp, it practically shatters under your fork. The secret isn't just in what ingredients you use — it's in how you treat them, how you layer them, and the tiny details that most recipes gloss over. I dare you to taste this and not go back for seconds. Actually, I double-dog dare you. Because once you experience the moment when that warm cherry filling meets the cold vanilla ice cream, creating those little rivers of melted cream running through the ruby-red fruit, you'll understand why I ate half the batch before anyone else even knew it existed. I'll be honest — I have zero regrets about that decision.
What makes this recipe absolutely game-changing is how it transforms humble pantry staples into something that tastes like it came from a fancy bakery. We're taking everyday ingredients and treating them with the respect they deserve. The cornstarch isn't just there to thicken — it's creating this glossy, jewel-like sauce that coats each cherry like liquid silk. That splash of lemon juice? It's not making things sour; it's making the cherry flavor sing like it's got its own backup band. And don't even get me started on the crumble topping. We're not just mixing flour and butter here — we're creating tiny pockets of buttery, crispy magic that stay crunchy even after a day in the fridge (if it lasts that long, which, let's be honest, it won't). Picture yourself pulling this out of the oven, the whole kitchen smelling incredible, steam rising like a beacon calling everyone to the table. Stay with me here — this is worth it. Every single step, every tiny detail, leads to a dessert that will ruin all other cherry crumbles for you forever.
Let me walk you through every single step — by the end, you'll wonder how you ever made it any other way. We're going to start with the cherry filling that actually tastes like cherries, not just red sugar goo. Then we'll craft a crumble topping that's so perfectly balanced between crispy and tender, you'll want to eat it by the handful. Along the way, I'll share all the kitchen wisdom I gained from my many (many) failures, so you can skip straight to the good part. Ready to make the cherry crumble that will steal not just your heart, but probably your family's hearts too? Let's do this.
What Makes This Version Stand Out
Flavor Bomb: This isn't your average one-note sweet dessert. We're building a cherry filling that balances tart and sweet so perfectly, your taste buds will do a double-take. The lemon juice and vanilla extract work together like a flavor amplifier, making the cherries taste more like themselves. It's like someone turned the volume up on cherry flavor without making it cloying.
Textural Paradise: Most crumbles are either soggy messes or dry disasters, but this one hits that sweet spot where the topping stays crisp while the filling stays juicy. The rolled oats in the crumble create these little nubbly bits that toast up like granola, giving you contrast against the soft, jammy cherries. Every spoonful delivers that perfect mix of creamy, crunchy, and chewy that makes eating this feel like a party in your mouth.
Idiot-Proof Simple: If you can stir things in a bowl and operate an oven, you can make this crumble. There's no fancy equipment, no technique that requires culinary school, no ingredients you need to special order from some obscure website. We're talking about a dessert that looks impressive enough to serve at dinner parties but comes together faster than ordering takeout. Even my friend who once burned water managed to nail this on the first try.
Unexpected Depth: Here's where we get sneaky — that cinnamon in the crumble isn't enough to make anyone say "cinnamon!", but it's working behind the scenes like a secret agent, adding warmth and complexity. The brown sugar brings molasses notes that make the whole thing taste more sophisticated than it has any right to be. This is hands down the best version you'll ever make at home, and I will fight anyone who says otherwise.
Crowd-Magnet Magic: I've brought this to potlucks where people literally followed me to the dessert table. It's that friend who gets along with everyone — kids love it because it's sweet and fruity, adults love it because it's not cloyingly sweet, and dessert snobs love it because it tastes like someone actually cared about balance. The first time I served it at a family dinner, my cousin asked if I was secretly taking baking classes on the side.
Make-Ahead Wonder: Unlike those fussy desserts that need to be served immediately, this crumble is actually better when made ahead. The flavors have time to meld and mingle, creating this harmonious taste that's impossible to achieve fresh from the oven. You can assemble it the night before, pop it in the oven when guests arrive, and serve it warm with that perfect "I just slaved away for hours" aroma. Okay, ready for the game-changer?
Inside the Ingredient List
The Flavor Foundation
The cherry pie filling is where most recipes go wrong — they treat it like a can opener exercise. But we're going to doctor it up until it tastes like summer sunshine captured in fruit form. That two cups of filling becomes our canvas, and we're about to paint it with flavor. The granulated sugar isn't just for sweetness; it's going to create this gorgeous syrupy sauce that makes each cherry glisten like a ruby. When you add the sugar to the cherries, watch how it starts to draw out the juices almost immediately — that's magic happening right in your bowl.
The cornstarch is your insurance policy against watery, sad crumble. Most people use too little and end up with cherry soup, or too much and get cherry cement. We're using just enough to transform the juices into this glossy, spoon-coating sauce that looks like it belongs in a jewelry store. When you mix it with the lemon juice first, it creates a slurry that prevents any weird lumps. Nobody wants to bite into their dessert and hit a pocket of dry cornstarch — trust me, I've been that person, and it's not cute.
The Texture Crew
All-purpose flour might seem basic, but it's doing heavy lifting here. It creates the structure that holds our crumble together while still keeping things tender. The rolled oats are where we get creative — they're not just filler, they're flavor bombs that toast up and add this nutty, almost caramelized taste to the topping. When you mix them with the flour, you're creating a textural playground that stays interesting bite after bite. The contrast between the soft fruit and the crispy oat bits is what separates a good crumble from a great one.
Brown sugar is our secret weapon for depth. While white sugar just brings sweetness, brown sugar brings personality — those molasses notes add this warm, almost butterscotch flavor that makes people ask "what's in this?" in the best way possible. When it melts and caramelizes in the oven, it creates these little pockets of chewy candy-like bits throughout the crumble. Combined with the cinnamon, it's like autumn and summer had a delicious baby.
The Unexpected Star
Cold butter is where most crumble recipes reveal who's serious about texture and who's just mashing ingredients together. The temperature of your butter is the difference between a sandy, sad topping and one that bakes up into buttery, crispy perfection. When you cut in cold butter, you're creating these little flour-coated butter pockets that steam in the oven, creating layers of flakiness. It's like making miniature puff pastries all throughout your crumble topping. That sizzle when it hits the pan? Absolute perfection.
The salt might seem out of place in a dessert, but it's the difference between a one-dimensional sweet dessert and one that makes people close their eyes when they taste it. Just a quarter teaspoon wakes up all the other flavors, making the cherries taste more like cherries and the butter taste more buttery. It's like the conductor in an orchestra — you don't notice it's there, but everything falls apart without it.
The Final Flourish
Vanilla extract is our flavor bridge, connecting the tart cherries to the sweet crumble in a way that makes everything taste more expensive than it is. Don't go cheap here — imitation vanilla tastes like disappointment and regret. The real stuff adds these floral, almost woody notes that make the whole dessert taste more complex. A little goes a long way, but that teaspoon we're using is enough to make people think you spent way more time on this than you actually did.
Lemon juice is probably the most underrated ingredient in fruit desserts. It's not there to make things sour — it's there to make the cherries taste more like cherries. The acid brightens all the other flavors, cutting through the sweetness and adding this refreshing note that keeps you coming back for more. It's like adding a spotlight to the cherries, making them the star of the show instead of just another sweet fruit filling.
Everything's prepped? Good. Let's get into the real action...
The Method — Step by Step
-
Preheat your oven to 375°F (190°C) and position the rack in the center. This isn't just about hitting a temperature — it's about creating the perfect environment for your crumble to transform into golden perfection. While your oven heats, grab an 8-inch square baking dish and lightly butter it. Don't skip this step even if you're using a non-stick dish; the butter adds flavor and prevents any potential sticking disasters that could ruin your beautiful presentation. If you've ever tried to serve crumble that welded itself to the dish, you know the heartbreak I'm talking about.
-
In a medium bowl, combine the cherry pie filling, granulated sugar, and cornstarch. Here's where we start building our flavor foundation — the sugar will begin to dissolve into the cherry juices immediately, creating this glossy coating on each fruit piece. Add the lemon juice and vanilla extract, stirring gently to combine. You want to be careful here because over-mixing can break down the cherries and turn your filling into baby food. The mixture should look like shiny rubies in syrup, not like cherry soup. If it seems too thick, don't panic — the cherries will release more juice as they bake.
-
Let the cherry mixture sit for about 5 minutes while you prepare the topping. This isn't dead time — it's when the magic starts happening. The sugar is pulling moisture from the cherries, creating a natural syrup. The cornstarch is hydrating, getting ready to do its thickening job. This brief rest prevents that dreaded watery filling that seeps into your crumble and turns everything soggy. While you wait, you should see the mixture become more cohesive and less like separate ingredients. This next part? Pure magic.
-
In a large bowl, whisk together the flour, rolled oats, brown sugar, cinnamon, and salt. This is where we're building our textural masterpiece. The dry ingredients need to be thoroughly combined so you don't end up with pockets of just flour or just oats in your finished crumble. The brown sugar should break up into small clumps as you whisk — these will become those delicious caramelized bits that everyone fights over. Take your time here because once you add the butter, there's no going back to fix uneven distribution.
-
Add the cold, cubed butter to the flour mixture. This is the moment of truth, where many crumble dreams die a sad, buttery death. Using a pastry cutter or your fingertips, cut the butter into the flour until the mixture resembles coarse crumbs with some pea-sized pieces of butter remaining. Don't overwork it — those larger butter pieces are what create the flaky layers in your topping. The mixture should hold together when squeezed but easily break apart. If your kitchen is warm and the butter starts getting soft, pop the whole bowl in the freezer for 5 minutes. Cold butter is the difference between a sandy topping and one that bakes up into crispy perfection.
-
Pour the cherry mixture into your prepared baking dish, spreading it into an even layer. Take a moment here to appreciate how gorgeous that ruby-red filling looks against the buttered dish. The cherries should be distributed relatively evenly, but don't stress about perfect placement — they're going to bubble and shift as they bake anyway. Just make sure there aren't any huge bare spots where the topping could sink through and get soggy. The filling should come up about halfway in the dish, leaving room for our glorious crumble topping.
-
Sprinkle the crumble topping evenly over the cherry filling. Here's where you get to be an artist — use your fingers to break up any large clumps and distribute them evenly. You want complete coverage, but don't pack it down. The topping should look like a rough, bumpy landscape with some pieces larger than others. Those bigger clumps? They'll become the crispy, caramelized bits that everyone fights over. Make sure to get the topping all the way to the edges of the dish, creating a seal that keeps the filling from bubbling up and making a mess.
-
Place the dish on a baking sheet (trust me on this — cherry filling has a way of bubbling over at the most inconvenient times) and slide it into your preheated oven. Bake for 30-35 minutes, but don't walk away completely. After about 20 minutes, the topping should be turning golden and your kitchen should smell like a bakery had a baby with a cherry orchard. The edges will start to bubble first, and you want to see the filling actively bubbling through the crumble in spots. This bubbling action is how you know the cornstarch is doing its thickening job.
-
Remove from the oven when the topping is deep golden brown and the filling is bubbling up around the edges and through any cracks in the crumble. The filling should look thick and jammy, not watery. Let it cool for at least 15 minutes before serving — I know, I know, this is torture when it smells this good, but this cooling time is crucial. It allows the filling to set up properly so you don't end up with cherry soup sliding all over your plate. The crumble topping will stay crispy on top while the filling thickens to that perfect spoon-coating consistency. That's it — you did it. But hold on, I've got a few more tricks that'll take this to another level...
Insider Tricks for Flawless Results
The Temperature Rule Nobody Follows
Here's where most home bakers sabotage their own success — they serve crumble straight from the oven or ice-cold from the fridge. Both are crimes against dessert. The sweet spot is serving it warm, around 30-40 minutes after baking. At this temperature, the filling has thickened to that perfect, spoon-coating consistency while the topping maintains its crispy integrity. A friend tried skipping this step once — let's just say it didn't end well. She served it immediately, and the filling was so runny it created a moat around her vanilla ice cream that looked like a crime scene. If you must serve it hot (and I get it, sometimes waiting is impossible), at least let it sit for 10 minutes so the filling can set up a bit. Your future self will thank you when you're not mopping cherry juice off your tablecloth.
Why Your Nose Knows Best
Your sense of smell is actually the best doneness indicator for this recipe. When the crumble first goes in the oven, you'll smell the butter and flour cooking — a rich, almost nutty aroma. As it nears completion, the scent transforms into something deeper and more complex. The brown sugar starts to caramelize, creating this butterscotch-like perfume that wafts through your kitchen. When you start smelling the cherries — that bright, fruity note cutting through the buttery richness — you're about 5 minutes from perfection. Most people rely on timers, but your nose knows when the topping has achieved that deep golden color and the filling is bubbling with enthusiasm. This is the moment when the Maillard reaction has worked its magic, creating hundreds of flavor compounds that make your crumble taste like it took all day instead of under an hour.
The 5-Minute Rest That Changes Everything
If you take nothing else from this recipe, remember this: never skip the cooling period. I know it's tempting to dig in immediately, especially when that aroma is driving you crazy and the ice cream is melting on the counter. But those five extra minutes of patience transform your dessert from good to legendary. During this time, the filling continues to thicken as the cornstarch reaches its full gelling potential. The topping sets up, becoming crispy instead of just warm and soft. More importantly, the flavors have a moment to meld and marry, creating that harmonious balance where no single element overpowers the others. Think of it like letting a fine wine breathe — you're allowing all the components to reach their full potential. Plus, serving it too hot means your ice cream melts into a puddle instead of creating those gorgeous rivers of cold cream running through the warm fruit. That contrast between hot and cold is one of the best parts of this dessert, and you miss it entirely if you rush.
Creative Twists and Variations
This recipe is a playground. Here are some of my favorite ways to switch things up:
The Bourbon Cherry Bomb
Add two tablespoons of good bourbon to the cherry filling along with the vanilla. The alcohol cooks off, leaving behind this smoky, vanilla-tinged complexity that makes people ask if you've been taking secret pastry classes. Use a bourbon you'd actually drink — the cheap stuff just tastes like regret. The bourbon pairs especially well with the brown sugar in the crumble, creating this butterscotch-bourbon flavor that's absolutely irresistible. This version has converted more bourbon-haters than I can count.
The Almond Dream
Replace half the flour in the crumble with almond flour, and add a quarter teaspoon of almond extract to the cherry filling. The almond flour adds this gorgeous nuttiness and creates a more tender, sandy texture in the topping. The almond extract amplifies the cherry flavor in a way that's subtle but addictive — it's like the cherries and almonds were always meant to be together. Serve this one to people who think they don't like fruit desserts and watch their minds change in real time.
The Spiced Winter Warmer
Add a quarter teaspoon each of cardamom and nutmeg to the crumble topping, and swap the cinnamon for a cinnamon stick steeped in the cherry filling. This version tastes like Christmas morning but works any time you want to feel cozy. The cardamom adds this exotic, almost citrusy note that plays beautifully with the cherries. It's like someone took all the best parts of holiday spices and made them play nice with summer fruit.
The Tropical Cherry Escape
Add half a cup of shredded coconut to the crumble topping and a tablespoon of rum to the cherry filling. The coconut toasts up into these crispy, golden bits that taste like candy. The rum adds depth without being obvious — people will know something special is happening but won't be able to put their finger on it. This version is dangerously good with coconut ice cream, creating this tropical-cherry fusion that shouldn't work but absolutely does.
The Chocolate Cherry Decadence
Add two tablespoons of cocoa powder to the crumble topping and a handful of dark chocolate chips scattered over the cherry filling before adding the topping. The cocoa powder makes the crumble taste like chocolate cookie crumbs, while the chocolate chips create these pockets of molten chocolate throughout. It's rich enough to serve in small portions but so delicious that people will go back for thirds. This is the version you make when you need to impress people who think fruit desserts are boring.
The Breakfast-Approved Version
Reduce the sugar by a third in both the filling and topping, add a tablespoon of ground flaxseed to the crumble, and serve it warm with Greek yogurt instead of ice cream. Suddenly it's a perfectly acceptable breakfast that tastes indulgent but won't send you into a sugar coma. The flaxseed adds omega-3s and creates extra-crispy bits in the topping. I've served this version to health-conscious friends who asked for the recipe, thinking it was some kind of breakfast crumble situation.
Storing and Bringing It Back to Life
Fridge Storage
Let the crumble cool completely, then cover tightly with plastic wrap or transfer to an airtight container. It'll keep for up to 4 days in the refrigerator, though honestly, it rarely lasts that long in my house. The topping will lose some of its crunch after the first day, but we've got a fix for that. Store it without the ice cream, obviously — nobody wants to deal with melted ice cream soup in their storage container. When you're ready to eat, portion out what you want rather than reheating the whole thing every time. Each reheat cycle makes the topping a little less crispy, so only reheat what you'll actually eat. If you notice the topping getting soft, don't panic — that's normal and totally fixable.
Freezer Friendly
This crumble freezes beautifully, which makes it perfect for dessert emergencies or when you want to impress unexpected guests. Let it cool completely, then wrap the entire dish (or individual portions) in a double layer of plastic wrap followed by a layer of aluminum foil. It'll keep for up to 3 months in the freezer, though I've never tested that limit because it always gets eaten within weeks. When you're ready to enjoy, thaw it overnight in the refrigerator, then reheat in a 350°F oven for about 15-20 minutes. The topping might need a little help to regain its crunch — just broil it for 1-2 minutes at the end, watching carefully so it doesn't burn.
Best Reheating Method
Forget the microwave — it turns the topping into a rubbery mess and does weird things to the filling. Instead, reheat individual portions in a 350°F oven for 10-12 minutes, or until warmed through. If you're in a hurry, you can microwave for 30-45 seconds just to take the chill off, then finish in a toaster oven or under the broiler for 2-3 minutes to crisp up the topping. Add a tiny splash of water before reheating — it steams back to perfection, preventing the filling from drying out. The goal is to recreate that fresh-from-the-oven experience: warm, comforting filling with a crispy, buttery topping that crackles under your spoon.