I’m going to start with a confession: the first time I attempted a banana pudding cheesecake, I set the oven to broil instead of bake and ended up with a caramelized disaster that smelled like burnt sugar and regret. That smoky fiasco forced me to go back to the drawing board, and after a week of trial, error, and a few midnight cravings, I finally nailed a version that makes the classic Southern banana pudding and New York‑style cheesecake shake hands in a perfect, creamy waltz. Imagine the buttery, crumbly Nilla Wafer crust hugging a silky, banana‑kissed filling that’s as light as a cloud but as rich as a chocolate truffle—this is the moment where comfort food meets gourmet ambition. I dare you to taste this and not go back for seconds, because the moment the first forkful hits your tongue, you’ll understand why this is hands down the best version you’ll ever make at home.
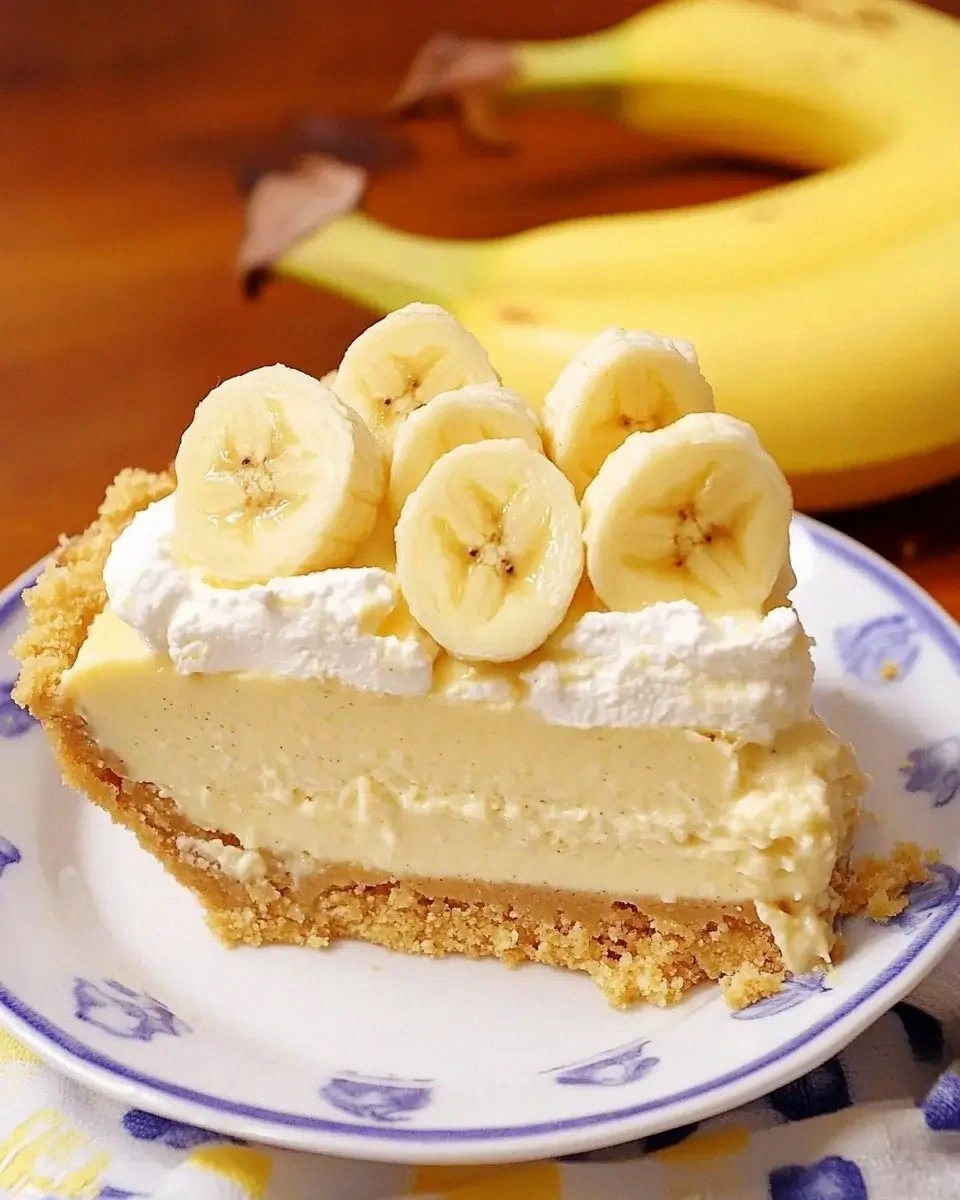
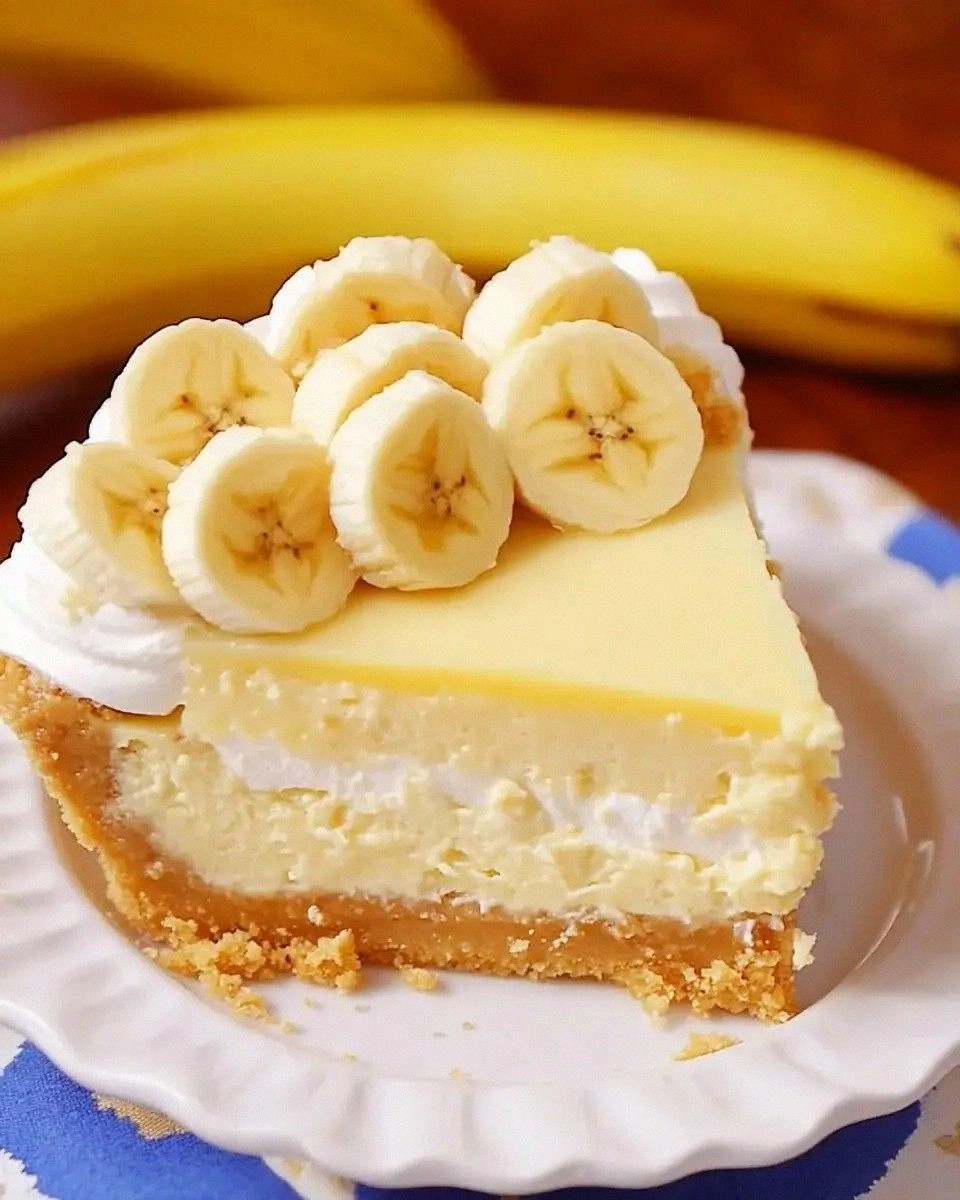
Picture yourself pulling this out of the oven, the whole kitchen smelling incredible, a sweet perfume of vanilla, banana, and a faint caramel note that whispers, “stay a little longer.” The top is a golden‑brown canvas, slightly cracked at the edges, inviting you to peek beneath the surface where a velvety layer of cheesecake rests, speckled with tiny banana slices that have softened into tender ribbons. When you cut into it, the slice holds its shape like a work of art, the crust staying firm while the filling yields with a gentle wobble—think of it as a custard that refuses to collapse under its own weight. If you’ve ever struggled with a wobbling banana pudding or a dry cheesecake, you’re not alone — and I’ve got the fix that turns those kitchen nightmares into a flawless dessert.
Most recipes get the balance between banana sweetness and cheesecake tang completely wrong. Some drown the cheese in sugar, others forget the crucial gelatin that gives the pudding its signature jiggle. Here’s what actually works: a double‑step baking method that first sets the crust, then gently bakes the filling in a water bath to keep every bite moist, and finally a quick chill that lets the flavors meld like old friends catching up. The secret ingredient? A dash of vanilla bean paste that adds depth without overwhelming the banana, and a splash of heavy cream that makes the texture buttery smooth, not grainy. I’m about to walk you through every single step — by the end, you’ll wonder how you ever made it any other way.
Okay, ready for the game‑changer? We’ll be using Nilla Wafers for the crust, but I’m also throwing in a pinch of sea salt to cut the sweetness just enough to make your palate sing. The banana layer isn’t just mashed fruit; I’m folding in a light custard made from egg yolks and sugar that sets the stage for the cheesecake to shine. And for the final flourish, a whipped topping that’s lightly sweetened and dusted with crushed wafers for that satisfying crunch. This next part? Pure magic. Stay with me here — this is worth it.
What Makes This Version Stand Out
- Taste: The banana flavor is bright yet mellow, balanced by a subtle tang from the cream cheese that never overpowers.
- Texture: A buttery crust, a custardy middle, and a silky cheesecake top create a three‑layer mouthfeel that’s unforgettable.
- Simplicity: Only a handful of pantry staples are needed, and the technique is straightforward enough for a weekend cook.
- Uniqueness: The water‑bath bake locks in moisture, giving the filling that signature “pudding‑like” jiggle.
- Crowd Reaction: Guests often claim they’ve never tasted anything like it, and the first bite usually earns a chorus of “more, please!”
- Ingredient Quality: Using real Nilla Wafers and ripe bananas makes a world of difference compared to generic substitutes.
- Cooking Method: The two‑stage bake prevents cracking and ensures an even set throughout the cheesecake.
- Make‑Ahead Potential: This dessert actually improves after a night in the fridge, as the flavors fully integrate.
Inside the Ingredient List
The Flavor Base
Bananas are the heart of this dessert, providing natural sweetness and that unmistakable aroma that says “summer in a bowl.” I always use overripe bananas—those with brown spots—because they’re sweeter and mash into a smoother puree, eliminating any grainy texture. If you skip the bananas, you’ll lose the signature flavor and end up with a plain cheesecake that feels out of place. As a swap, you can use frozen banana slices thawed and mashed; this actually intensifies the banana punch.
The Texture Crew
Cream cheese is the structural backbone, giving the filling its luxurious density while still allowing it to wobble like a proper pudding. Choose a full‑fat, block‑style cream cheese and let it soften at room temperature for at least 30 minutes; this prevents lumps and ensures a smooth blend. If you’re looking for a lighter version, substitute half the cream cheese with Greek yogurt, but expect a slightly tangier finish. The heavy cream adds richness and helps the custard set without becoming grainy—don’t skimp on it.
The Unexpected Star
A splash of vanilla bean paste may seem modest, but it adds depth that plain vanilla extract can’t match. The tiny specks of vanilla bean give a visual cue that this isn’t a shortcut dessert; it’s a crafted treat. If you don’t have vanilla bean paste, a teaspoon of high‑quality vanilla extract works, though you’ll miss the little flecks of green that look gorgeous when you slice the cheesecake. A pinch of sea salt is also crucial—it lifts the sweetness and balances the banana’s natural sugars.
The Final Flourish
A light dusting of crushed Nilla Wafers on top adds a contrasting crunch that makes each bite feel dynamic. The whipped topping, lightly sweetened with powdered sugar and a dash of cream, creates a fluffy cloud that sits atop the dense layers below, preventing the dessert from feeling heavy. For those who love a little extra decadence, drizzle a caramel sauce just before serving; the salty‑sweet combo elevates the whole experience. Finally, a garnish of fresh banana slices or a sprig of mint adds a pop of color that makes the plate Instagram‑ready.
Everything's prepped? Good. Let’s get into the real action…
The Method — Step by Step
Preheat your oven to 325°F (163°C). While the oven warms, line the bottom of a 9‑inch springform pan with parchment paper; this prevents the crust from sticking and makes removal effortless. I like to lightly grease the sides of the pan with butter, which adds a subtle richness to the final edge. Once the oven is ready, set a timer for the crust bake and get your crushed Nilla Wafers ready.
Kitchen Hack: Pulse the wafers in a food processor with a splash of melted butter for an ultra‑fine crumb that sticks together without extra sugar.Combine 2 cups crushed Nilla Wafers with ½ cup melted butter and a pinch of sea salt in a bowl. Stir until the mixture resembles wet sand, then press it firmly into the bottom of the prepared pan, creating an even layer about ½ inch thick. Use the bottom of a measuring cup to smooth the surface; this ensures a uniform crust that won’t crumble when you slice. Bake the crust for 10‑12 minutes, or until it turns a light golden hue and you can smell that buttery toasted aroma.
While the crust bakes, whisk together 1 ½ cups mashed ripe bananas, ½ cup granulated sugar, and 2 teaspoons vanilla bean paste in a medium bowl. The mixture should be glossy and slightly thick, the sugar beginning to dissolve into the banana puree. This is the moment where the banana flavor intensifies, so give it a quick taste and adjust with a splash more sugar if you like extra sweetness. Set the banana mixture aside; it will later be folded into the cheesecake base.
In a large mixing bowl, beat 24 oz (about 680 g) softened cream cheese until smooth, about 2‑3 minutes on medium speed. Gradually add 1 cup powdered sugar, making sure each addition is fully incorporated before adding the next. Once the sugar is fully blended, pour in ¾ cup heavy cream and continue beating until the mixture is light and airy, resembling a thick frosting.
Watch Out: Over‑mixing at this stage can incorporate too much air, leading to cracks once the cheesecake cools.Add 3 large egg yolks, one at a time, to the cream cheese mixture, beating just until combined after each addition. Then gently fold in the prepared banana puree, using a rubber spatula to preserve the airy texture. The batter should look glossy and slightly looser than a traditional cheesecake, which is exactly what we want for that pudding‑like wobble.
Prepare a water bath: place the springform pan inside a larger roasting pan, then pour hot (not boiling) water into the outer pan until it reaches halfway up the sides of the springform. This bain‑marie creates a gentle, even heat that prevents the edges from over‑cooking while the center stays creamy. Carefully pour the cheesecake batter over the pre‑baked crust, smoothing the top with a spatula.
Slide the whole assembly into the preheated oven and bake for 45‑55 minutes. You’re looking for the edges to be set and a slight wobble in the center—think of a firm jelly that jiggles when you nudge it. The top should be lightly golden, not browned, and you might hear a faint “hiss” as the water bath steams around the pan. Resist the urge to open the oven door too often; each peek can cause temperature drops that affect the set.
When the timer dings, turn off the oven, crack the door open just a crack, and let the cheesecake sit inside for another 15 minutes. This gradual cooling prevents sudden temperature shocks that cause cracks. Afterward, remove the springform pan from the water bath and let it cool completely on a wire rack, then refrigerate for at least 4 hours, preferably overnight.
While the cheesecake chills, whip 1 cup heavy cream with 2 tablespoons powdered sugar and a splash of vanilla until soft peaks form. Spread the whipped topping over the chilled cheesecake, then sprinkle the remaining crushed Nilla Wafers on top for that final crunch. If you’re feeling fancy, drizzle a thin ribbon of caramel sauce and garnish with thin banana slices for an extra pop of color.
Kitchen Hack: Chill the mixing bowl and beaters before whipping the cream; this speeds up the process and yields firmer peaks.Finally, release the springform pan, slice with a hot, wet knife (dip and wipe between cuts), and serve. The first bite should reveal a buttery crust, a silky banana‑infused cheesecake that jiggles just enough, and a fluffy whipped crown that melts into the layers. That sizzle when the knife meets the chilled surface? Absolute perfection. And now the fun part—watch your guests devour every slice and beg for the recipe.
That's it — you did it. But hold on, I've got a few more tricks that'll take this to another level...
Insider Tricks for Flawless Results
The Temperature Rule Nobody Follows
Never bake a cheesecake straight from the fridge; the batter needs to be at room temperature to avoid a dense, uneven set. Let the mixture sit for at least 30 minutes after mixing, which allows the fats to relax and the air bubbles to rise to the surface where they can escape. I once tried to skip this step, and the result was a cheesecake that felt like a rubber slab—hardly the dreamy texture we’re after. Keep an eye on the oven thermostat; a few degrees off can make the difference between a smooth surface and an unsightly crack.
Why Your Nose Knows Best
Your sense of smell is the ultimate timer for this cheesecake. When the crust turns a light amber and you catch that toasted butter scent, you know it’s ready to be lifted out of the oven. Similarly, as the cheesecake bakes, you’ll notice a subtle sweet‑vanilla perfume that intensifies just before the center stops firming up. Trust those aromatic cues more than the clock; they’re far more reliable than a generic 45‑minute rule.
The 5‑Minute Rest That Changes Everything
After the bake, let the cheesecake sit in the turned‑off oven with the door cracked for an extra five minutes. This gentle residual heat finishes the set without shocking the batter, which reduces the risk of cracks. Then move it to a wire rack for a quick cool‑down before refrigerating. Skipping this rest often leads to a surface that looks perfect but collapses once it hits the fridge.
Banana Prep Pro Tip
If you’re short on time, mash the bananas with a fork and then pass them through a fine sieve. This removes any fibrous bits and gives you a silky puree that integrates flawlessly into the batter. The result is a smoother texture that feels like a custard rather than a fruit‑laden mixture. I’ve tried both methods, and the sieved version always wins the “smoothest bite” contest.
Whipped Topping Perfection
When whipping the cream, start on low speed for the first 30 seconds, then crank up to high. This prevents the cream from turning buttery too quickly. Add the powdered sugar gradually; this keeps the sweetness level even and avoids a grainy finish. For an extra lift, fold in a tiny pinch of cream of tartar—it stabilizes the peaks without making the topping taste metallic.
Creative Twists and Variations
This recipe is a playground. Here are some of my favorite ways to switch things up:
Chocolate Banana Fusion
Swap half of the crushed Nilla Wafers for chocolate graham crackers, and melt ¼ cup dark chocolate into the banana mixture before folding it in. The result is a decadent, mocha‑kissed cheesecake that satisfies both chocolate lovers and banana fans. Serve with a dusting of cocoa powder for an elegant finish.
Tropical Coconut Twist
Replace the heavy cream with coconut cream, and add ¼ cup toasted shredded coconut to the crust. The coconut aroma pairs beautifully with banana, evoking a beach‑side sundae. Garnish with a drizzle of pineapple glaze for a truly island‑inspired dessert.
Nutty Caramel Crunch
Fold in ½ cup chopped toasted pecans into the batter and drizzle caramel sauce over the top before chilling. The nuts add a buttery crunch that contrasts the silky interior, while the caramel adds a salty‑sweet layer that deepens the flavor profile. This version is a hit at fall gatherings.
Coffee‑Infused Delight
Dissolve 1 tablespoon instant espresso powder in the heavy cream before adding it to the cream cheese mixture. The coffee notes enhance the banana’s natural sweetness, creating a sophisticated flavor that’s perfect for brunch. Top with a dusting of cocoa powder for a mocha‑like finish.
Mini Cheesecake Bites
Divide the batter among a muffin tin lined with paper liners for individual servings. These bite‑size versions bake faster—about 25 minutes—and are perfect for potlucks or dessert bars. Serve each mini with a tiny dollop of whipped topping and a single crushed wafer on top for a polished look.
Storing and Bringing It Back to Life
Fridge Storage
Cover the cheesecake loosely with plastic wrap or store it in an airtight container and keep it in the refrigerator for up to 5 days. The flavors continue to meld, so the second day often tastes even better than the first. If you notice a thin film forming on the surface, simply brush it off with a paper towel before serving.
Freezer Friendly
Wrap the entire cheesecake (still in the springform pan) in a double layer of foil, then place it in a freezer‑safe bag. It will keep for up to 2 months. To thaw, move it to the fridge overnight; once softened, add a splash of milk or water to the surface and gently stir to revive any lost moisture.
Best Reheating Method
When you’re ready to serve a slice that’s been in the fridge for a while, warm the plate in the oven at 200°F for 5 minutes, then place the slice on the hot plate. Add a tiny splash of water to the edges of the cheesecake and cover with foil for 2‑3 minutes; the steam will bring back that luscious, creamy texture without cooking it further. This trick rescues any dry edges and makes each bite feel freshly baked.