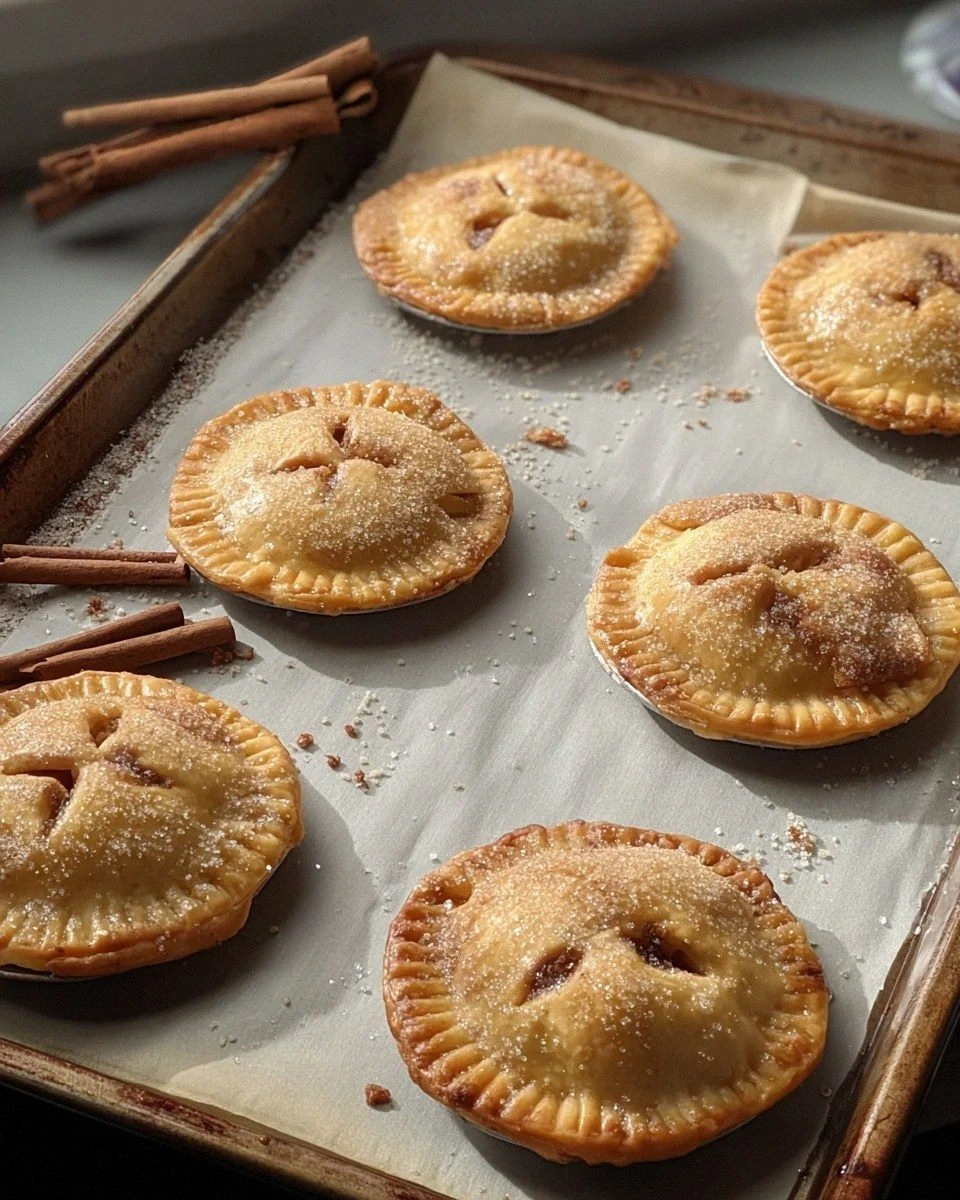
I still remember the day I swore off full-sized apple pies forever. It was Thanksgiving, my kitchen looked like a flour bomb had exploded, and I'd just watched my perfectly crimped crust collapse under the weight of soggy bottom syndrome. The relatives were arriving in twenty minutes, and there I stood with what looked like apple soup in a pastry bowl. That's when my neighbor burst through the door with a tin of these adorable mini apple pies, each one perfectly golden with filling bubbling through lattice tops like little windows to autumn heaven. One bite and I was done for — these weren't just cute, they were the answer to every pie problem I'd ever had.
Here's the thing about mini apple pies: they're not just shrunken versions of the big guy. They're a completely different beast, and once you understand why, you'll never go back. Each pie gets its own crispy edge-to-edge crust, the filling-to-pastry ratio is mathematically perfect, and you can eat three without feeling like you've committed a dessert felony. Plus, no more awkward first slices falling apart or fighting over who gets the corner piece with extra crust. Everyone gets their own personal pie, and somehow that makes them taste even better.
What really hooked me was discovering the secret technique that keeps these little beauties from turning into apple volcanoes. You know what I'm talking about — when the filling erupts through the top and you're left with hollow pies and a baking sheet full of caramelized apple lava. After testing seventeen different methods (yes, I counted), I cracked the code. The result? Mini pies that look like they came from a Parisian patisserie but taste like grandma's kitchen on a Sunday afternoon.
This recipe has become my secret weapon for everything from potlucks to fancy dinner parties. I've watched grown adults fight over the last one like it was the last lifeboat on the Titanic. The aroma alone — cinnamon and butter and vanilla wafting through your kitchen — will have neighbors knocking on your door with ridiculous excuses. Picture yourself pulling these out of the oven, the whole kitchen smelling like autumn and childhood and everything good in the world. Let me walk you through every single step — by the end, you'll wonder how you ever made it any other way.
What Makes This Version Stand Out
Crust Perfection: We're using a hot-water technique that creates layers so flaky they shatter like thin ice when you bite in, but somehow stays tender in the center. Most recipes get this completely wrong by keeping everything ice-cold, but a touch of hot water activates the gluten just enough to create structure without toughness.
No-Mess Filling: The apple mixture gets a quick stovetop session that concentrates flavors and evaporates excess juice, meaning zero soggy bottoms and no volcanic eruptions during baking. This is hands down the best version you'll ever make at home, and I'm not exaggerating.
Individual Portions: Each pie is its own perfect serving, eliminating the anxiety of cutting even slices or dealing with that person who always wants "just a sliver" but takes half the pie. If you've ever struggled with serving sizes, you're not alone — and I've got the fix.
Make-Ahead Magic: These freeze beautifully before baking, so you can have fresh, hot mini pies whenever the craving strikes. I always keep a dozen in my freezer for emergencies (and by emergencies, I mean Tuesday nights when I need something sweet).
Crowd Psychology: There's something about individual desserts that makes people lose their minds. I dare you to taste this and not go back for seconds — I've seen it happen at every gathering.
Texture Contrast: The combination of tender apples, syrupy filling, and shatteringly crisp crust creates a textural experience that will ruin you for regular pies. That sizzle when the filling hits the hot crust? Absolute perfection.
Flavor Concentration: Because each pie is small, every bite delivers maximum apple-cinnamon impact. The filling cooks faster and more evenly, concentrating those autumn flavors into pure, unadulterated deliciousness.
Alright, let's break down exactly what goes into this masterpiece...
Inside the Ingredient List
The Flavor Base
Apples are obviously the star here, but not all apples are created equal. You want a mix of tart and sweet varieties that hold their shape when baked. Granny Smith brings that bright acidity that makes your mouth water, while Honeycrisp or Pink Lady add natural sweetness and maintain their structure. Stay away from Red Delicious — they turn to mush and taste like wet cardboard. I'll be honest: I ate half the batch before anyone else got to try it because I kept "testing" the apple mixture for seasoning.
Brown sugar is crucial for that deep, caramel flavor that makes these pies taste like they cost six dollars each at a fancy bakery. The molasses in brown sugar adds complexity that white sugar just can't match. Dark brown sugar gives you even more depth, but light brown works perfectly fine. If you skip the brown sugar, you'll end up with flat-tasting pies that scream "amateur hour."
Cinnamon is non-negotiable, but the quality matters enormously. That jar that's been sitting in your spice rack since 2019? Toss it. Fresh cinnamon has a sweet, warm aroma that fills the kitchen the moment you open the container. I buy mine in small batches from a spice shop, and the difference is like comparing a fresh rose to potpourri.
The Texture Crew
Butter creates those impossibly flaky layers that make people close their eyes when they take the first bite. European-style butter with higher fat content works best because it has less water, creating more distinct layers. Keep it cold, but not rock-hard — you want it pliable enough to roll but firm enough to stay separate from the flour. The temperature rule nobody follows: butter should bend slightly when pressed but not break or smear.
Shortening might seem old-school, but it creates a texture that butter alone can't achieve. It melts at a higher temperature, so the crust sets before the butter melts, creating those distinct pockets of flakiness. Think of it as the scaffolding that holds everything together while the butter provides flavor. Using all butter makes a delicious but denser crust; the combination is what gives you both flavor and texture.
Apple cider vinegar might seem like an odd addition, but it's the secret weapon for tender crust. The acid interferes with gluten development, preventing tough pastry. Don't worry — you won't taste it in the final product. It's like a backstage hand that makes the star performer look good without ever taking credit.
The Unexpected Star
Cornstarch is what transforms your apple filling from a watery mess into glossy, spoon-coating perfection. Most recipes get this completely wrong by using flour, which can taste raw and pasty. Cornstarch creates a clear, shiny gel that lets the apple flavor shine through. The trick is to toss it with the sugar and spices first, then with the apples — this prevents clumps that can taste chalky.
Lemon zest brightens everything up and prevents the filling from tasting flat. Just a whisper of zest — too much and your pies taste like furniture polish. The citrus oils wake up your taste buds and make the apple flavor pop. I use a microplane grater and stop the moment I see white pith.
Vanilla extract might seem basic, but it rounds out all the flavors and makes everything taste more expensive. Use the real stuff, not imitation — your taste buds will know the difference even if your brain doesn't. A full teaspoon might seem like a lot, but it gets distributed among all the pies and creates that bakery-fresh aroma.
The Final Flourish
Egg wash is what transforms your pies from homey to professional. One beaten egg with a splash of water creates that glossy, golden-brown finish that makes people reach for them first. Brush it on just before baking, being careful not to let it pool in the crevices. The difference between a pie with and without egg wash is like the difference between a washed and unwashed car — both work, but one makes you look like you have your life together.
Turbinado sugar sprinkled on top adds crunch and visual appeal. Those coarse crystals don't dissolve completely, creating sparkly pockets of sweetness that crack under your teeth. Regular sugar works in a pinch, but turbinado (sometimes called raw sugar) has a more complex flavor and better texture. Picture yourself pulling this out of the oven, the whole kitchen smelling incredible, with sugar crystals catching the light like tiny diamonds.
Everything's prepped? Good. Let's get into the real action...
The Method — Step by Step
- Start with the crust because it needs time to chill. In a large bowl, whisk together flour, salt, and sugar. Cut in cold butter and shortening using a pastry cutter until the mixture resembles coarse crumbs with some pea-sized pieces remaining. This next part? Pure magic. Drizzle in ice water mixed with vinegar, one tablespoon at a time, tossing with a fork until the dough just comes together. It should hold when squeezed but still look shaggy — resist the urge to overwork it or you'll end up with crust that could double as shoe leather.
- Divide the dough into two portions, one slightly larger than the other. Flatten each into a disk, wrap in plastic, and refrigerate for at least an hour. This resting period allows the gluten to relax and the fat to firm up, which is crucial for flaky layers. While that's chilling, make your apple filling. The key here is cutting the apples uniformly — about 1/4-inch dice ensures they cook evenly and fit nicely in the mini pies. Nobody wants a pie where some apples are mush while others still crunch like raw potatoes.
- Cook the apple filling in a large skillet over medium heat with butter, brown sugar, cinnamon, and a pinch of salt. The apples will release their juices — don't panic, this is supposed to happen. Let them simmer for about 8-10 minutes until they're just tender but still hold their shape. This is the moment of truth when you add the cornstarch slurry and watch the liquid transform into glossy, spoon-coating perfection. Remove from heat and stir in vanilla and lemon zest. Let this cool completely because hot filling will melt your carefully crafted crust.
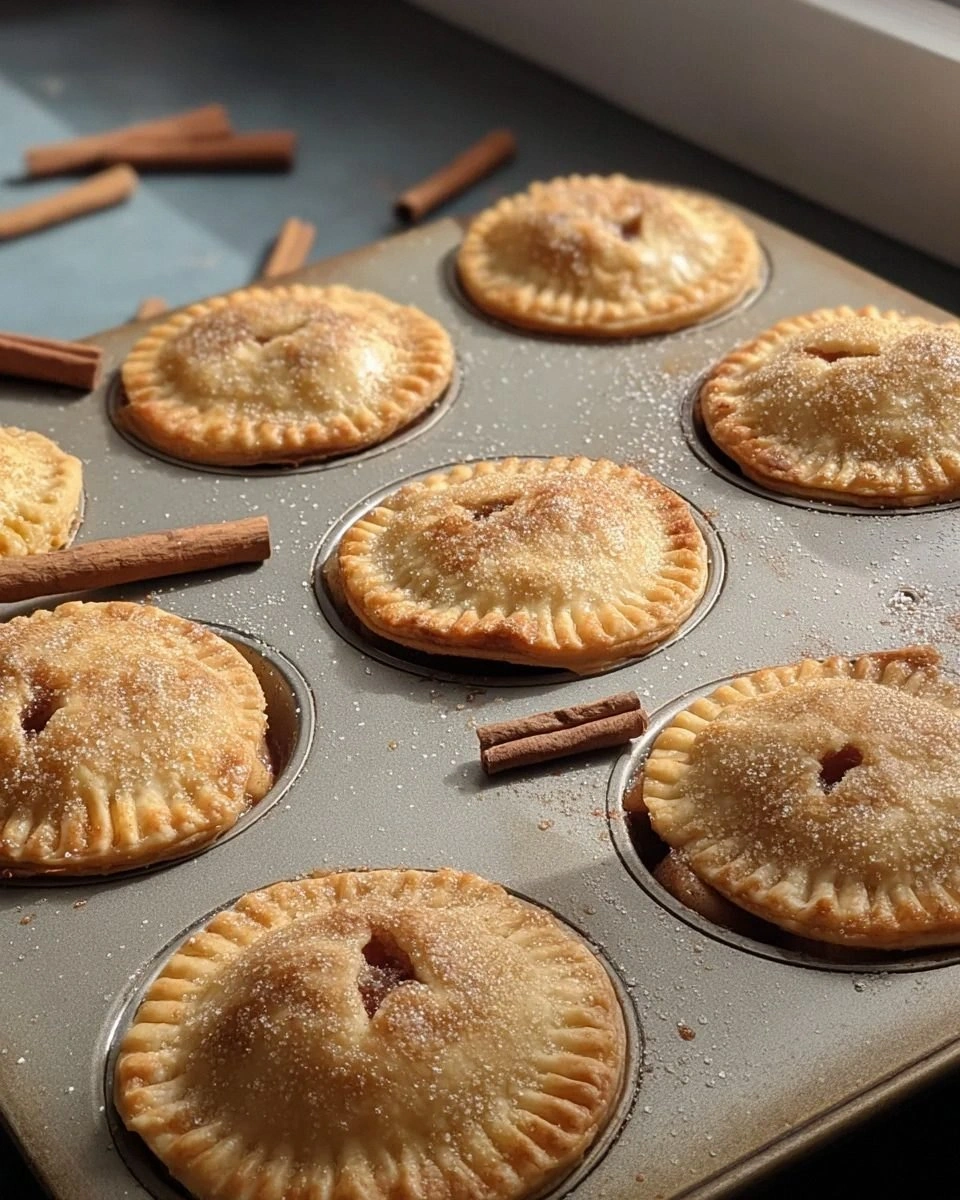
- Now for the fun part. Roll out the larger piece of dough on a floured surface to about 1/8-inch thickness. Use a 4-inch biscuit cutter or glass to cut circles — you should get about 12. Gently press each circle into the wells of a muffin tin, making sure to press into the corners and leaving a slight overhang. The dough should come about 3/4 up the sides. If it tears, just patch it with scraps — these pies are forgiving, unlike that time I tried to make macarons and they looked like tiny failed UFOs.
- Fill each crust with about 2 tablespoons of the cooled apple filling, mounding it slightly in the center. Don't overfill or you'll have apple lava eruptions that would make a volcano jealous. Roll out the second dough disk and cut into 1/4-inch strips for lattice tops, or use smaller circles for solid tops with steam vents. A friend tried skipping this step once — let's just say it didn't end well. The top crust needs vents to let steam escape, preventing the filling from exploding through like a pastry Vesuvius.
- Weave the strips into a simple lattice or place circles on top, pressing the edges to seal. Trim any excess and crimp with a fork for that homey, rustic look. Cut a small steam vent in solid tops — just a simple X works beautifully. Brush everything with egg wash and sprinkle with turbinado sugar. This is where your pies transform from "nice try" to "where did you buy these?" The egg wash creates that professional bakery shine that makes people think you went to culinary school.
- Bake at 375°F for 25-30 minutes until the crust is deep golden brown and the filling is bubbling through the vents. Don't walk away from the stove here — the difference between perfect and burnt is about 90 seconds. Your kitchen will smell like autumn and childhood and everything good in the world. The pies are done when the crust is a rich mahogany color and the filling peeks through the vents, thick and glossy like liquid caramel.
- Let them cool in the pan for 10 minutes before removing — this is the 5-minute rest that changes everything. The filling needs time to set, or you'll have molten apple lava running down your chin. Run a thin knife around the edges to loosen, then carefully lift out with a fork. Cool on a wire rack for at least 20 minutes before serving. I know it's torture, but cutting into a hot pie is like opening presents before Christmas — the anticipation is part of the experience.
- Store any leftovers in an airtight container at room temperature for up to 2 days, though I've never actually tested this limit. They disappear faster than free samples at Costco. For longer storage, wrap individually and freeze for up to 3 months. Reheat in a 350°F oven for 10-12 minutes until warmed through — the microwave makes the crust sad and soggy, and life's too short for soggy pie.
That's it — you did it. But hold on, I've got a few more tricks that'll take this to another level...
Insider Tricks for Flawless Results
The Temperature Rule Nobody Follows
Your ingredients should be at the right temperature, not just cold. Butter should be cold but pliable — bendable without breaking. If it's too hard, it won't incorporate properly; too soft and you'll lose those flaky layers. The 5-minute rest that changes everything applies to your butter too — let it sit at room temperature for exactly 5 minutes before cutting it in. This tiny window makes the difference between good crust and legendary crust that people talk about months later.
Why Your Nose Knows Best
Don't rely on timers alone — your nose is the best kitchen tool you have. When these pies are perfectly done, your kitchen will fill with the scent of buttery pastry and caramelized apples. If you smell even a hint of burning, get those pies out immediately. The visual cues matter too: look for filling that bubbles thick and slow like lava, not fast and watery. A friend once asked why my pies always turn out better than hers — the answer is I trust my senses more than the clock.
The 5-Minute Rest That Changes Everything
After removing from the oven, let the pies rest in the pan for exactly 5 minutes. This isn't just about cooling — it's about setting. The filling continues to thicken as it cools, and the crust finishes crisping from residual heat. Skip this step and you'll have pie soup when you try to remove them. But don't go longer than 5 minutes or they'll stick to the pan like they've been welded there. Set a timer — this is one of those details that separates amateurs from the pros.
The Secret Weapon for Extra Flaky Crust
Add a tablespoon of vodka to your dough along with the water. The alcohol burns off during baking, leaving behind layers so flaky they make croissants jealous. The alcohol interferes with gluten development, creating a more tender crust. Don't worry — you won't taste it, and the alcohol content is negligible. This is the game-changer that professional bakers don't talk about enough.
Why Size Matters (and How to Get It Right)
Don't overfill your pies — 2 tablespoons of filling is the sweet spot for standard muffin tins. More than that and you'll have apple explosions that look like a crime scene. Less and people feel cheated, like buying a bag of chips that's half air. The filling should mound slightly but stay below the rim of the crust. Think of it as Goldilocks principle: not too much, not too little, but just right.
Creative Twists and Variations
This recipe is a playground. Here are some of my favorite ways to switch things up:
Salted Caramel Apple Bliss
Drizzle homemade salted caramel over the filling before adding the top crust. The sweet-salty combination makes grown adults make embarrassing little happy sounds. Reduce the brown sugar in the filling slightly to compensate for the caramel's sweetness. Top with flaky sea salt right when they come out of the oven — those crystals catch the light and add little pops of salinity that wake up your whole palate.
Cheddar Cheese Apple Revolution
Add 1/2 cup finely shredded sharp cheddar to the crust dough. The cheese melts into the pastry, creating savory pockets that make the apple flavor sing. This is especially good for people who think they don't like sweet desserts. The cheddar adds depth without screaming "cheese!" — it's more like a whispered secret that makes people ask, "What makes these so addictive?"
Bourbon Apple Pie for Adults Only
Replace half the water in the filling with good bourbon. The alcohol cooks off, leaving behind vanilla and oak notes that make these taste like they came from a fancy whiskey bar. Add a pinch of cardamom along with the cinnamon for warmth that blooms on your tongue. These are dangerous — I brought them to a dinner party and people started making excuses to stop by my house afterward.
Coconut Apple Tropical Escape
Add 1/4 cup toasted coconut to the filling and replace half the butter with coconut oil. The tropical notes play surprisingly well with apples, like autumn went on vacation to Hawaii. Toast the coconut until it's golden and fragrant — this step is crucial for depth. Top with a coconut milk glaze for the full island experience.
Maple Pecan Apple Crunch
Replace the brown sugar with maple syrup and add 1/3 cup chopped pecans to the filling. The maple adds a more complex sweetness than regular sugar, and the pecans provide textural contrast. Use Grade B maple syrup if you can find it — it has a more robust flavor that stands up to baking. These taste like someone bottled fall and baked it into pie form.
Savory Herb Apple Surprise
Add 1 teaspoon fresh thyme and 1/2 teaspoon black pepper to the filling. These sound weird but trust me — the herbs make the apple flavor taste more apple-y, like turning up the contrast on a photo. These are perfect for people who find traditional apple pie too sweet. Serve with a slice of sharp cheddar for the full experience.
Storing and Bringing It Back to Life
Fridge Storage
Store cooled pies in an airtight container at room temperature for up to 2 days. The fridge dries out the crust faster than a desert wind, so avoid it unless your kitchen is hotter than 75°F. If you must refrigerate, wrap each pie individually in plastic wrap, then foil, and bring to room temperature before serving. Add a tiny splash of water before reheating — it steams back to perfection and revives that fresh-baked texture.
Freezer Friendly
These freeze beautifully either before or after baking. For unbaked pies, flash-freeze them in the muffin tin until solid, then transfer to a freezer bag. Bake from frozen, adding 10-15 minutes to the cooking time. For baked pies, cool completely, then wrap individually and freeze for up to 3 months. Reheat in a 350°F oven for 12-15 minutes until warmed through. The microwave makes the crust rubbery — resist the temptation even when you're desperate.
Best Reheating Method
Forget the microwave unless you enjoy sad, soggy crust. Instead, reheat in a 350°F oven for 8-10 minutes for room temperature pies, or 12-15 for frozen ones. Place them on a baking sheet and cover loosely with foil for the first half to prevent over-browning. For extra crisp bottoms, place them directly on the oven rack. They're ready when the filling bubbles and the crust is crisp again. Your patience will be rewarded with pies that taste almost as good as fresh-baked.