Picture this: the kitchen clock reads 2:17 a.m., the fridge light flickers, and you’re staring at a half‑empty box of Oreos while the sweet tooth in you is louder than your alarm. I had just finished a marathon of binge‑watching sitcoms, and the only thing that could rescue me from the post‑movie slump was something that screamed “dessert” louder than the theme song of my favorite show. I grabbed the cookie box, a tub of cream cheese, and a handful of pantry staples, and what followed was a culinary revelation that turned a simple craving into a midnight masterpiece. I dare you to taste this and not go back for seconds, because once you experience the velvety bite of these Oreo No‑Bake Cheesecake Cups, you’ll find yourself plotting your next late‑night dessert session. I’ll be honest — I ate half the batch before anyone else got to try it, and I still have a second cup in the freezer. If you’ve ever struggled with a dessert that feels like a compromise between cookie and cheesecake, you’re not alone, and I’ve got the fix that will blow your mind and satisfy that sweet spot in your stomach.
What Makes This Version Stand Out
I’ve tested countless cheesecake variations, and this one stands out for its flawless balance of flavors, textures, and convenience. Below are the key reasons why this recipe eclipses every other Oreo‑based dessert you’ve tried.
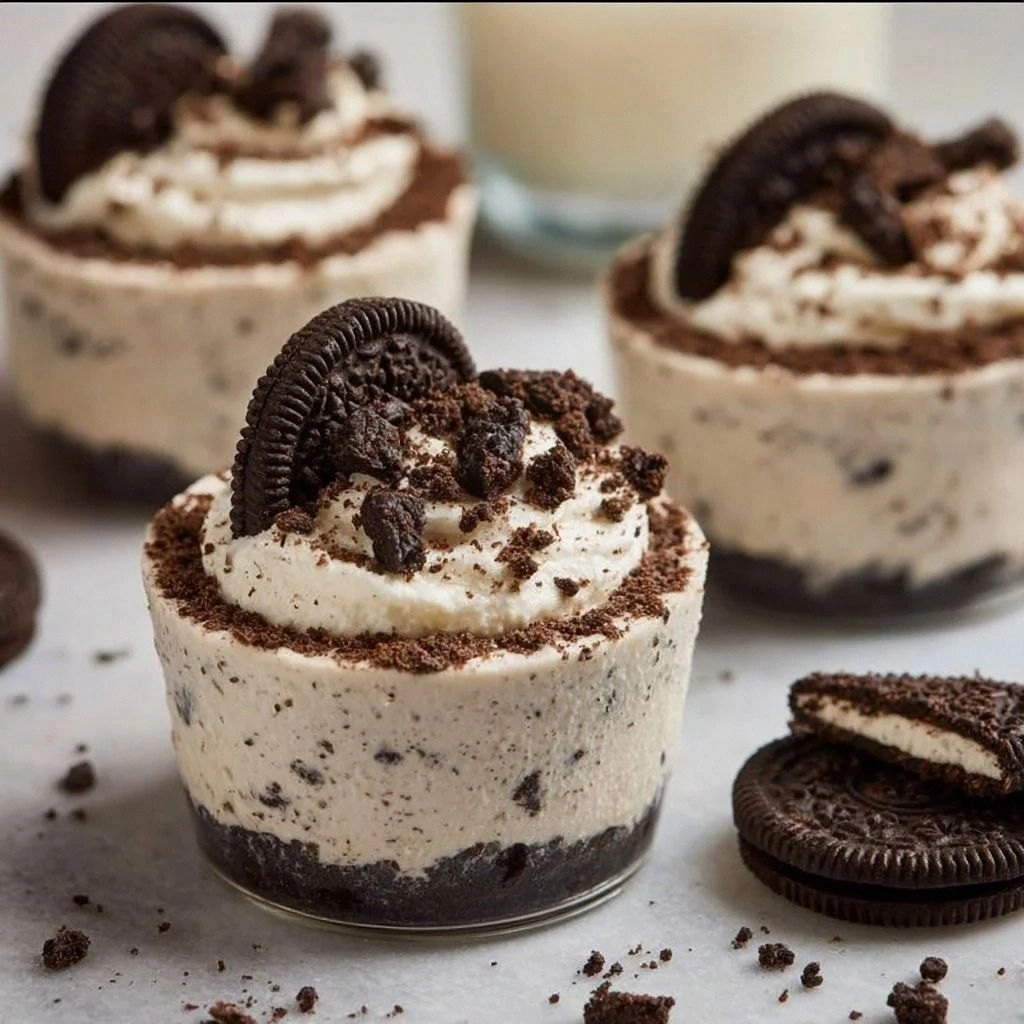
- Texture: The crunchy Oreo base contrasts perfectly with the silky, mousse‑like filling, creating a mouthfeel that feels like a party in every bite.
- Flavor: The subtle vanilla undertone lifts the richness of the cream cheese, while the crushed Oreos add a caramelized chocolate whisper.
- No‑Bake: Forget the oven; this recipe is all about speed, making it ideal for spontaneous gatherings or a quick treat after a long day.
- Make‑Ahead: The cups can be assembled a day ahead, allowing you to focus on other tasks while the cheesecake sets in the fridge.
- Portion Control: Individual cups mean you can serve the perfect amount to guests without the worry of leftovers or waste.
- Customization: Swap out the Oreos for your favorite cookie, or add a splash of espresso for a mocha twist.
- Visual Appeal: The layered look of cookie crumbs, creamy filling, and chocolate drizzle makes for Instagram‑ready dessert.
- Kid‑Friendly: Kids love the cookie crunch, while adults appreciate the sophisticated cheesecake flavor.
Alright, let’s break down exactly what goes into this masterpiece. The next section will guide you through each ingredient group, explaining why each component matters and what happens if you skip it.
Inside the Ingredient List
The magic of this dessert lies in its carefully selected ingredients. Think of each group as a role in a play: the flavor base sets the stage, the texture crew provides the drama, the unexpected star adds surprise, and the final flourish ties everything together.
The Flavor Base
Crushed Oreos: The heart of the dessert. Their buttery chocolate flavor forms the foundation of each cup, creating a cookie crust that’s both crunchy and slightly sweet. If you skip the Oreos, you lose the signature cookie‑cheesecake hybrid and end up with a plain cream cheese mousse.
Vanilla Extract: A dash of vanilla lifts the richness of the cream cheese, adding a subtle aroma that balances the sweetness. A substitution of almond extract works, but it will change the flavor profile significantly.
The Texture Crew
Cream Cheese: Provides the silky, tangy base of the filling. Its high fat content gives the cheesecake its luxurious mouthfeel. If you use low‑fat cream cheese, the texture becomes thin and watery, and the dessert will not set properly.
Heavy Cream: Adds creaminess and helps the mixture set into a firm yet airy consistency. Replacing it with half‑and‑half reduces richness and can result in a less stable structure.
Powdered Sugar: Sweetens the filling while dissolving smoothly, avoiding a gritty texture. If you substitute granulated sugar, it won’t dissolve completely, leaving a sandy feel in the cheesecake.
The Unexpected Star
Chocolate Chips: These add a glossy, glossy chocolate layer on top, creating a visual contrast and a burst of flavor with each bite. If omitted, the dessert loses its classic chocolate‑cheesecake look and a touch of indulgence.
The Final Flourish
Butter: Butter is used to toast the crushed Oreos, giving them a slightly caramelized flavor and a deeper color. Without butter, the cookies remain raw and the flavor is flat.
Pinch of Salt: Enhances all the flavors, cutting through the sweetness and brightening the overall taste. Skipping salt can leave the dessert tasting overly sweet.
Everything’s prepped? Good. Let’s get into the real action and bring this dessert to life.
The Method — Step by Step
- Toast the Oreos: In a medium skillet over medium heat, melt the butter until foamy. Add the crushed Oreos and stir constantly for 2–3 minutes until they turn a deep golden brown and release a fragrant, caramelized aroma. This step is crucial; the toasted flavor elevates the entire dessert. Keep the heat steady to avoid burning the crumbs. Once done, transfer the mixture to a bowl and let it cool to room temperature. This will prevent the cream cheese from melting prematurely in the next step.
- Blend the Creamy Core: In a blender or food processor, combine the cream cheese, heavy cream, powdered sugar, vanilla extract, and a pinch of salt. Blend on high until the mixture is completely smooth and glossy. Watch the texture; it should be thick enough to hold its shape when spooned but still pourable. If it’s too thick, add a splash of milk to reach the desired consistency. This is the moment of truth, where the creaminess of the cheesecake takes center stage. Don’t rush; the smoother it is, the better it will set.
- Layer the Cups: Line a 12‑cup muffin tin with paper liners. Spoon a tablespoon of the toasted Oreo crumbs into each liner, pressing down gently to form a uniform base. Then, carefully pour the cream cheese mixture over the crumbs, filling each cup about two‑thirds full. The filling should sit just above the crumb line. This layering creates the signature cookie‑cheesecake effect. If the cups start to wobble, tap the tin lightly to settle the mixture.
- Refrigerate: Place the assembled cups in the refrigerator for at least 3 hours, or overnight for a firmer set. During this time, the filling will thicken into a luscious, firm cheesecake consistency. Check the cups after 2 hours; they should be firm enough to hold their shape without sagging. The refrigerator acts as the unsung hero, turning a simple mixture into a decadent dessert. Keep the cups covered with plastic wrap to prevent them from absorbing fridge odors.
- Add the Chocolate Drizzle: In a small saucepan, melt the chocolate chips over low heat, stirring constantly until smooth. Allow the chocolate to cool slightly so it doesn’t melt the cheesecake. Drizzle the chocolate over the set cups, creating a glossy, decadent finish. If you prefer a thicker chocolate layer, simply pour more melted chocolate. This final flourish adds visual appeal and a rich chocolate bite that balances the cookie and cream flavors.
- Optional Garnish: Top each cup with a dusting of powdered sugar or a few fresh berries for added color and freshness. For a more indulgent twist, add a dollop of whipped cream. The garnish not only enhances the look but also adds a contrasting texture or burst of flavor. Serve immediately or keep refrigerated until ready to enjoy.
That’s it — you did it. But hold on, I’ve got a few more tricks that will take this to another level. Let’s dive into insider tips that will ensure every cup is a masterpiece.
Insider Tricks for Flawless Results
Even a simple recipe can be elevated with a few extra steps. Below are my top insider tricks that guarantee a silky texture, balanced flavor, and a dessert that impresses every guest.
The Temperature Rule Nobody Follows
Cool the Oreo Crumbs: After toasting, let the crumbs cool completely before adding them to the cups. Warm crumbs can melt the cream cheese mixture, causing it to become runny. I once tried this and the cups collapsed like a house of cards. Keep them at room temperature for at least 10 minutes.
Why Your Nose Knows Best
Aroma Check: While toasting the Oreos, keep a close eye on the scent. When the cookies start to smell like toasted chocolate, you’re ready. A burnt smell means you’re overcooking, which will ruin the flavor profile. Trust your nose; it’s the best judge of flavor.
The 5‑Minute Rest That Changes Everything
Let the Filling Set: Once the cups are in the fridge, give them a 5‑minute rest before serving. This allows the cheesecake to firm up slightly, making it easier to scoop or spoon without it spilling. I’ve seen people try to serve immediately and end up with a mess. The brief rest makes all the difference.
The Sweet‑Savory Balance
Add a Pinch of Sea Salt: A tiny pinch of sea salt on top of the chocolate drizzle amplifies the sweetness and gives the dessert a refined finish. I once added too much and it tasted like a salty candy bar; keep it minimal.
The Visual Appeal Trick
Layering Technique: When pouring the cream cheese mixture, use a spoon to create a gentle swirl that mimics the look of a classic cheesecake. This not only looks appealing but also ensures each cup has a uniform flavor distribution. A straight pour can result in a layered look that’s less attractive.
With these insider tricks in your arsenal, you’ll be able to create Oreo No‑Bake Cheesecake Cups that look as stunning as they taste. Now let’s explore some creative twists that can transform this classic into something entirely new.
Creative Twists and Variations
This recipe is a playground. Here are some of my favorite ways to switch things up:
Chocolate‑Mint Oreo Cups
Add a few drops of peppermint extract to the cream cheese mixture for a refreshing minty undertone. Top with crushed mint chocolate Oreos for an extra layer of flavor. This variation is perfect for summer parties and offers a cool contrast to the rich base.
Red Velvet Oreo Cheesecake
Stir a tablespoon of red velvet cake mix into the cream cheese blend for a subtle cocoa flavor and striking color. Replace the chocolate chips with dark chocolate for a sophisticated finish. This version is great for Halloween or Valentine’s Day celebrations.
Espresso‑Infused Cups
Add a shot of espresso or a tablespoon of instant coffee to the cream cheese mixture for a coffee‑kissed flavor. Pair with coffee‑crushed Oreos for a double espresso punch. This variation is ideal for brunches or late‑night cravings.
Berry‑Burst Variation
Fold fresh blueberries or raspberries into the cream cheese mixture before pouring. Top with a drizzle of raspberry jam and a few whole berries. The bright fruit notes add a fresh, tart contrast to the creamy sweetness.
Almond Crunch Cups
Swap the Oreos for crushed almond biscotti or almond cookies for a nutty crunch. Add a splash of almond extract to the filling for extra depth. This variation offers a delightful crunch and a nutty aroma that pairs well with the creamy base.
No matter which variation you choose, the core technique remains the same. These tweaks allow you to tailor the dessert to your mood, the season, or your guests’ preferences.
Storing and Bringing It Back to Life
Storing these cups properly ensures they stay fresh and delicious for days. Here’s how to keep them at their best.
Fridge Storage
How to Store: After setting, cover each cup with plastic wrap or store them in an airtight container. Keep them in the refrigerator for up to 3 days. The cold environment maintains the firm texture and prevents spoilage. Avoid placing them near strong‑flavored foods to keep their distinct taste.
Freezer Friendly
Freezing Tips: Freeze the cups in a single layer on a parchment‑lined tray for 1–2 hours, then transfer to a freezer bag. They can be stored for up to 2 weeks. When ready to serve, let them thaw in the refrigerator for 4–6 hours or at room temperature for 30 minutes. This method preserves the creamy texture.
Best Reheating Method
Reheating Steps: To revive a frozen cup, add a tiny splash of water to the bottom of the cup before microwaving on low for 30–45 seconds. The water steams the cheesecake, restoring its silky mouthfeel. Avoid overheating, as it can cause the filling to separate.