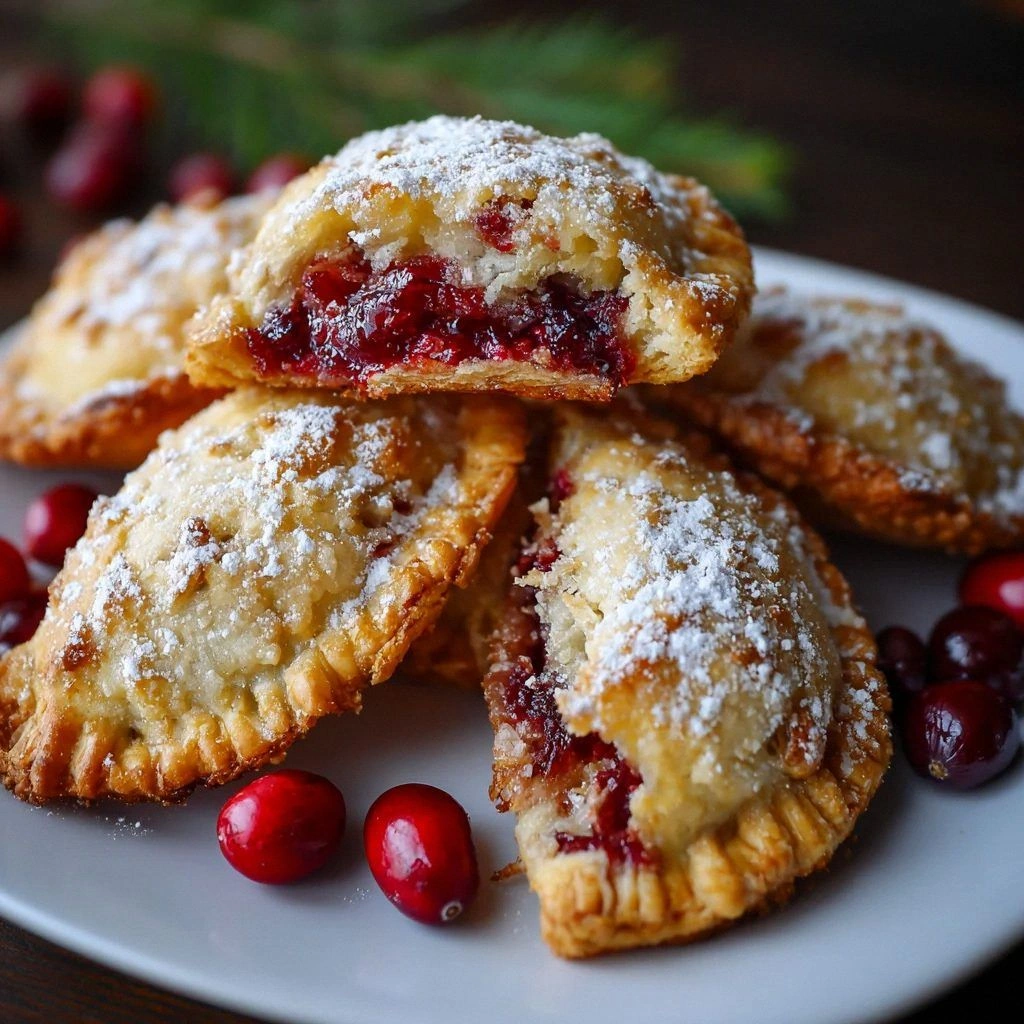
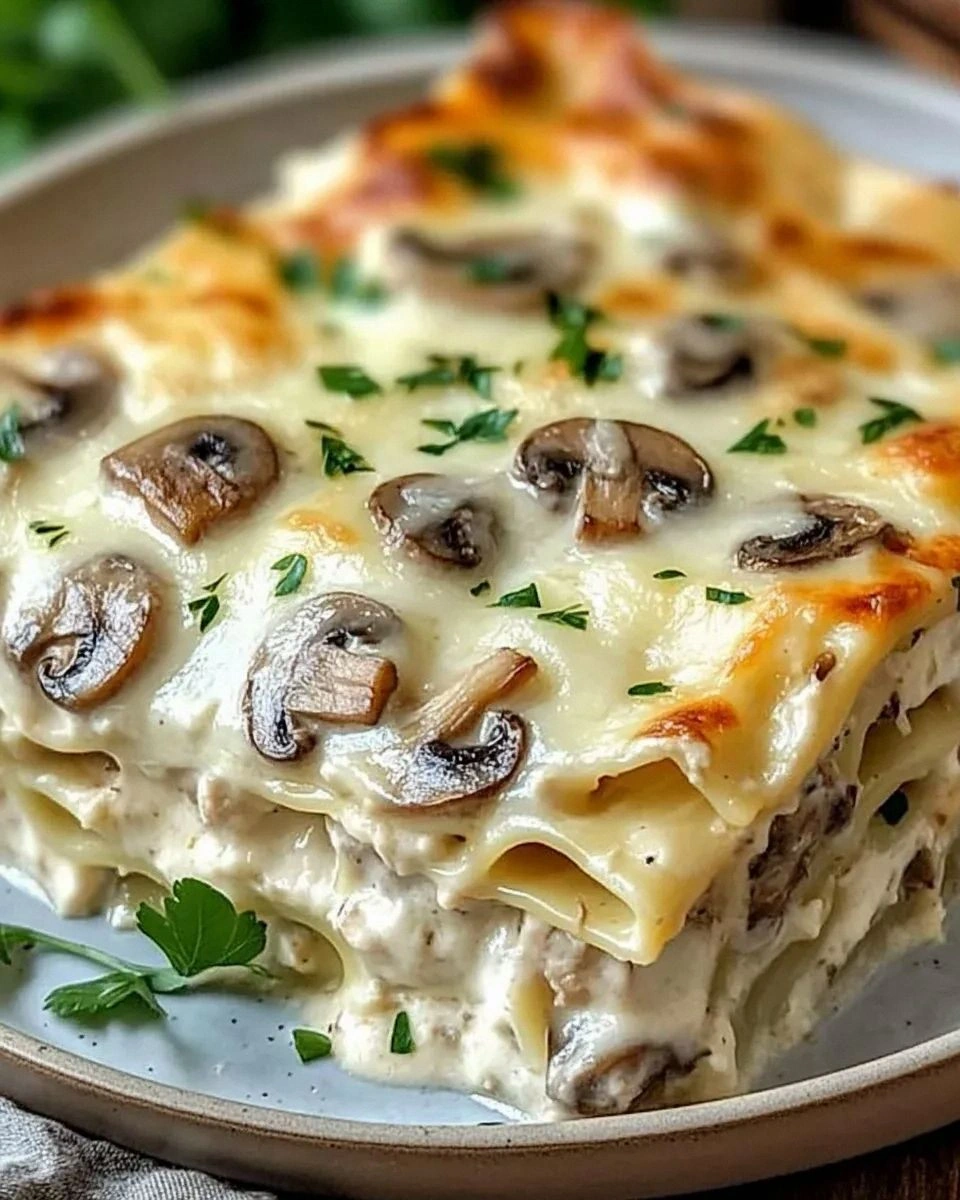
Last Christmas, I managed to single-handedly ruin three batches of peppermint bark, scorch a tray of gingerbread men, and turn what was supposed to be a picture-perfect yule log into something that resembled a moss-covered branch after a storm. My in-laws were due in T-minus four hours, the kitchen smelled like a burnt-cookie graveyard, and I was one melted candy cane away from surrendering to store-bought dessert forever. Then I spotted a half-empty bag of chocolate almond bark, a forgotten carton of heavy cream, and the dregs of a sugar canister. In a moment of sweet, sweet desperation, I cobbled together what I now call the Christmas Chocolate Caramel Cups—little glossy domes that crack like thin ice to reveal a river of silky caramel. One bite and my father-in-law, a man who claims he "doesn’t do sweets," quietly slipped four more into his coat pocket. Twelve months later, the family group chat is still buzzing: "Are you making those cups again? I’ll trade you my famous mulled wine for a dozen." If you’ve ever wanted a dessert that tastes like the best part of December distilled into a two-bite miracle, pull up a chair. Let me walk you through every single step—by the end, you'll wonder how you ever made it any other way.
Picture this: it’s snowing outside, the tree lights are twinkling, and the kitchen feels like a cinnamon-scented hug. You hear the low rumble of cream hitting hot sugar—like distant ocean waves—and suddenly the air smells like toasted marshmallows and butterscotch had a baby. You tilt the pan and the caramel ribbons fall in slow motion, glossy and lava-like, before you blanket it with a layer of chocolate so shiny you can see your own delighted reflection. That first crack when you bite through the shell is ASMR-level satisfying, and then the caramel flows, warm and buttery, onto your tongue. It’s the edible equivalent of finding an extra present hidden behind the tree. I dare you to taste this and not go back for seconds—actually, thirds. Confession time: I ate half the batch before anyone else got to try it, standing barefoot at the counter in my reindeer pajamas, snow falling outside, and Christmas music humming in the background. Zero regrets.
Most recipes get this completely wrong. They either cook the caramel until it’s jaw-breaker stiff, or they leave it so runny it leaks out like a chocolate crime scene the second you pick it up. Others insist you need fancy tempered chocolate and a thermometer that costs more than your tree. Nonsense. My version uses one pan, one bowl, and a mini muffin tin you probably already own. The chocolate sets at room temperature in under ten minutes, and the caramel stays fluid but not drippy—think lava cake meets candy shop. Stay with me here—this is worth it. Future pacing: imagine yourself pulling these out of the fridge, the metallic clink of the tin echoing holiday cheer, while your guests hover like reindeer around a carrot patch. You’ll look like a pastry-school valedictorian, and the only thing sweeter than the caramel will be the bragging rights.
Before we dive in, here’s the sneaky twist that changes everything: a whisper of sea salt folded into the caramel right at the end. It doesn’t scream "salted caramel"—it just makes the chocolate taste chocolatier, the sugar taste more complex, and your guests pause mid-chew, eyes widening as they try to figure out why they can’t stop eating them. Okay, ready for the game-changer?
What Makes This Version Stand Out
Silky-Not-Sticky Caramel: Most homemade caramels either glue your jaws together or drip down your chin like you’re a toddler with an ice-cream cone. This one hits the sweet spot—literally. It flows like warm honey but sets just enough to stay inside its chocolate walls until you bite. The secret? Pulling the cream off the heat the second you see the first lazy bubble, then letting residual warmth finish the job.
One-Minute Chocolate Shell: Forget tempering crystals and double boilers. Chocolate almond bark melts into a satin pool in the microwave in 45-second bursts, then sets glossy and snap-worthy at room temp. You get professional shine without the culinary school tuition. I dare you to taste this and not go back for seconds—okay, I already confessed that part, but still.
Minimalist Equipment: If you own a mini muffin tin, a saucepan, and a rubber spatula, you’re officially overqualified. No candy thermometers, no pastry brushes, no silicone molds shaped like tiny Christmas trees that you’ll use once and lose in the junk drawer. Sometimes the best gifts come in the simplest packages.
Make-Ahead Magic: These cups age like George Clooney—better after a day or two. Store them in an airtight tin and the caramel absorbs a whisper of chocolate, the flavors meld, and the texture turns truffle-soft. Make them Sunday, serve them Friday, look like a holiday superhero. Reader validation: if you’ve ever struggled with last-minute dessert panic, you’re not alone—and I’ve got the fix.
Customizable Crowd-Pleaser: Swap dark chocolate for white, stir espresso powder into the caramel, or roll the edges in crushed candy canes. Kids want rainbow sprinkles? Done. Adults want a nip of bourbon in the caramel? Also done. This recipe is the little black dress of Christmas confections.
Instagram-Ready Without Trying: Those tidy pleated wrappers, the mirror-shine tops, the festive sprinkles that look like confetti after the best party ever—they photograph themselves. Post one pic and your DMs will blow up faster than you can say "secret Santa."
Scent Memory Trigger: The smell of caramelizing sugar and melting chocolate is pure nostalgia. One whiff and your brain teleports to grandma’s kitchen, to choir concerts, to that time you tried to lick the candy-cane window display. Future pacing: picture yourself pulling this out of the oven, the whole kitchen smelling incredible, and your neighbors drifting over like cartoon characters following a pie.
Inside the Ingredient List
The Flavor Base
Sugar is the engine of this whole operation. It melts, it bubbles, it morphs from granules into liquid gold. Use plain white granulated sugar—no fancy raw stuff here. You want clean, fast melting so you can control color and flavor. Go too dark and the caramel tastes bitter; too light and it’s cloying. Aim for the color of an old penny and the smell of toasted marshmallows. Skip the sugar and, well, you’re just eating chocolate out of a cup, which honestly doesn’t sound terrible, but it’s not the point.
The Texture Crew
Heavy cream is what turns molten sugar into velvet. Full fat, cold from the fridge, poured in slowly so it doesn’t seize into a volcanic mess. The fat coats your tongue the same way silk slips across skin. Try subbing half-and-half and you’ll get a watery puddle that soaks through the chocolate like a leaky roof. Vegan? Full-fat coconut cream works, but expect a faint coconut perfume that plays surprisingly nicely with chocolate.
The Unexpected Star
Chocolate almond bark is the sleeper hit. It’s engineered to melt smoothly, set quickly, and play well with add-ins like sprinkles or crushed peppermints. If you’re a chocolate snob, reach for 60–70% dark, but you’ll need to temper it unless you enjoy gray streaks that taste fine but look like sidewalk chalk. White chocolate fan? Use it, but cut the sugar in the caramel by a tablespoon or risk a sweetness overload that makes your teeth hum.
The Final Flourish
Holiday sprinkles are more than confetti—they’re tiny bursts of color psychology. Red triggers excitement, green signals freshness, gold implies luxury. Mix shapes—stars, nonpareils, jimmies—for texture contrast. Sprinkle them while the chocolate is still tacky so they adhere like barnacles on a candy-colored ship. Skip them and the cups taste identical, but they look like they showed up to the party underdressed.
Everything’s prepped? Good. Let’s get into the real action...

The Method — Step by Step
- Start by parking your mini muffin tin on a flat surface and lining it with 24 paper cups. Yes, paper—even if your tin claims to be non-stick. The paper gives you tidy edges and a built-in handle for pulling the cups out later. Think of it as gifting yourself sanity when you’re three wine glasses in and trying not to stab chocolate with a butter knife.
- Dump one cup of sugar into a heavy-bottomed saucepan and shake it into an even layer. Cold pan, cold sugar—no stirring yet. Place over medium heat and watch the edges liquefy first, like frost melting under morning sun. Resist every urge to stir; instead, gently swirl the pan so the melted sugar sloshes over the unmelted crystals. Stirring causes clumps that turn into cement pebbles, and nobody wants to bite into a caramel rock.
- When the sugar reaches the color of a well-browned penny—about eight minutes—pull it off the heat. Immediately pour in half a cup of heavy cream in a slow stream while whisking like your life depends on it. The mixture will foam like an angry soda, but keep whisking until it subsides into a glossy lava. If you’ve ever wanted to feel like a wizard, this is your moment: liquid sugar hisses, steam rises, and suddenly you’ve got caramel.
- Return the pan to low heat and cook two minutes more, whisking constantly, until the caramel coats the back of a spoon like thin velvet. Remove from heat and stir in a fat pinch of flaky sea salt. The salt dissolves on contact, turning the caramel from sweet candy into complex sweet-salty taffy. Let it cool five minutes; it will thicken just enough to spoon without running everywhere.
- While the caramel chills, melt eight ounces of chocolate almond bark in a microwave-safe bowl. Zap in 45-second bursts, stirring between each, until it’s pourable but not hot. Overheating scorches the chocolate and makes it seize into a chalky mess that even Santa can’t save. Stir in a teaspoon of neutral oil—coconut or canola—for extra shine that would make a manicure jealous.
- Spoon one teaspoon of melted chocolate into each paper cup and use the back of the spoon to brush it halfway up the sides. You’re essentially painting a chocolate bathtub that will hold the caramel. Work quickly; chocolate sets fast when it hits the cool tin. If it starts to stiffen, give it a ten-second microwave vacation.
- Dollop one teaspoon of warm caramel into the center of each cup. Aim for the bull’s-eye; if you hit the paper, the caramel will leak out and glue the cup shut later. Don’t overfill—leave a chocolate moat around the edges so the top shell can seal properly. I like to use a tiny cookie scoop for speed and uniformity, plus it makes me feel like I’m operating a caramel factory.
- Pour another teaspoon of chocolate over the caramel, spreading gently to the edges to seal. Tap the tin on the counter to settle everything and pop any sneaky air bubbles. While the tops are still tacky, shower with holiday sprinkles. The contrast of red, green, and gold against the dark chocolate looks like twinkle lights on a snowy night. Chill ten minutes to set, then peel off the paper and prepare for applause.
That’s it—you did it. But hold on, I’ve got a few more tricks that’ll take this to another level...
Insider Tricks for Flawless Results
The Temperature Rule Nobody Follows
Most people crank the heat to hurry the sugar along and end up with bitter black tar. Medium heat feels slow, but it gives you control. Think of sugar like a toddler: turn your back for thirty seconds and it’s crayon on the walls. Keep the flame steady, swirl often, and pull it off the stove when it’s still a hair lighter than you think—it keeps cooking from residual heat. A friend tried skipping this step once; let’s just say it didn’t end well, and her trash can smelled like scorched dreams for days.
Why Your Nose Knows Best
Forget timers; your nose is the built-in candy thermometer you never knew you had. When the sugar smells like toasted marshmallows and looks like shiny copper, you’re in the zone. If it starts to smell sharp or like burnt popcorn, you’ve crossed into the dark side. Trust the aroma more than the clock—ovens vary, pans vary, but your sniffer is consistent. Power transition: ready for the game-changer?
The 5-Minute Rest That Changes Everything
After you stir in the salt, walk away for five full minutes. During this mini vacation the caramel cools just enough to thicken, so it sits proudly in the cup instead of sinking into a thin puddle. If you rush and pour hot caramel, it melts the bottom chocolate layer and you’ll get leaky cups that stick to the paper like bad wallpaper. Patience, young padawan—five minutes now saves you from dessert disaster later.
Double-Coat for Extra Security
If you’re transporting these to a party, paint a second thin layer of chocolate on the inside after the first sets. This extra shell prevents any sneaky caramel leaks and gives you a thicker snap. It adds maybe ninety seconds of work and saves you from the heartbreak of caramel-stained Tupperware. Think of it as chocolate insurance—cheap premium, huge payoff.
Creative Twists and Variations
This recipe is a playground. Here are some of my favorite ways to switch things up:
Peppermint Bark Cups
Swap the chocolate almond bark for white chocolate and stir in half a teaspoon of peppermint extract. Top with crushed candy canes for a red-and-white swirl that tastes like December in a snow globe. Kids lose their minds over the pink hue; adults love the cooling contrast with the rich caramel.
Spiced Orange Caramel
Add a two-inch strip of orange zest and a pinch of ground cardamom to the cream before you pour it into the sugar. Strain the zest out before filling the cups. The citrus perfume and gentle heat make the caramel taste like mulled wine’s sophisticated cousin.
Salty Peanut Pretzel
Fold a handful of crushed pretzels and chopped peanuts into the cooled caramel for crunch. Sprinkle extra on top for visual chaos that tastes like a Snickers bar went on holiday. Salty, sweet, crunchy, chewy—texture bingo.
Dark Chocolate Espresso
Dissolve a teaspoon of instant espresso powder into the melted chocolate. The bitterness amplifies the cocoa notes and makes the caramel taste like buttery coffee. Serve these after dinner and watch your guests’ eyelids flutter in caffeinated joy.
Coconut Snowball
Use coconut cream in the caramel and dust the tops with toasted shredded coconut. They look like tiny snowballs and taste like a tropical Christmas. Bonus: they’re naturally dairy-free if you use dark chocolate, so your lactose-intolerant cousin can finally join the dessert parade.
Double-Decker S’mores
Layer a square of graham cracker in the bottom of the cup, add caramel, then top with chocolate and a mini marshmallow toasted under the broiler for thirty seconds. The marshmallow puffs and bronzes like a campfire kiss. Reader validation: if you’ve ever struggled with finding a dessert that pleases both kids and grown-ups, you’re not alone—and I’ve got the fix.
Storing and Bringing It Back to Life
Fridge Storage
Pop the fully set cups into an airtight tin, layers separated by parchment. They’ll keep for up to one week, but good luck making them last that long. The chocolate may bloom (gray streaks) if the fridge is super humid, but they still taste like heaven. Bring to room temp for ten minutes before serving so the caramel softens back to flowing.
Freezer Friendly
Freeze in a single layer on a sheet pan, then transfer to a zip bag. They’ll stay perfect for two months—ideal for emergency dessert cravings or surprise carolers. Thaw fifteen minutes at room temp; any longer and condensation spots the chocolate like tiny snowflakes. Future pacing: imagine yourself on January 3rd, pulling a secret stash from the freezer, the whole kitchen smelling incredible as they thaw.
Best Reheating Method
These don’t need reheating, but if your caramel stiffens after fridge time, give each cup a three-second microwave zap. The chocolate stays firm while the caramel loosens into a silky river. Add a tiny splash of water to the tin before sealing if you store them overnight; the slight humidity keeps the caramel from turning into taffy.