Picture this: it’s game day, the living room is a battlefield of cheering fans, and you’re the hero who just pulled a culinary miracle out of thin air. I was halfway through a nail‑biting overtime when my usual nacho tray fell flat—chips soggy, cheese clumpy, and a taste that screamed “meh.” I dared my roommate to a micro‑challenge: “I bet you can’t eat just one chip of what I’m about to make.” He laughed, I laughed, and then I went full‑tilt on a version of nachos that would make even the most seasoned snack connoisseur weep with joy. This is the story of how a busted bag of plain tortilla chips turned into the most irresistible blue cheese potato chip nachos you’ll ever taste.
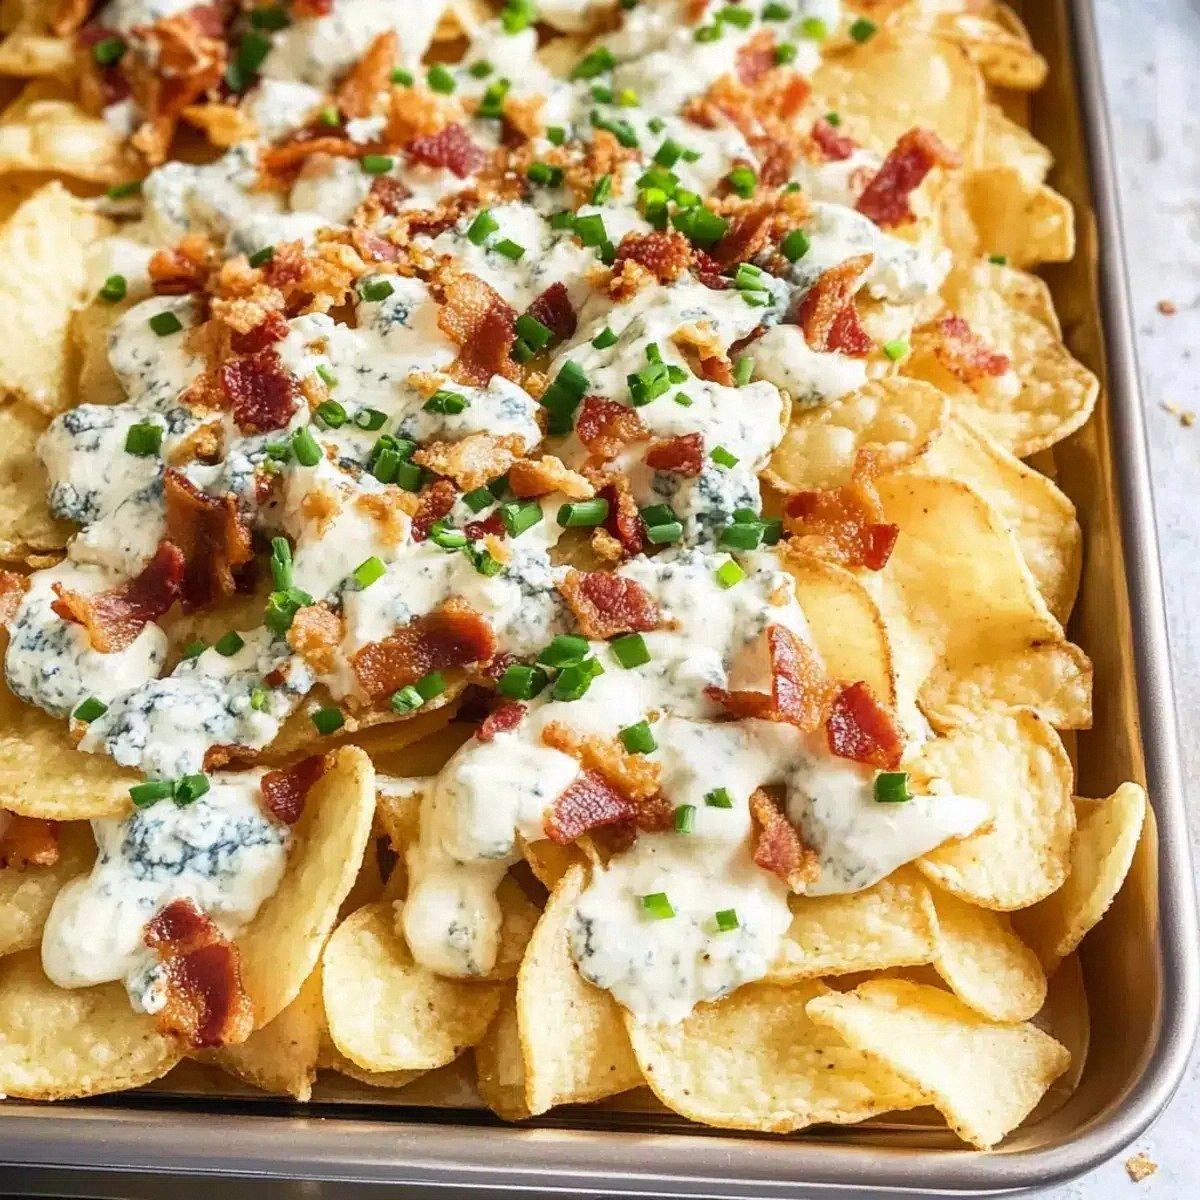
First, let’s set the scene with all five senses firing on all cylinders. The kitchen smells like a buttery, salty storm as the kettle‑style potato chips hit the pan, their edges shimmering like tiny golden swords. You hear the sizzle of bacon cracking, a rhythm that syncs perfectly with the roar of the crowd on TV. The texture under your fingertips is a paradox—crunchy chips that shatter like thin ice, yet they’re cloaked in a velvety, tangy blue cheese sauce that clings like a second skin. When you finally bite, the flavor detonates: sharp, creamy, smoky, with a whisper of herbaceous chive that cuts through the richness like a fresh breeze on a hot day.
What makes this version stand out isn’t just the ingredients; it’s the chemistry we create between them. Most nacho recipes get the sauce wrong, either drowning the chips or leaving them dry as a desert. Here, we blend 2% milk with cream cheese to create a silky base that hugs each chip without sogging it, then we fold in blue cheese crumbles and a ready‑made blue cheese sauce for that punchy, pungent kick. The result is a handheld masterpiece that stays crunchy, stays bold, and stays unforgettable. I’ll be honest — I ate half the batch before anyone else got to try it, and I still have the courage to say it’s the best version you’ll ever make at home.
Now, I’m about to spill the secret technique that most recipes skip: the “shaker coat.” Instead of drowning chips in a bowl, we toss them in a zip‑top bag with the sauce, then give them a vigorous shake so every corner gets an even, thin veil of cheese. It’s pure magic, and it guarantees that you’ll never get a soggy spot. Okay, ready for the game‑changer? Let me walk you through every single step — by the end, you’ll wonder how you ever made it any other way.
What Makes This Version Stand Out
- Bold Flavor: The combination of blue cheese sauce and fresh crumbles delivers a punchy tang that cuts through the richness of the chips and bacon, keeping every bite exciting.
- Ultimate Crunch: Kettle‑style potato chips retain their structural integrity even after being coated, offering a satisfyingly crunchy texture that never goes limp.
- Creamy Coating: A milk‑and‑cream‑cheese base creates a velvety veil that clings without soaking, a technique most recipes completely miss.
- Simple Prep: With just a handful of ingredients and a single oven pan, you can assemble the dish in under fifteen minutes, perfect for busy game days.
- Show‑Stopping Crowd Reaction: Guests will dive in headfirst, shouting “I dare you to taste this and not go back for seconds!”—a guaranteed hit for any gathering.
- Ingredient Quality: Using high‑quality kettle‑style chips and real blue cheese crumbles elevates the dish from snack to culinary experience.
- One‑Pan Simplicity: All the action happens on a single sheet, meaning cleanup is as painless as the flavor is powerful.
- Make‑Ahead Potential: You can prep the sauce and crumble the bacon ahead of time, then assemble and bake when the game starts.
Inside the Ingredient List
The Flavor Base
The star of the show is the blue cheese sauce, a tangy, creamy powerhouse that brings the whole dish to life. We pair it with 2% milk and cream cheese to create a base that’s smooth as silk yet sturdy enough to cling to the chips. Skipping the milk will leave the sauce too thick, making it difficult to coat the chips evenly; skipping the cream cheese will result in a watery, less indulgent sauce. If you’re lactose‑intolerant, try a splash of oat milk and a dairy‑free cream cheese alternative—just be sure to keep the texture thick.
The Texture Crew
Our chip choice matters more than you think. Kettle‑style potato chips bring a robust crunch and a salty crust that can stand up to the sauce without wilting. Regular tortilla chips would crumble under the weight of the cheese, turning the dish into a soggy mess. When buying, look for chips that are slightly thicker and have a natural ridged surface; these ridges act like tiny channels that trap the sauce, delivering flavor bursts with every bite.
The Unexpected Star
Bacon isn’t just a garnish—it’s a flavor catalyst. The smoky, salty crunch of crisped bacon strips adds a depth that balances the sharpness of the blue cheese. If you’re a vegetarian, try smoked tempeh or a drizzle of liquid smoke for a similar effect. The crumbled blue cheese on top provides an extra textural contrast, turning each chip into a layered experience of creamy and crunchy.
The Final Flourish
Fresh chives are the final garnish that brightens the whole composition. Their mild oniony bite cuts through the richness, preventing the dish from feeling heavy. If chives aren’t on hand, thinly sliced green onions or a sprinkle of parsley work just as well. The key is to add them after baking so the fresh herb retains its vibrant color and crispness.
Everything's prepped? Good. Let’s get into the real action...
The Method — Step by Step
-
Preheat your oven to 375°F (190°C). While the oven warms, line a large rimmed baking sheet with parchment paper; this prevents sticking and makes cleanup a breeze. The moment the heat hits the metal, you’ll hear a faint hum that signals the kitchen is ready for serious flavor work. I always set a timer for the preheat so I don’t get distracted by the game—trust me, that sizzle when the chips hit the oven is worth the wait.
-
Lay out the bacon strips on a separate sheet and bake them on the same rack for 12‑15 minutes, or until they reach a deep, caramelized crisp. Flip them halfway through to ensure even cooking. Once done, transfer to a paper towel to drain excess fat, then crumble them into bite‑size pieces. This step is crucial: if the bacon is under‑cooked, it will release grease into the sauce, making it greasy rather than silky.
-
While the bacon crisps, melt the 4 ounces of cream cheese in a medium saucepan over low heat. Slowly whisk in 0.5 cup of 2% milk, stirring until the mixture becomes smooth and glossy. This creates a luscious base that will later bind the blue cheese sauce to the chips. Power transition: this next part? Pure magic.
Kitchen Hack: Keep the heat low and stir constantly to prevent the cream cheese from scorching; a thin, even heat yields a perfectly silky sauce. -
Stir in 0.25 cup of blue cheese crumbles (for the sauce) and the prepared blue cheese sauce. Let the mixture melt together, swirling the pan so the crumbles dissolve into a uniform, tangy glaze. You’ll notice the sauce thickening and pulling away slightly from the sides—this is the perfect consistency for coating the chips. Watch Out: if the sauce boils, it will separate, leaving a grainy texture.
Watch Out: Keep the sauce just below a simmer; a rolling boil will cause the cheese to seize and become gritty. -
Place the entire bag of kettle‑style potato chips into a large zip‑top freezer bag. Pour the hot cheese sauce over the chips, seal the bag, and give it a vigorous shake for 30‑45 seconds. The “shaker coat” distributes the sauce evenly, ensuring every chip gets a thin, flavorful veil without becoming soggy. The chips will glisten with a buttery sheen that hints at the crunch to come.
Kitchen Hack: If the bag is too full, split the chips into two batches to avoid crushing them during the shake. -
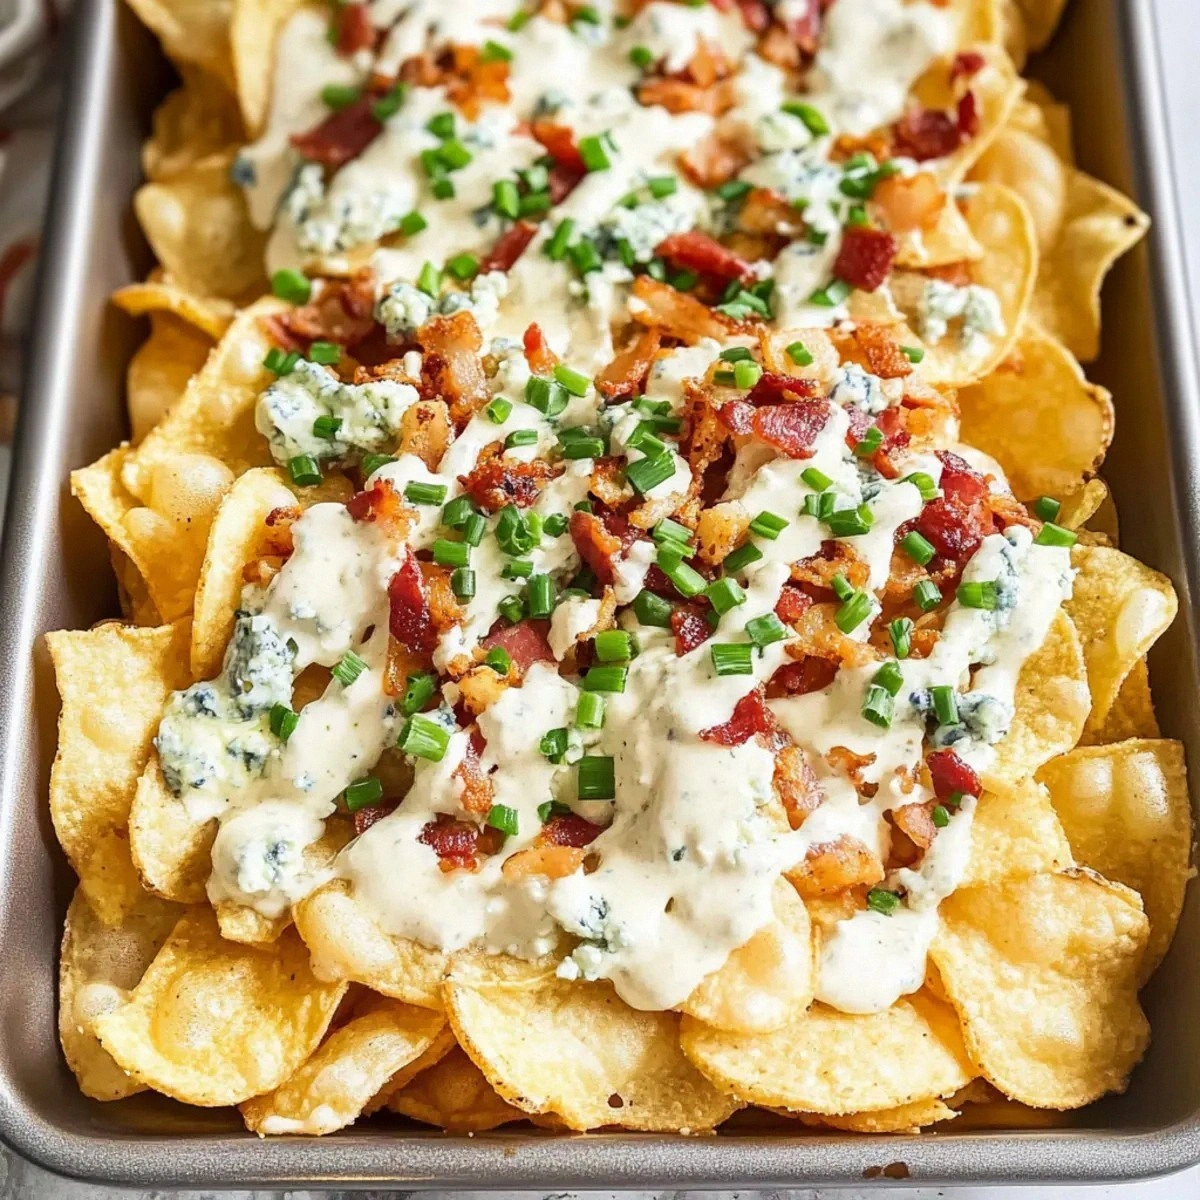
Spread the coated chips in a single, even layer on the prepared baking sheet. Sprinkle the crumbled bacon, an additional 0.25 cup of blue cheese crumbles for topping, and the fresh chives. The chives should stay green and vibrant, so add them just before the final bake. This layering technique ensures each bite gets a balanced mix of crunch, salt, and tang.
-
Slide the sheet into the preheated oven and bake for 8‑10 minutes, watching closely. You’re looking for the cheese to bubble lightly and the edges of the chips to turn a deeper golden brown. The aroma that fills the kitchen at this point is nothing short of intoxicating—think roasted nuts meeting sharp cheese in a celebratory dance.
Kitchen Hack: Rotate the pan halfway through baking to ensure even browning on all sides. -
Remove the nachos from the oven and let them rest for two minutes. This short pause lets the cheese set just enough to stay attached while still being melty. During this time, the kitchen will be filled with a lingering scent of smoked bacon and blue cheese that makes everyone’s stomachs growl louder than the crowd.
-
Finish with a final sprinkle of fresh chives for a pop of color and a drizzle of extra blue cheese sauce on the side for those who crave an extra punch. Serve immediately while the chips are still warm and the cheese is at its peak stretchiness. And now the fun part—watch your guests dive in, eyes wide, shouting for seconds. This is hands down the best version you’ll ever make at home.
That's it — you did it. But hold on, I've got a few more tricks that'll take this to another level...
Insider Tricks for Flawless Results
The Shaker Coat Secret
Using a zip‑top bag to coat the chips may sound like a kitchen hack, but it’s actually a game‑changing technique. The bag creates a sealed environment where the sauce can glide over each chip without crushing them. I once tried tossing the chips in a bowl and ended up with a mushy mess—lesson learned. Keep the bag half‑filled for optimal movement, and you’ll get an even, glossy coat every time.
The Temperature Rule Nobody Follows
Most home cooks bake nachos at 350°F, but that temperature leaves the cheese soft and the chips only mildly crisp. Cranking it up to 375°F creates a rapid caramelization on the chip surface while the cheese forms a thin, golden crust. Keep a close eye—if you go above 400°F the chips can burn in seconds. Trust your nose; when you smell a nutty, toasted aroma, you’re in the sweet spot.
Why Your Nose Knows Best
Never underestimate the power of scent as a cooking gauge. As soon as the cheese starts to bubble and the bacon aroma mingles, you know the dish is nearing perfection. I once relied on a timer alone and ended up with a burnt edge; the smell would have told me to pull it out five minutes early. Let your senses be the ultimate timer.
The 5‑Minute Rest That Changes Everything
After the oven, let the nachos sit for exactly five minutes before serving. This brief rest allows the cheese to set just enough that it won’t slide off the chips, while still staying delightfully stretchy. Skipping this step results in a sauce that slides off like a wet paint, disappointing both eyes and palate. Trust me, those five minutes are worth the anticipation.
Layering for Maximum Flavor
Instead of dumping all toppings on top, try a two‑step layering: half the cheese and bacon before baking, the rest after. The first layer melts and binds, while the second retains its texture and visual appeal. This method creates a contrast of soft, melty cheese and crisp, fresh toppings that dance on the tongue.
Creative Twists and Variations
This recipe is a playground. Here are some of my favorite ways to switch things up:
Spicy Jalapeño Kick
Slice fresh jalapeños thinly and toss them with the chips before baking. The heat cuts through the richness of the blue cheese, delivering a balanced fire that keeps the palate engaged.
Smoky Chipotle Twist
Stir a teaspoon of chipotle adobo sauce into the cheese base for a smoky, slightly sweet undertone. The deep, earthy flavor pairs beautifully with the bacon’s crispness.
Herbaceous Green Goddess
Swap the chives for a mix of finely chopped parsley, dill, and basil. The herb medley brightens the dish, making it perfect for spring gatherings when fresh greens are abundant.
Loaded Veggie Version
Add roasted red peppers, caramelized onions, and sliced black olives after baking. This adds color, texture, and a Mediterranean flair that surprises guests.
Cheese Lover’s Dream
Mix in shredded sharp cheddar or mozzarella with the blue cheese sauce for a richer, multi‑dimensional cheese pull. The cheddar adds a mellow sweetness that tempers the blue cheese’s pungency.
Gluten‑Free Crunch
If you need a gluten‑free option, replace the kettle‑style chips with certified gluten‑free corn chips. The flavor profile stays intact, and the texture remains satisfyingly crunchy.
Storing and Bringing It Back to Life
Fridge Storage
Transfer any leftovers to an airtight container and store in the refrigerator for up to 2 days. The chips will lose some crunch, but a quick reheating will revive them. Place a paper towel on top to absorb excess moisture.
Freezer Friendly
For longer storage, freeze the baked nachos in a single layer on a parchment‑lined tray, then transfer to a zip‑top freezer bag. They’ll keep for up to 1 month. When you’re ready to serve, bake straight from frozen at 350°F for 8‑10 minutes.
Best Reheating Method
Preheat your oven to 300°F (150°C) and spread the nachos on a baking sheet. Add a tiny splash of water (about a teaspoon) to the tray, then cover loosely with foil. The steam revives the chips’ crunch while the cheese re‑melts without drying out. In just 5‑7 minutes, you’ll have nachos that taste fresh out of the oven.