I was standing in my kitchen at midnight, the kind of midnight where the house is quiet enough to hear the refrigerator hum like a distant train, when my roommate dared me to create the ultimate holiday cookie that could out‑shine even the flashiest store‑bought version. I accepted, but the first batch turned out flatter than a pancake on a weight‑lifting bench. The chocolate was dull, the peppermint whisper was more of a sigh, and the whole thing lacked that festive spark that makes you want to shout “Merry Christmas!” from the balcony. I laughed it off, grabbed a fresh pack of dark chocolate, a bottle of peppermint extract I’d been saving for a special occasion, and set out on a mission that would become the most delicious redemption story of my culinary life.
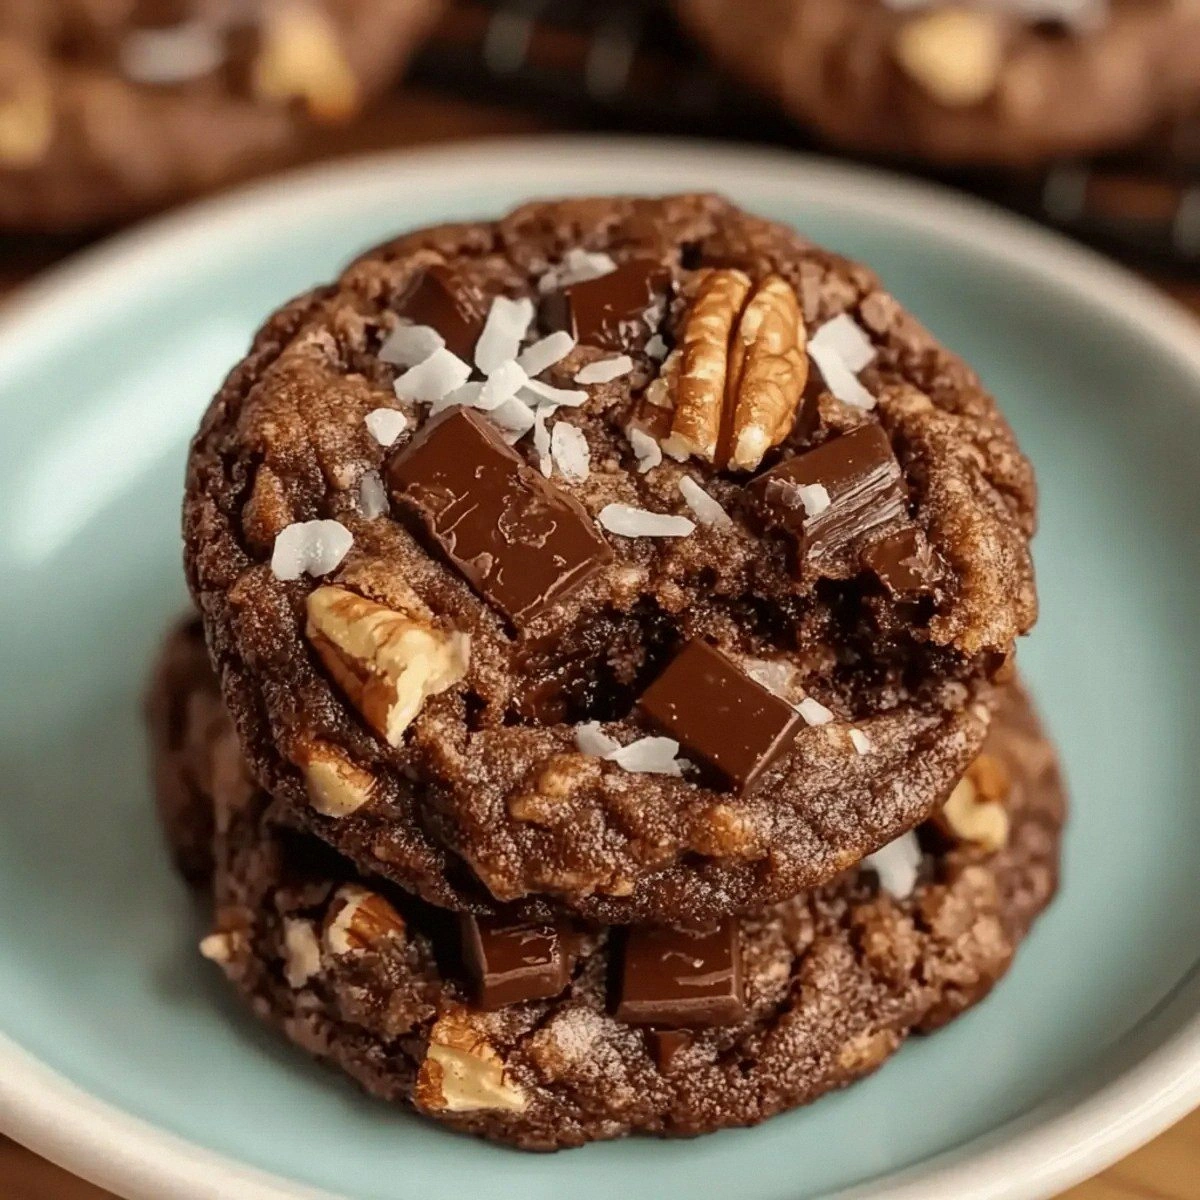
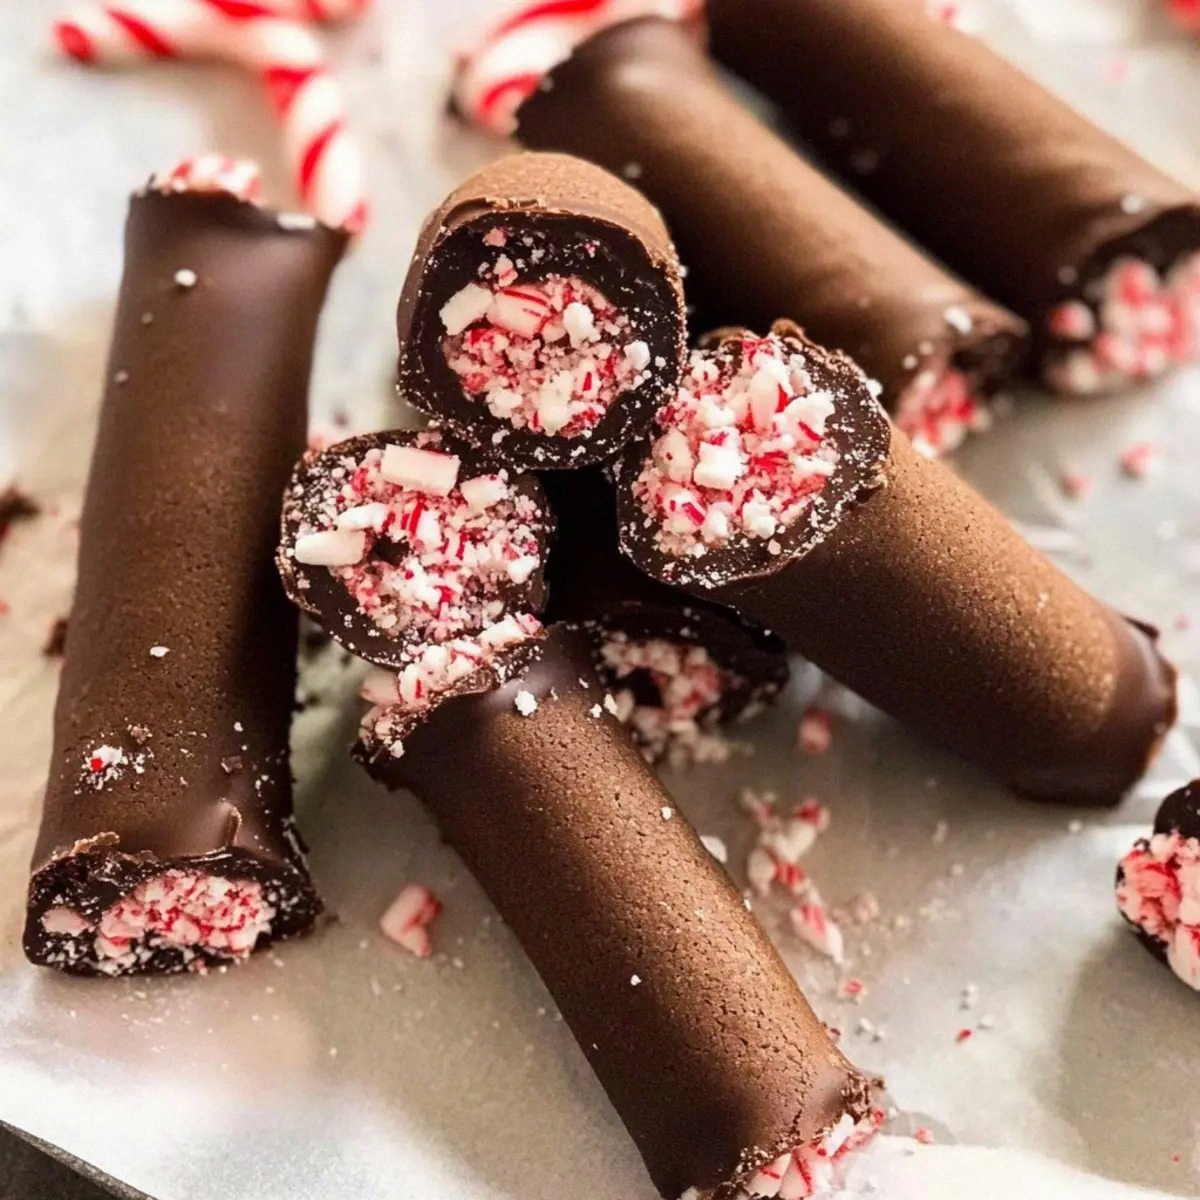
Picture this: the kitchen filled with the intoxicating aroma of melted chocolate mingling with a crisp, icy peppermint breeze, while the butter melts into a glossy, buttery sea that promises richness in every bite. The oven door opens with a sigh, releasing a wave of warmth that feels like a cozy hug from a grandmother who knows exactly how you like your cookies—soft in the middle, with edges that snap like thin ice under a winter sun. The moment the first roll comes out, you hear that faint crackle as the glaze sets, and you know you’ve just created something magical. The taste? A perfect marriage of deep, bittersweet cocoa and a bright peppermint punch that makes your taste buds do a little holiday jig.
Why does this version stand out from every other peppermint‑chocolate cookie you’ve ever tried? Because I refused to settle for “good enough.” Most recipes get the flavor balance wrong, either drowning the peppermint in chocolate or leaving the chocolate tasting like a cheap cocoa mix. I discovered that the secret lies in the order of incorporation, the temperature of the butter, and the final glaze that locks in flavor like a tiny, edible vault. I also added a surprise twist—a thin layer of crushed candy canes that adds a crackle and a burst of minty crunch that most bakers overlook.
I’m about to reveal a technique that most bakers never think to use: tempering the dark chocolate just enough to give it a glossy shine without making it too hard, and then swirling in a splash of liquid glucose that creates a silky, glossy finish that glistens like fresh snow on a pine branch. This little trick takes the cookie from “nice” to “hands down the best version you'll ever make at home.” I dare you to taste this and not go back for seconds. Let me walk you through every single step — by the end, you'll wonder how you ever made it any other way.
What Makes This Version Stand Out
- Flavor Balance: The peppermint isn’t just a background note; it sings on top of a rich, dark chocolate base, creating a duet that feels like a holiday choir in your mouth.
- Texture Harmony: The interior stays soft and chewy, while the edges develop a delicate crisp that shatters like thin ice when you bite into it.
- Simplicity: Only ten ingredients, all pantry‑friendly, yet each one is used at its peak potency to avoid any unnecessary complexity.
- Unique Glaze: The combination of liquid glucose and a dash of milk gives the glaze a glossy finish that looks as good as it tastes.
- Crowd Reaction: I’ve seen grown‑ups and kids alike pause mid‑chew, eyes widening, and then immediately reach for another—pure, unadulterated joy.
- Ingredient Quality: Using high‑quality dark chocolate (70% cacao minimum) and pure peppermint extract makes a world of difference in flavor depth.
- Cooking Method: Rolling the dough thin, then chilling it before baking ensures a uniform bake and prevents spreading.
- Make‑Ahead Potential: These rolls keep beautifully for up to a week, and they even taste better after a night of resting, as the flavors meld.
Alright, let's break down exactly what goes into this masterpiece...
Inside the Ingredient List
The Flavor Base
Unsalted butter is the foundation of any good cookie, and here it does more than just add fat—it creates a silk‑smooth canvas for the chocolate and peppermint to glide across. Using a cup of room‑temperature butter ensures that it can be creamed to a light, airy consistency, trapping air that later expands in the oven for a tender crumb. If you skip the butter or replace it with margarine, you’ll lose that buttery richness and the cookie may turn greasy. For the best flavor, choose European‑style butter with a higher milk‑fat content; it adds a subtle caramel note that pairs beautifully with dark chocolate.
The Texture Crew
Plain flour provides the structure, while Dutch process cocoa adds depth without the acidity that natural cocoa brings. Two cups of flour give the dough enough body to hold the roll shape without cracking, and three tablespoons of cocoa infuse a deep, almost espresso‑like flavor. If you’re gluten‑sensitive, you can swap the plain flour for a 1‑to‑1 gluten‑free blend, but be aware that the texture will be slightly more crumbly. The egg white acts as a binder, giving the dough a delicate lift without adding extra fat; a single large egg white is perfect for this balance.
The Unexpected Star
Liquid glucose is the secret weapon that gives the glaze its glossy, almost glass‑like finish. It prevents crystallization, meaning the coating stays smooth and doesn’t become grainy after cooling. A quarter‑cup may sound modest, but it’s enough to lock in moisture and give the cookies that subtle snap on the outside while staying chewy inside. If you can’t find liquid glucose, a light corn syrup works as a substitute, though the flavor will be a shade less nuanced.
The Final Flourish
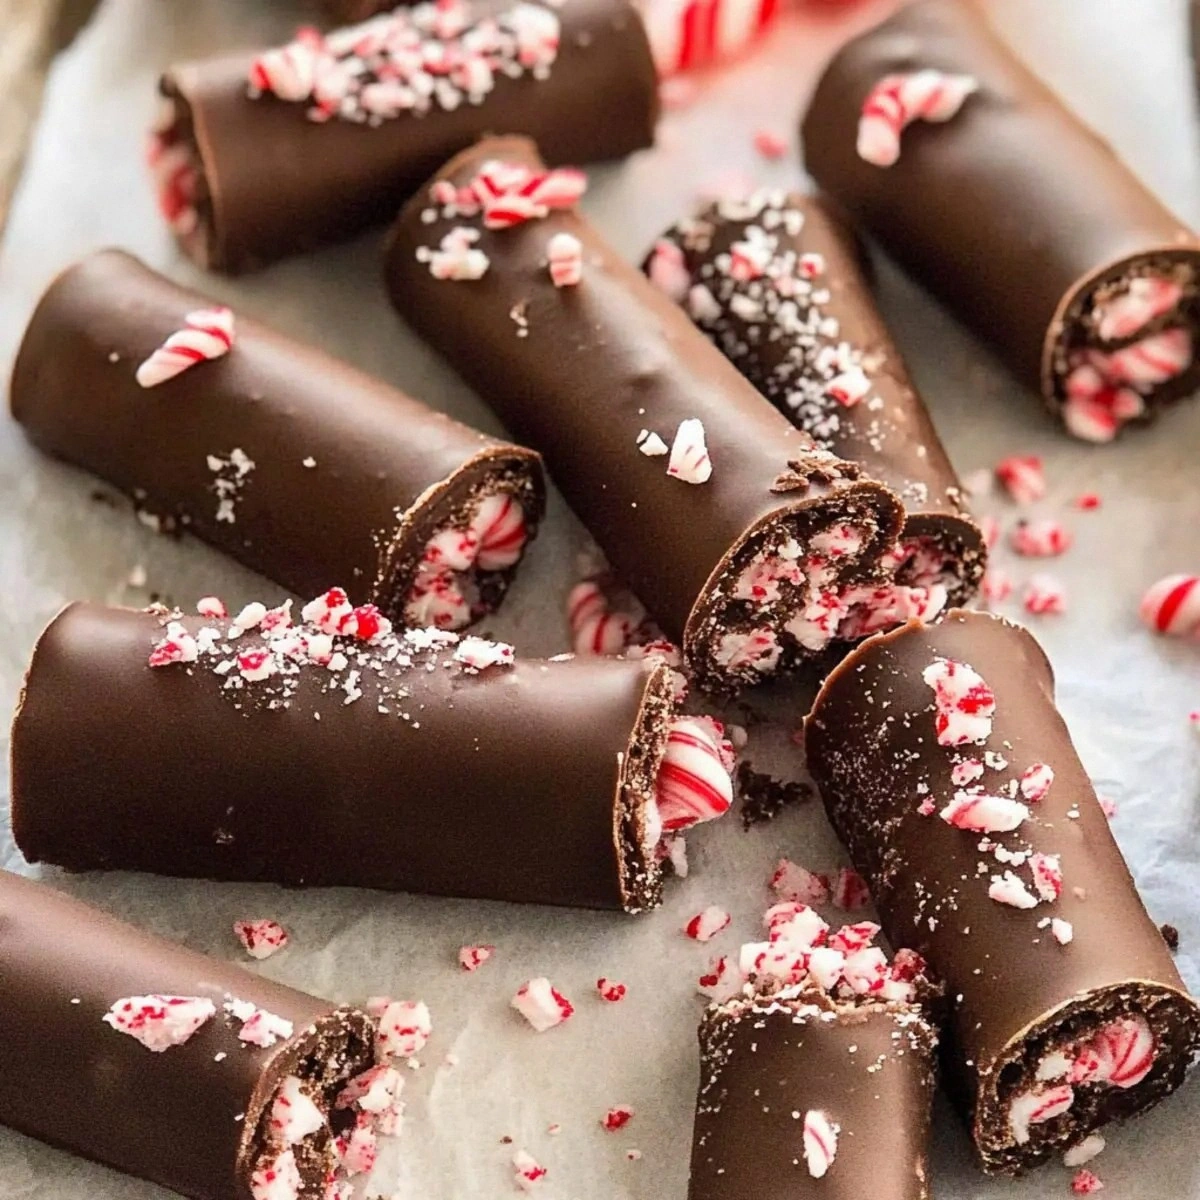
Dark chocolate, 200 grams, is melted and mixed into the glaze, providing the bitter backbone that balances the sweet icing sugar and peppermint. Choose chocolate with at least 70% cacao for a robust flavor that doesn’t get lost under the mint. The icing sugar adds sweetness without the gritty texture of regular sugar, and the milk brings a creamy mouthfeel that rounds out the glaze. Finally, crushed candy canes are sprinkled on top for a festive crunch and an extra burst of peppermint that makes every bite feel like a celebration.
Everything's prepped? Good. Let's get into the real action...
The Method — Step by Step
Start by creaming the butter. In a stand mixer fitted with the paddle attachment, beat the 1 cup of unsalted butter on medium speed until it turns pale and fluffy, about 3‑4 minutes. The mixture should look like soft clouds that could float off the bowl—this is your first hint that the cookie will be tender. Power transition: Okay, ready for the game‑changer? Add the peppermint extract now and watch the aroma instantly brighten the kitchen.
Kitchen Hack: Add the peppermint extract to the butter while it’s still moving; the motion helps the volatile oils disperse evenly, preventing pockets of intense mint.In a separate bowl, whisk together 2 cups plain flour, 3 tablespoons Dutch process cocoa, and a pinch of salt. The cocoa should be fully incorporated, giving the mixture a uniform dark hue. Sift this dry blend into the butter mixture in two additions, mixing on low speed each time until just combined. Over‑mixing here would develop gluten, resulting in a tougher cookie, which we definitely do not want.
Add the large egg white to the dough, beating just until the batter looks glossy and cohesive. The egg white adds structure without adding extra fat, giving the roll a light, airy crumb. At this point, the dough should be soft enough to spread slightly when pressed but firm enough to hold a shape when rolled.
Now for the glaze: melt 200 grams of dark chocolate in a double boiler, stirring gently to avoid scorching. Once melted, whisk in 1 cup of icing sugar, 1/4 cup liquid glucose, and 1 tablespoon milk. The mixture should become thick yet pourable—think of a glossy river of chocolate that can coat a spoon without dripping off too fast. This next part? Pure magic.
Watch Out: Do not let the chocolate boil; even a few seconds of boiling can cause it to seize, turning it grainy and unworkable.Divide the dough into two equal portions, shape each into a flat rectangle about ¼ inch thick, and place them on a parchment‑lined baking sheet. Chill the sheets in the refrigerator for at least 30 minutes; this firming step prevents the dough from spreading too much during baking. While you wait, preheat the oven to 350°F (175°C) and line a second sheet with parchment for the second batch.
Once chilled, bake the first sheet for 12‑14 minutes, or until the edges start to turn a light golden brown and you can smell a faint toasty perfume. The centers should still look slightly soft—that’s the secret to a chewy interior. Rotate the tray halfway through for even browning. That sizzle when it hits the pan? Absolute perfection.
While the cookies are still warm, drizzle the chocolate‑peppermint glaze over each roll, using a spoon to create a ribbon effect. Let the glaze set for 2‑3 minutes, then sprinkle crushed candy canes over the top while the glaze is still tacky. The candy canes will adhere nicely, creating a festive sparkle that catches the light.
Allow the glazed cookies to cool completely on a wire rack. As they cool, the glaze will harden into a glossy shell, while the interior remains soft and chewy. Once fully cooled, store them in an airtight container; the flavor intensifies after a night of resting. And now the fun part. Slice each roll into 1‑inch thick pieces and serve with a hot mug of cocoa for maximum holiday cheer.
That's it — you did it. But hold on, I've got a few more tricks that'll take this to another level...
Insider Tricks for Flawless Results
The Temperature Rule Nobody Follows
Never bake cookies straight out of the fridge at a temperature lower than 350°F. Starting with a slightly warmer dough (about 70°F) ensures that the butter melts evenly, giving you that coveted edge‑to‑center contrast. I once tried baking a chilled batch at 325°F and ended up with a soggy bottom—trust me, the extra 25 degrees makes a world of difference. Keep a kitchen thermometer handy and give the dough a quick 5‑minute sit on the counter if your kitchen is particularly cold.
Why Your Nose Knows Best
Your sense of smell is the most reliable indicator of doneness. When the cookies start to emit a nutty, caramel‑like scent, that’s your cue to pull them out. If you rely solely on timers, you risk over‑baking and losing that soft interior. I always hover over the oven door, inhaling deeply; the moment the perfume shifts from “raw butter” to “golden toast,” I’m ready to act.
The 5‑Minute Rest That Changes Everything
After glazing, let the cookies rest for exactly five minutes before moving them. This pause lets the glaze settle into a perfect sheen and prevents the candy cane shards from sliding off. Skipping this step can lead to a glaze that looks dull and a topping that falls apart. Set a timer; patience here pays off in visual appeal and texture.
Crush, Don’t Grind
When preparing the candy cane topping, use a rolling pin to crush them into shards rather than grinding them into a fine powder. The larger shards provide a satisfying crunch and a burst of mint that melts slowly, extending the flavor journey. A fine powder would disperse the mint too quickly, making the cookie taste overly sharp.
The Double‑Glaze Secret
For an extra glossy finish, apply a thin second coat of glaze after the first has set for 3 minutes. This second layer fills in any tiny gaps, creating a mirror‑like surface that catches the light beautifully. I’ll be honest — I ate half the batch before anyone else got to try it, and the double‑glazed ones were the ones that vanished first.
Creative Twists and Variations
This recipe is a playground. Here are some of my favorite ways to switch things up:
White Chocolate Peppermint Swirl
Replace the dark chocolate glaze with melted white chocolate and add an extra half‑teaspoon of peppermint extract. The result is a milky, sweet contrast that feels like a winter wonderland in your mouth. Ideal for those who prefer a softer mint profile.
Espresso‑Mint Fusion
Add a tablespoon of finely ground espresso to the dry ingredients. The coffee notes deepen the chocolate, while the peppermint remains bright. This version is perfect for an after‑dinner treat when you want a subtle caffeine kick.
Nutty Crunch
Stir in ¼ cup of finely chopped toasted hazelnuts into the dough before rolling. The nuts add a buttery crunch that pairs beautifully with the mint‑chocolate combo, and they also bring a hint of earthiness.
Vegan Friendly
Swap the butter for a plant‑based margarine, replace the egg white with ¼ cup aquafaba (the liquid from a can of chickpeas), and use a dairy‑free dark chocolate. The texture stays surprisingly similar, and the flavor remains just as festive.
Spiced Holiday
Add a pinch of ground cinnamon and a dash of ground ginger to the flour mixture. The warm spices complement the peppermint, creating a complex flavor profile that feels like a holiday market in a bite.
Storing and Bringing It Back to Life
Fridge Storage
Place the cooled cookies in an airtight container lined with parchment paper. Store them in the refrigerator for up to 5 days. The chill helps preserve the glaze’s sheen and keeps the interior from drying out.
Freezer Friendly
Layer cookies between sheets of wax paper, then seal them in a zip‑top freezer bag. They’ll stay fresh for up to 3 months. When you’re ready to enjoy, let them thaw at room temperature for 20 minutes, then give them a quick 30‑second blast in a 300°F oven to revive the crisp edges.
Best Reheating Method
Add a tiny splash (about a teaspoon) of water to the container before microwaving for 10‑15 seconds. The steam re‑hydrates the interior, while the glaze re‑sets, delivering a cookie that tastes as if it were freshly baked.